Variables and Conditions
To better understand how menus and other logic can be created in Reactor, we need to understand Reactor's Variables and Conditions.
Variables
A Variable is, like many other things, an element in the tree (See Tree Elements). Variables are a concept used in programming and mathematics to store information. In Reactor, they can be used to store values like:
- the current page of a menu
- the currently selected Device ID
- whether the engineering menu is open
- and much more...
Types of Variables
Reactor variables can have two main types:
- Option List: A list of options, where each option can also have a label. Option values can be numbers or strings.
- Range: A numeric range with a minimum, a maximum, and a default (or center) value.
When a variable is set, the system checks if the value matches the possible defined values. If not, it will not set the variable unless the option Accept any value is checked under "Show More".
Basic Usage of Variables
Variables can be created on layers. The quickest way to do so is to select the base layer of your current configuration and add a variable. Start by clicking anywhere on the blue or black area of your controller. You should now see the root layer of this panel.
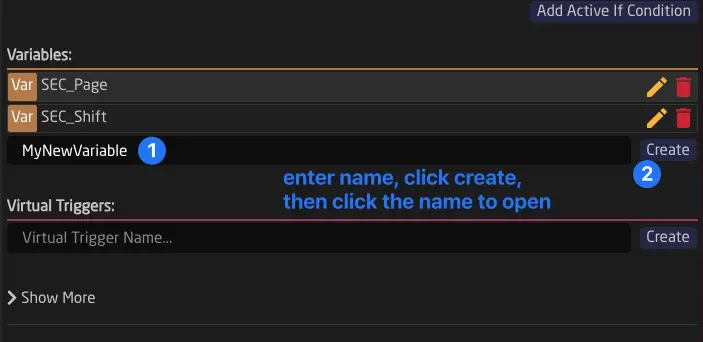
When a variable is created, its value defaults to the first value unless otherwise specified. From that point on, you can use your variables in all Parameter or Condition fields in any layer or behavior. Keep in mind that variables are available only to the layer they are defined on and its child layers. This follows Tree Inheritance.
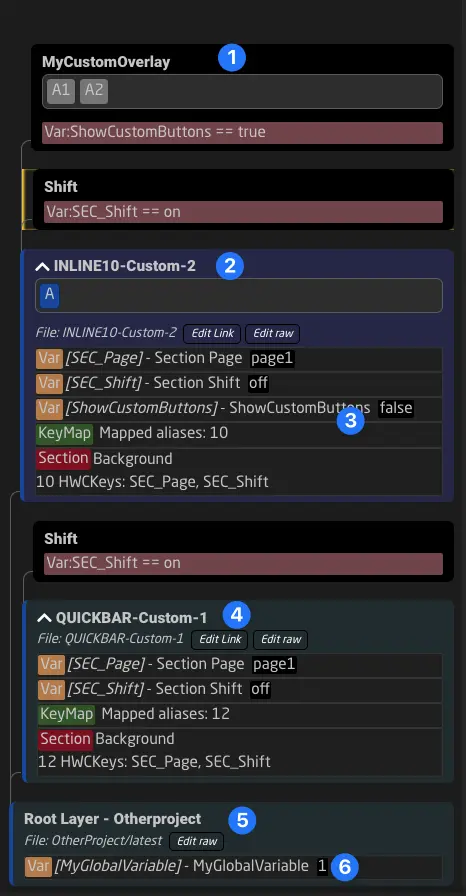
Example:
The components on the layer MyCustomOverlay (1) and INLINE10-Custom-2 (2) can use the variable ShowCustomButtons (3). Components on the layer QuickBar-Custom-1 (4) cannot use the variable, as they do not inherit its definition.
To create variables that can be accessed by all layers, they need to be created on the main root layer of the project (5). The variable MyGlobalVariable (6) is accessible to all layers and controllers.
Setting and Checking Variables Using the Configurator
In the configurator, you can always see the current values of variables in the tree.
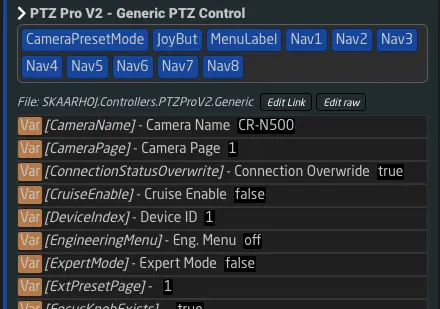
In the Inspector, you can also set different options active using the blue flag icon next to them.
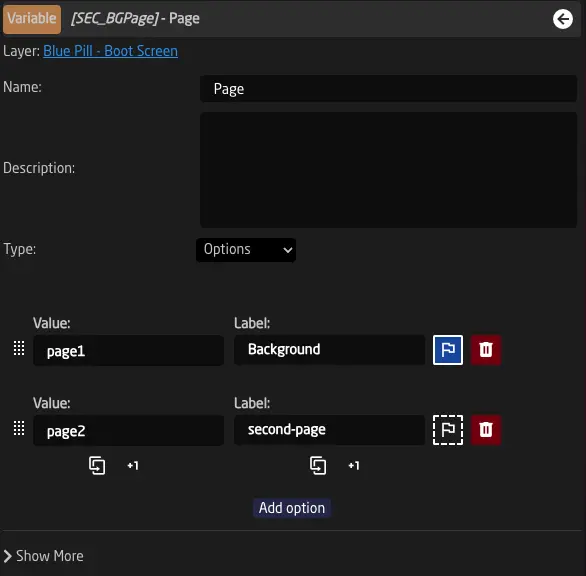
Finally, you can use the bottom of the form to force set a variable or even set more than one value.

One Variable, Multiple Values
Any variable in Reactor can be seen as an array of values. While this array will only contain one element in most cases, it can also be empty or contain multiple elements. To add or remove values from a variable, you can use the Set Mode in the EventHandler config:
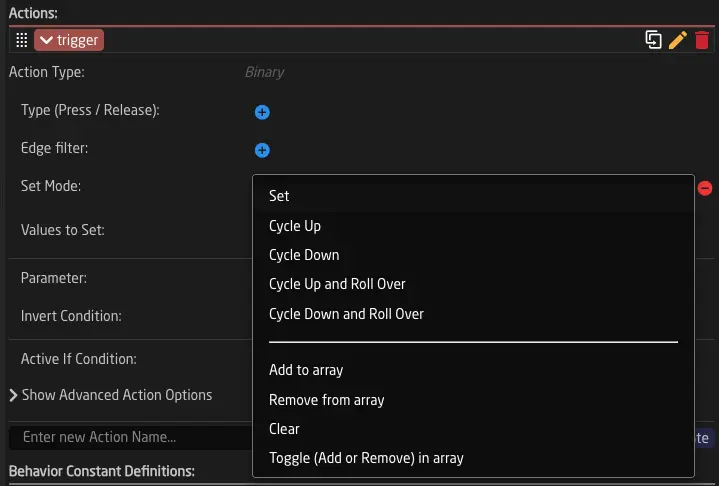
Here are the relevant ones explained:
- Add To Array: Adds a new value to the current value array.
- Remove From Array: Removes a specified value from an array.
- Clear: Clears all values of a variable, resetting it to an empty array.
- Toggle Add Remove: Adds a value to the array or removes it if it's already there.
Example: In a setup with multiple cameras, you may want to have one button controlling gain on several cameras at once. You can set up buttons to add more than one ID to the DeviceIndex to make this possible. ParameterReferences that already reference Var:DeviceIndex will now control all Devices in the array.


Conditions
Conditions are a structure used in many places in Reactor. They are text strings that combine multiple Parameters into a condition that can ultimately evaluate to either "true" or "false".
Some example places where they are used are:
- Active-If Condition on Layers: Determines if a layer is visible (rendered) or not.
- Active-If Conditions on FeedBack Handlers: Determines if a certain Feedback (e.g., Text, Color, etc.) is active or not.
- Active-If Conditions on Event Handlers: Determines if a certain interaction (e.g., left edge press) is active or not.
- Conditions on Virtual Triggers: Determines if a Virtual Trigger simulates an active button press (See Virtual Triggers).
- And several other places...
The Condition Helper Window
When you see a condition in Reactor, you can simply click it once to open the Condition Helper Window.
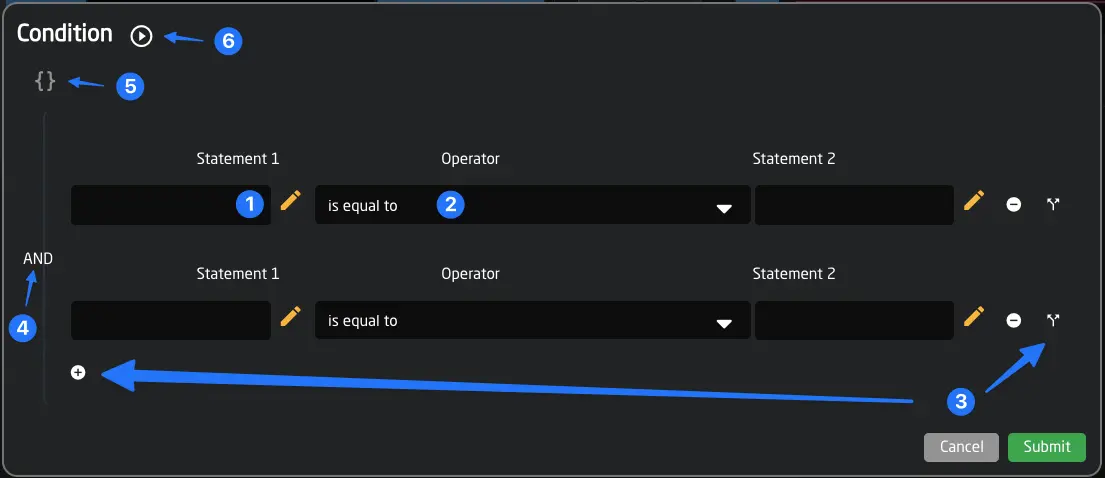
The helper window can make it quick to create the condition you need. You can:
- Select Parameter References by clicking the yellow pencil icons or just start typing values into the text field.
- Change the comparison operator in the middle to check.
- Add logical branches to your conditions.
- Change how your conditions are combined (AND or OR).
- Edit the raw string value of your condition.
- Evaluate the current result of the condition in Reactor by clicking the button. If true, you will see a green check ✅, else a red mark ❌.
Basic Format
The basic format of a Condition looks like this:
<Value or Parameter Reference> <comparison operator> <Value or Parameter Reference>
Comparison Operators
The basic operators for comparing values are:
- == equal to
- != not equal to
- < smaller than (only for numeric values)
- <= smaller than or equal to (only for numeric values)
- > larger than (only for numeric values)
- >= larger than or equal to (only for numeric values)
You can also quickly "force" a variable by simply typing true or false directly into the first field and leaving the second one empty.
Combining Different Conditions into One
You can also combine several different conditions using the logical combination operators:
- && AND
- || OR
Additionally, you can use parentheses ( ) to group parts together and specify the order in which the individual parts of a combined condition are evaluated.
Example:
Var:MyVariable == true && (DC:bmd-atem/1/programInputVideoSource/1 == 5 || DC:bmd-atem/1/programInputVideoSource/1 == 8)
This will evaluate to true if the variable MyVariable is set to true and the Program Parameter of the ATEM device 1 (on ME1) is either 5 or 8.
Example:
Var:MyVariable == true && DC:bmd-atem/1/programInputVideoSource/1 == [5,8]
This is the same, but shorter, using an array for the literal values 5 and 8, which implies an OR operator.
Checking Against Empty or Zero Values
When checking if a value is empty, there are different possibilities to consider:
- A value can be completely undefined: In this case, we can check against an empty array
[]or['']. - A value can be an empty string: In this case, we can check against
''.
Inside of the Condition Helper Window, you will get these values recommended in a dropdown.
Example Usages of Variables and Conditions
The simplest use case for variables and conditions is to switch the visibility of a layer on and off. To do so, simply create a Variable - let's use "ShowCustomButtons" as the name for this example.
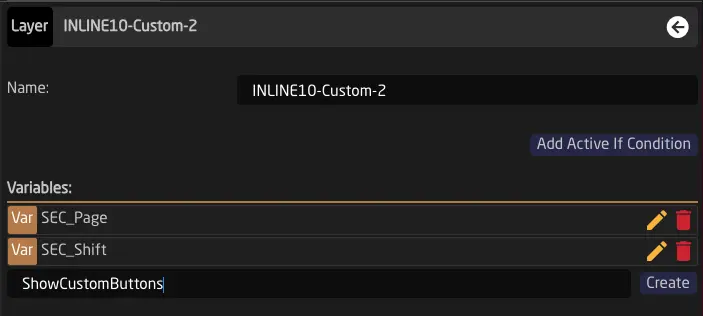
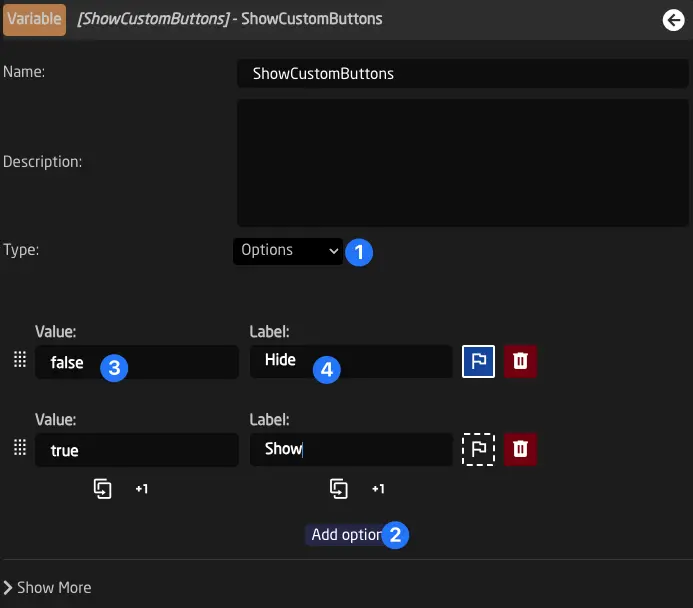
In the variable settings, set it to "Options" (1), click "Add option" (2), and add true and false options (3). We can also add labels (4) to these options - let's type in "Show" and "Hide" for this example.
The next step is to add our custom layer.
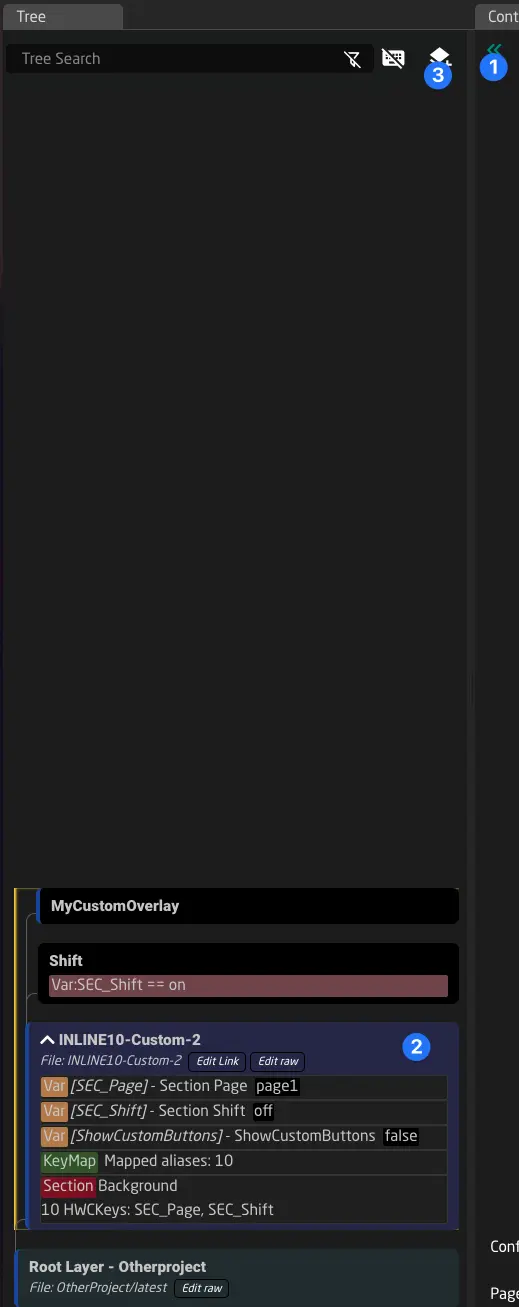
(If the tree is not open yet, click the green arrow in the top left corner (1)).
We can click the config layer (2) of our controller's config and click the Add Child Layer button (3).
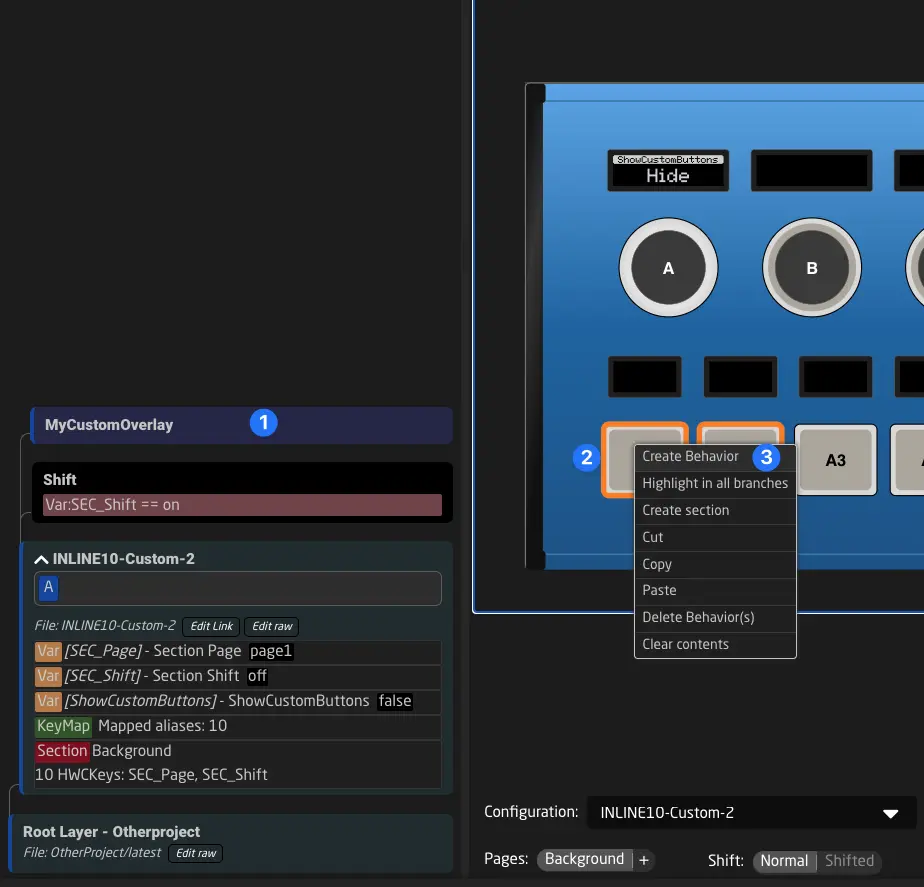
Let's add two Behaviors to our buttons. To do this, we click the layer (1), select the two components by dragging (2), right-click them, and choose Create Behaviors (3). By default, Reactor will create dummy behaviors that show their button name and layer path.
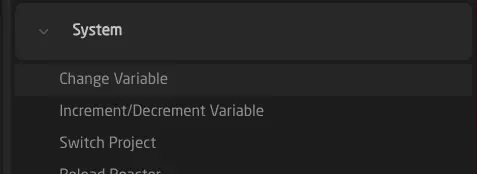
We also need to map one of the encoders of our controller to the variable we just created. Simply click the component, choose System -> Change Variable from the sidebar, and select the Variable ShowCustomButtons.

Finally, we need to add an Active-If condition to our layer. To do this, click the layer and select Add Active-If Condition in the inspector.
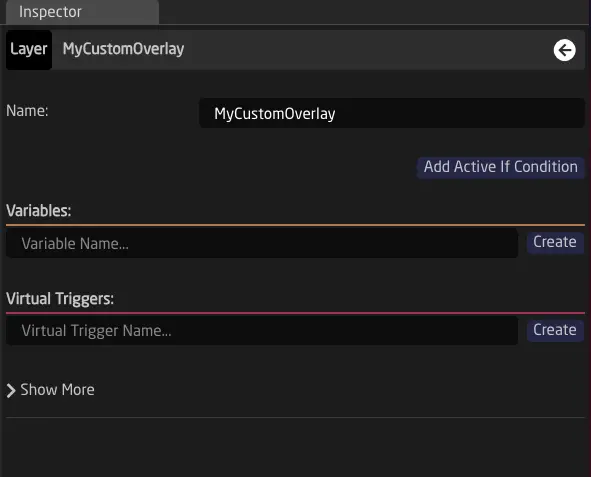
On the left side, click the yellow pencil and select the variable ShowCustomButtons. On the right side, you can just type out true.

Click "Submit", and we are done.
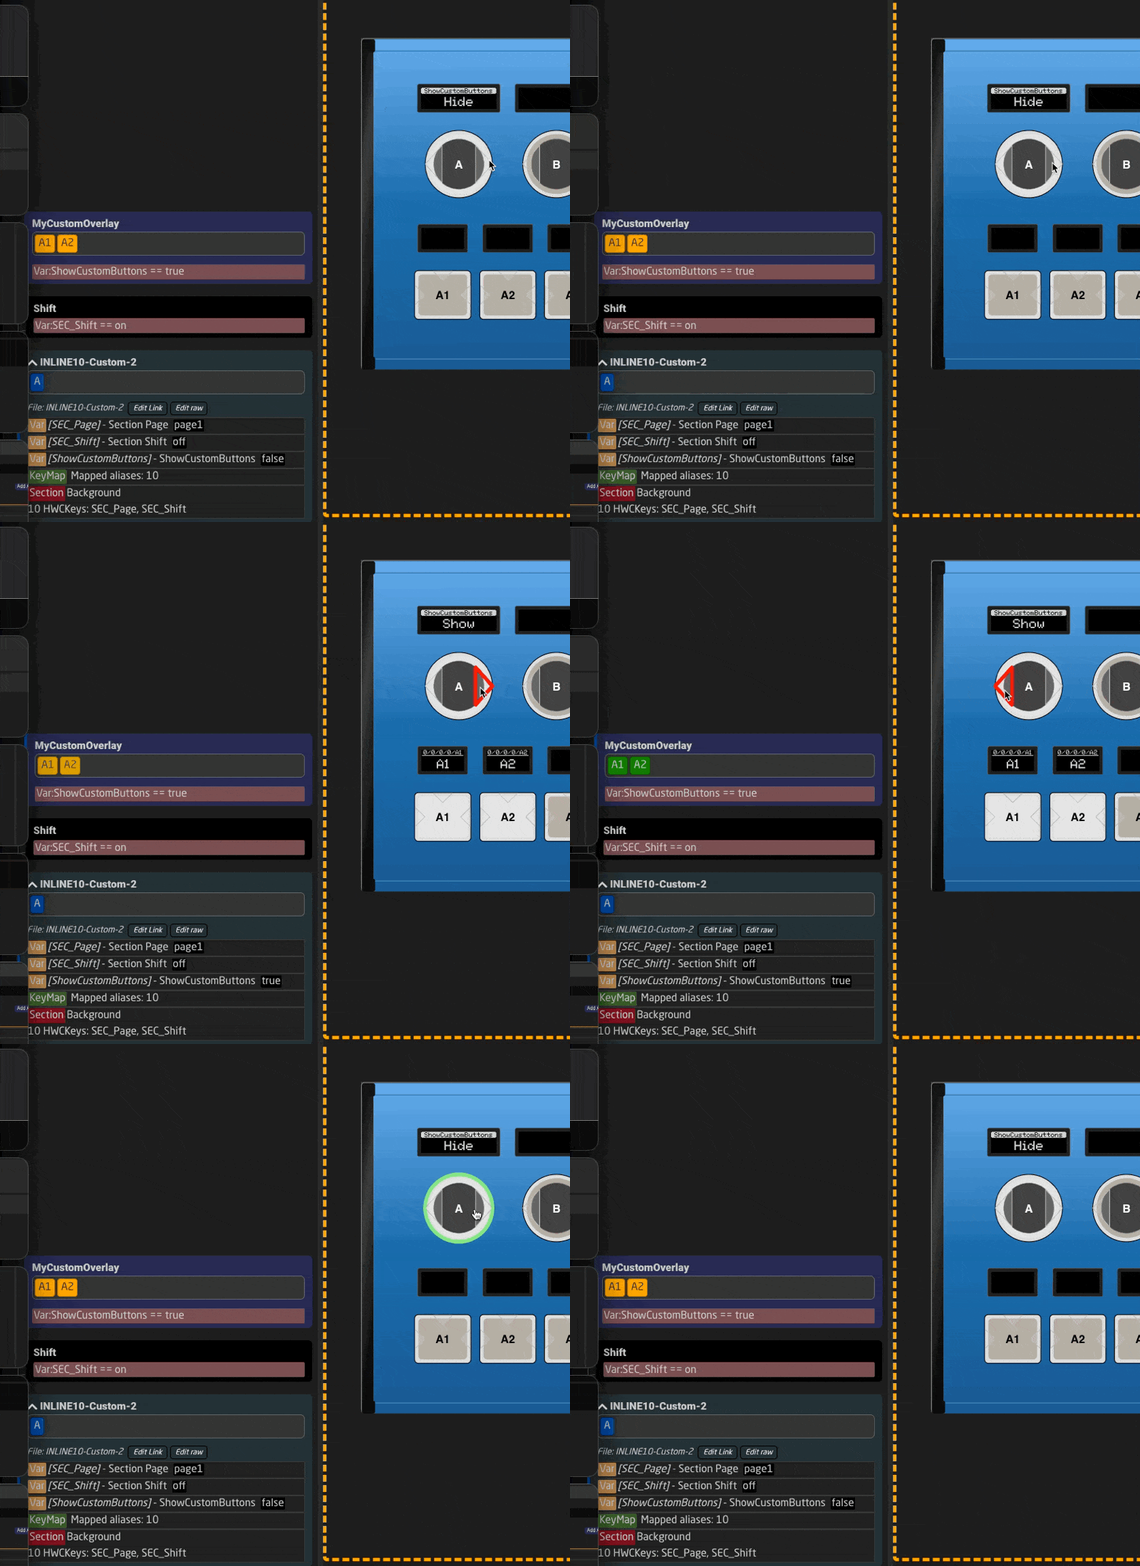
To check the result, activate simulation mode (ctrl/cmd+e) and change the variable using the encoder. It should look like this:
