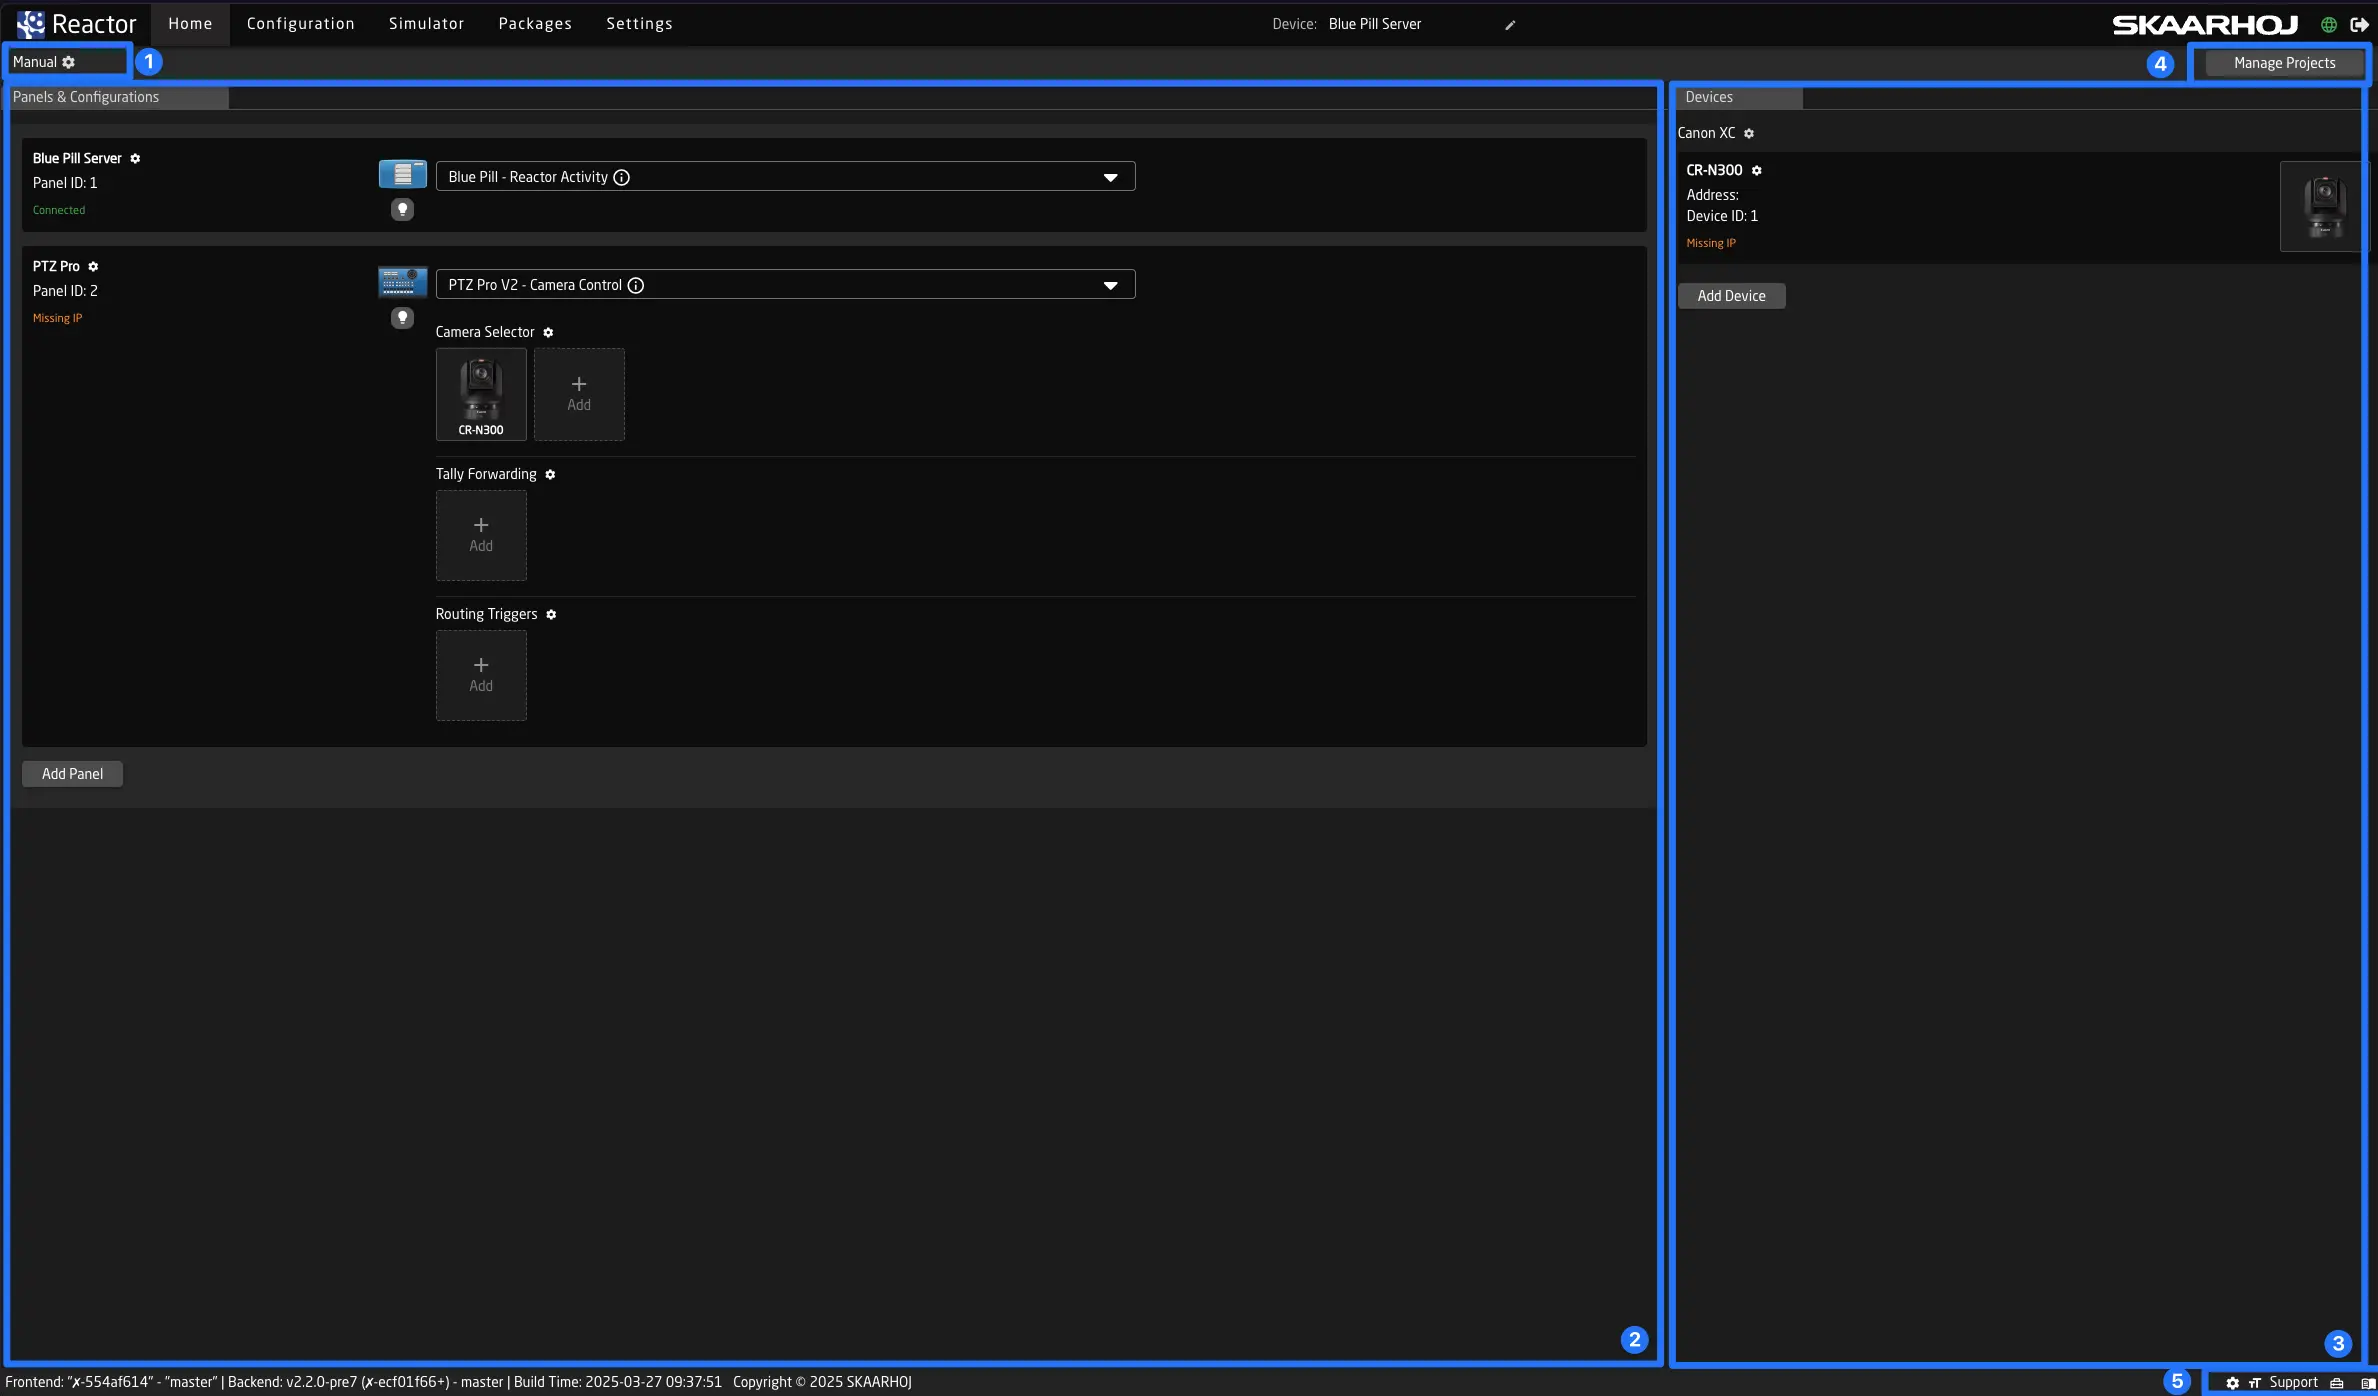
The Home Screen
When you first open your Blue Pill product, you will see the 'Home Screen.'
-
Right below the navigation on the top you can see the current project name, and also edit it's details by clicking on the pen.
-
On the left side you can add and configure panels
-
On the right side you can add and configure devices
-
You can access and edit all Reactor Projects by clicking Manage Projects
-
In the bottom (footer) you can (from left to right):
- open the view settings. These are saved in your browser.

- change reactors global text size

- check the status of remote support mode (active when support text is yellow)

- find a link to the tools page (toolbox icon)

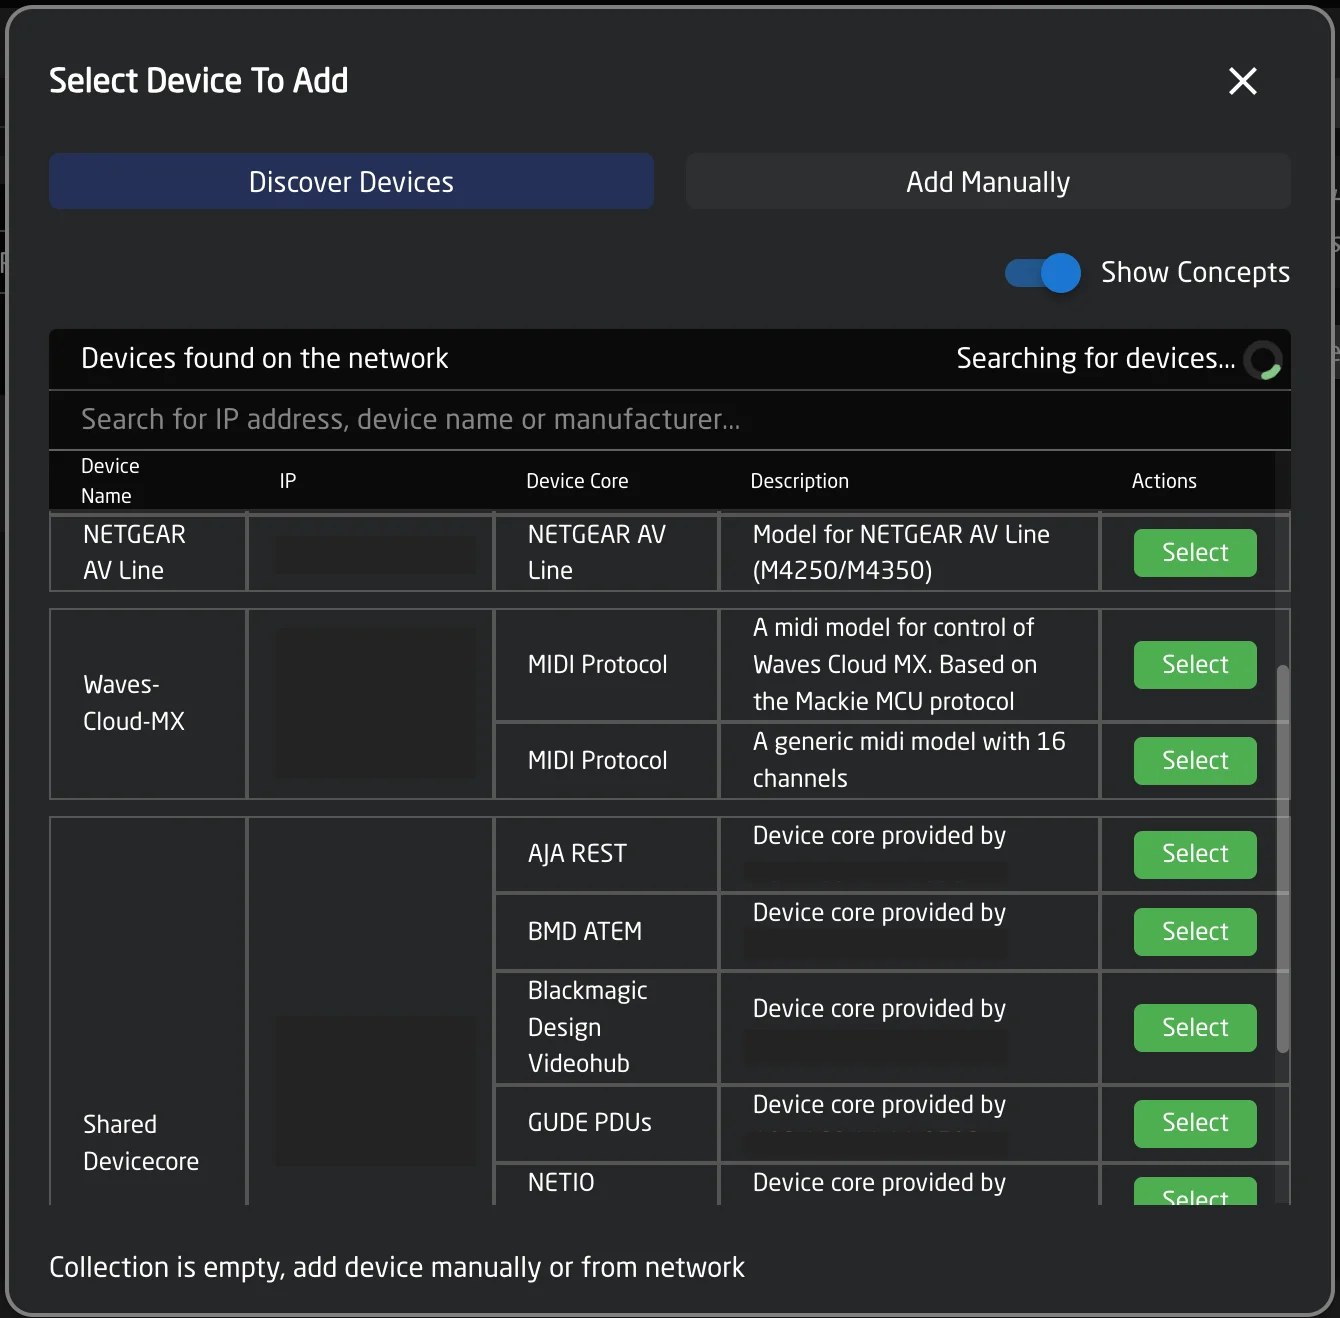
Devices
This is where you can add all connections to other devices on the network that you want to control with Reactor. Simply click "Add Device" at the bottom to open the device browser. You will see a list of all devices Reactor discovers on the network, using mDNS or other mechanisms. If your device does not support these, you can also click "Add manually" at the top and select your device from the list.
Pressing shift while clicking "select" will not close the window and let you add multiple devices quicker
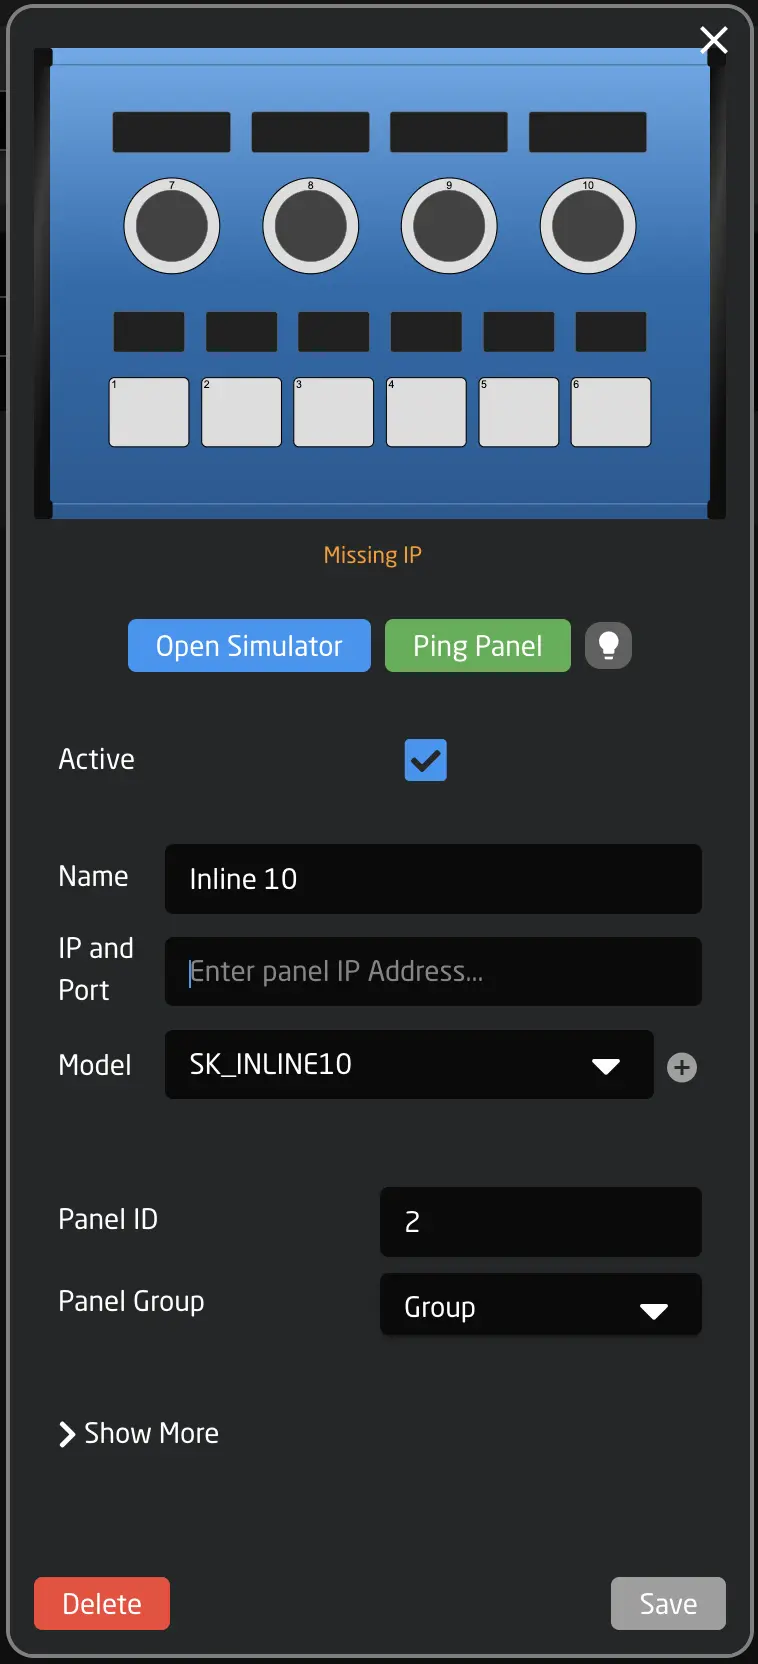
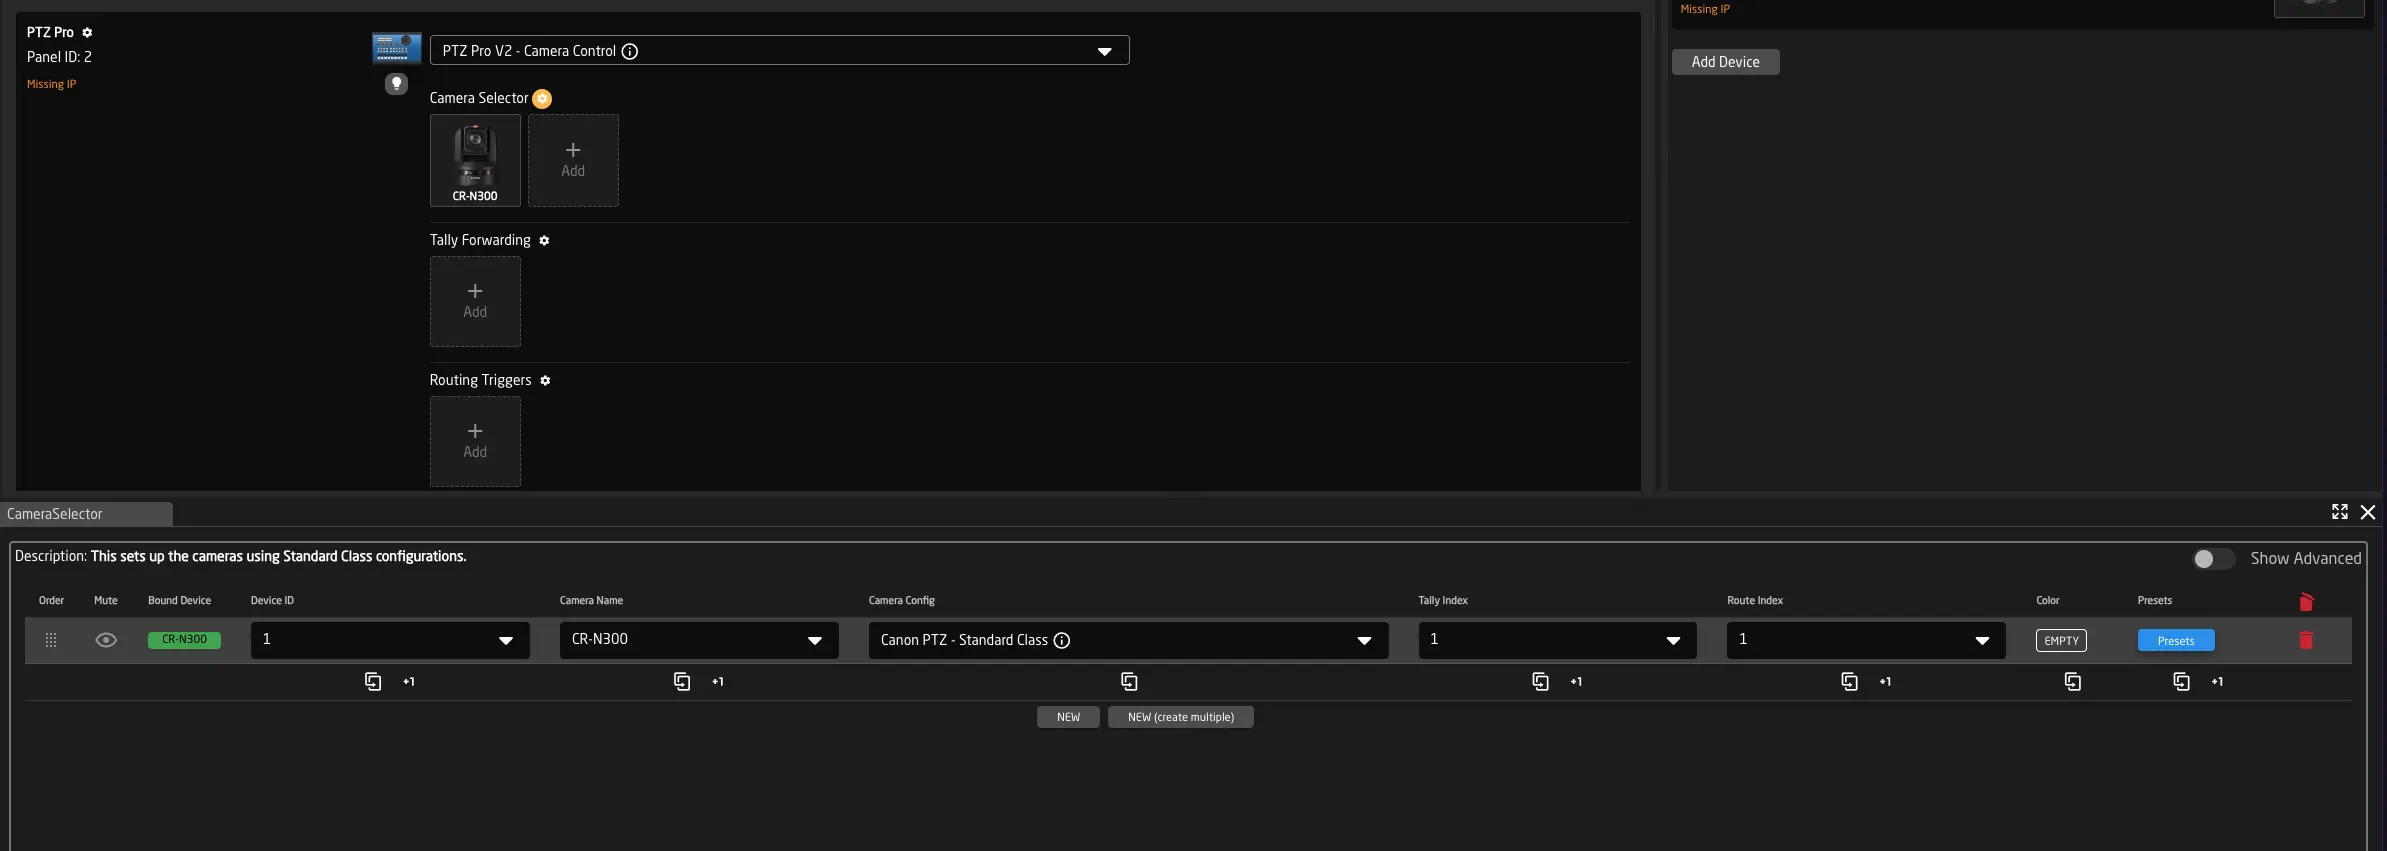
Panels
On this tab, you can add your panels. When working with a Blue Pill device, your panel should automatically appear when creating a new project.
Clicking on the panels name allows you to adjust its IP address, name, brightness, and sleep settings.
After a panel is added, it will automatically select one of the available default configurations. In many cases, these configurations are the generic SKAARHOJ default settings, allowing you to easily add devices from different manufacturers to your panel.
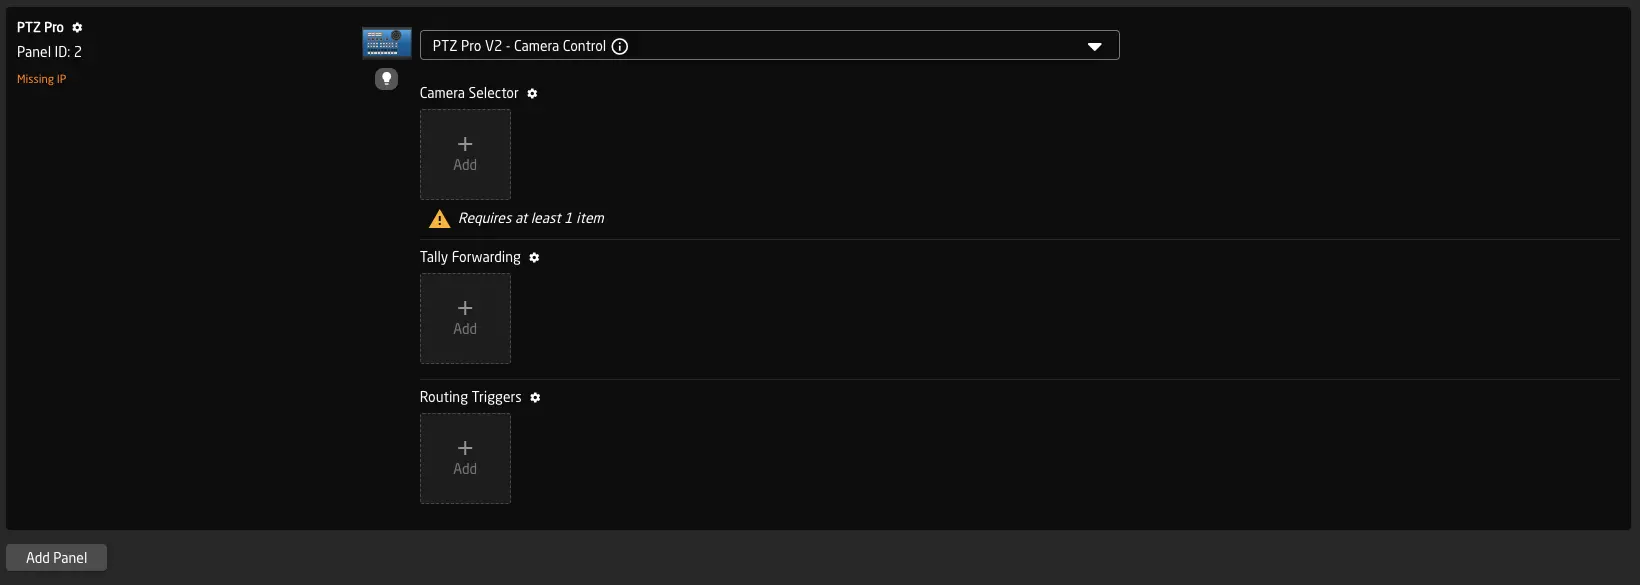
Below the selected configuration, you can see its configuration options. If the configuration includes a Camera Selector, you will also see which devices are already mapped to the controller, or you can add new ones. To configure the settings of your panel in more detail, click the blue name of the setting (e.g., Camera Selector, Switcher Inputs, Quick Class, etc.) to open them in a table.
Selecting Configurations for your Panels
Once you have added panels and devices, you need to select the preferred configuration for your panels. This is done using the dropdown menus. From here, you can choose one of the built-in default configurations or create a fully custom configuration by clicking "Create Custom Config" in the dropdown.
Using the small info icon, you can check additional details of your configuration, edit it in the JSON Editor, or delete/reset it to the system.

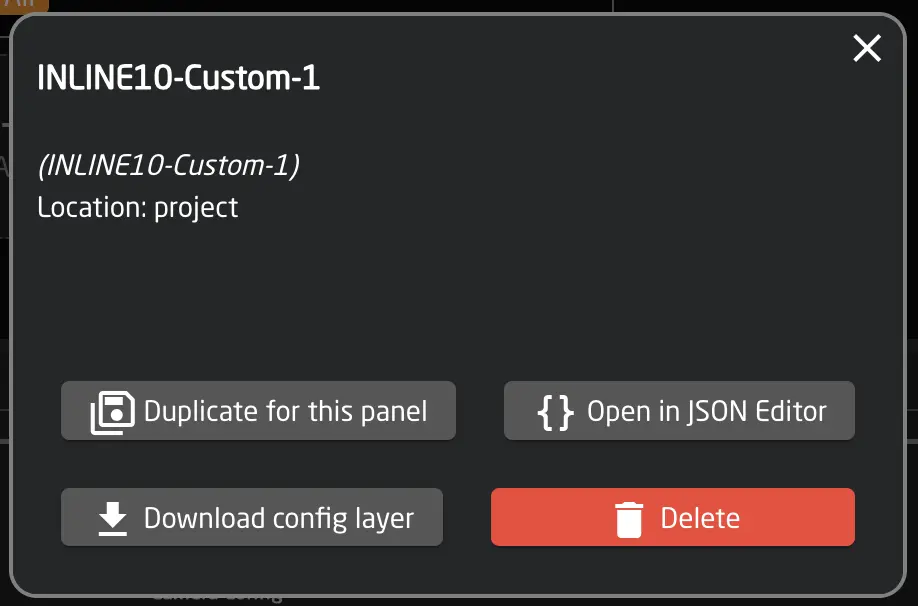
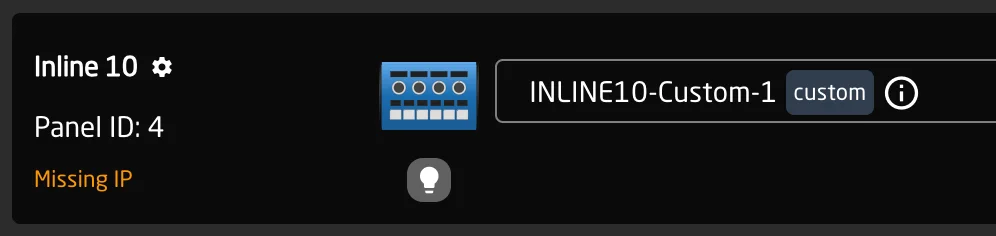
When creating custom configurations or modifying system configurations, you will see a small 'custom' or 'modified' indicator next to the configuration. Modifications are local to the current project.
To manage all available configurations, click "Manage Projects" and select "Manage Used Configs" at the top.
Panel Groups
Panels can be grouped to set shared brightness and sleep time, and to provide additional organization.
This feature is disabled by default. Open the View Options (cog wheel in the footer) and activate it.
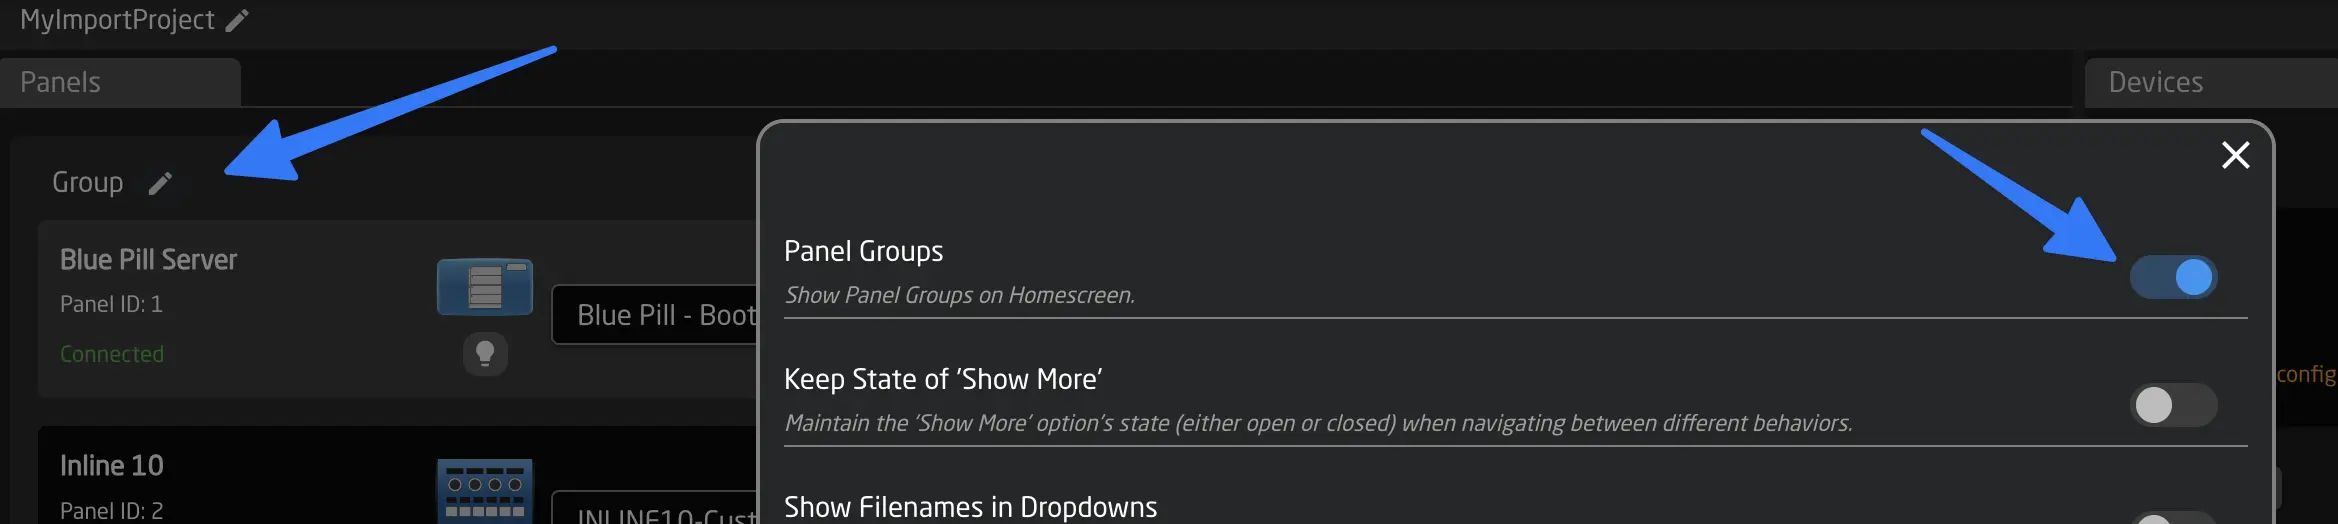
Groups can be renamed and their settings adjusted. Panels can be moved between groups, and sleep settings and brightness can be managed for multiple panels at once.