Understanding Sections
Sections provide a simplified way to configure menus without having to use the tree. Instead of working through complex layer hierarchies, sections let you focus on specific areas of your controller's functionality - like camera adjustments, user buttons, or routing controls.
It is basically our way of highlighting what is most important in our existing configs, so you can make adjustments with ease.
Most SKAARHOJ default configurations include sections. If you've ever used the Section Selector dropdown in the configurator, you've already been working with sections. When creating custom configs, they usually have one main section. You can also create your own sections and add or remove individual components from them (advanced feature)
What Are Sections?
A Section is a named group of hardware components (buttons, encoders, faders) that belong together functionally. When you select a section in the configurator directly from the dropdown, only that section's components are highlighted and editable. This makes it easier to:
- Focus on one functional area at a time
- Navigate complex configurations without needing to use the tree
- Make changes to related controls without affecting other parts
Working with Sections
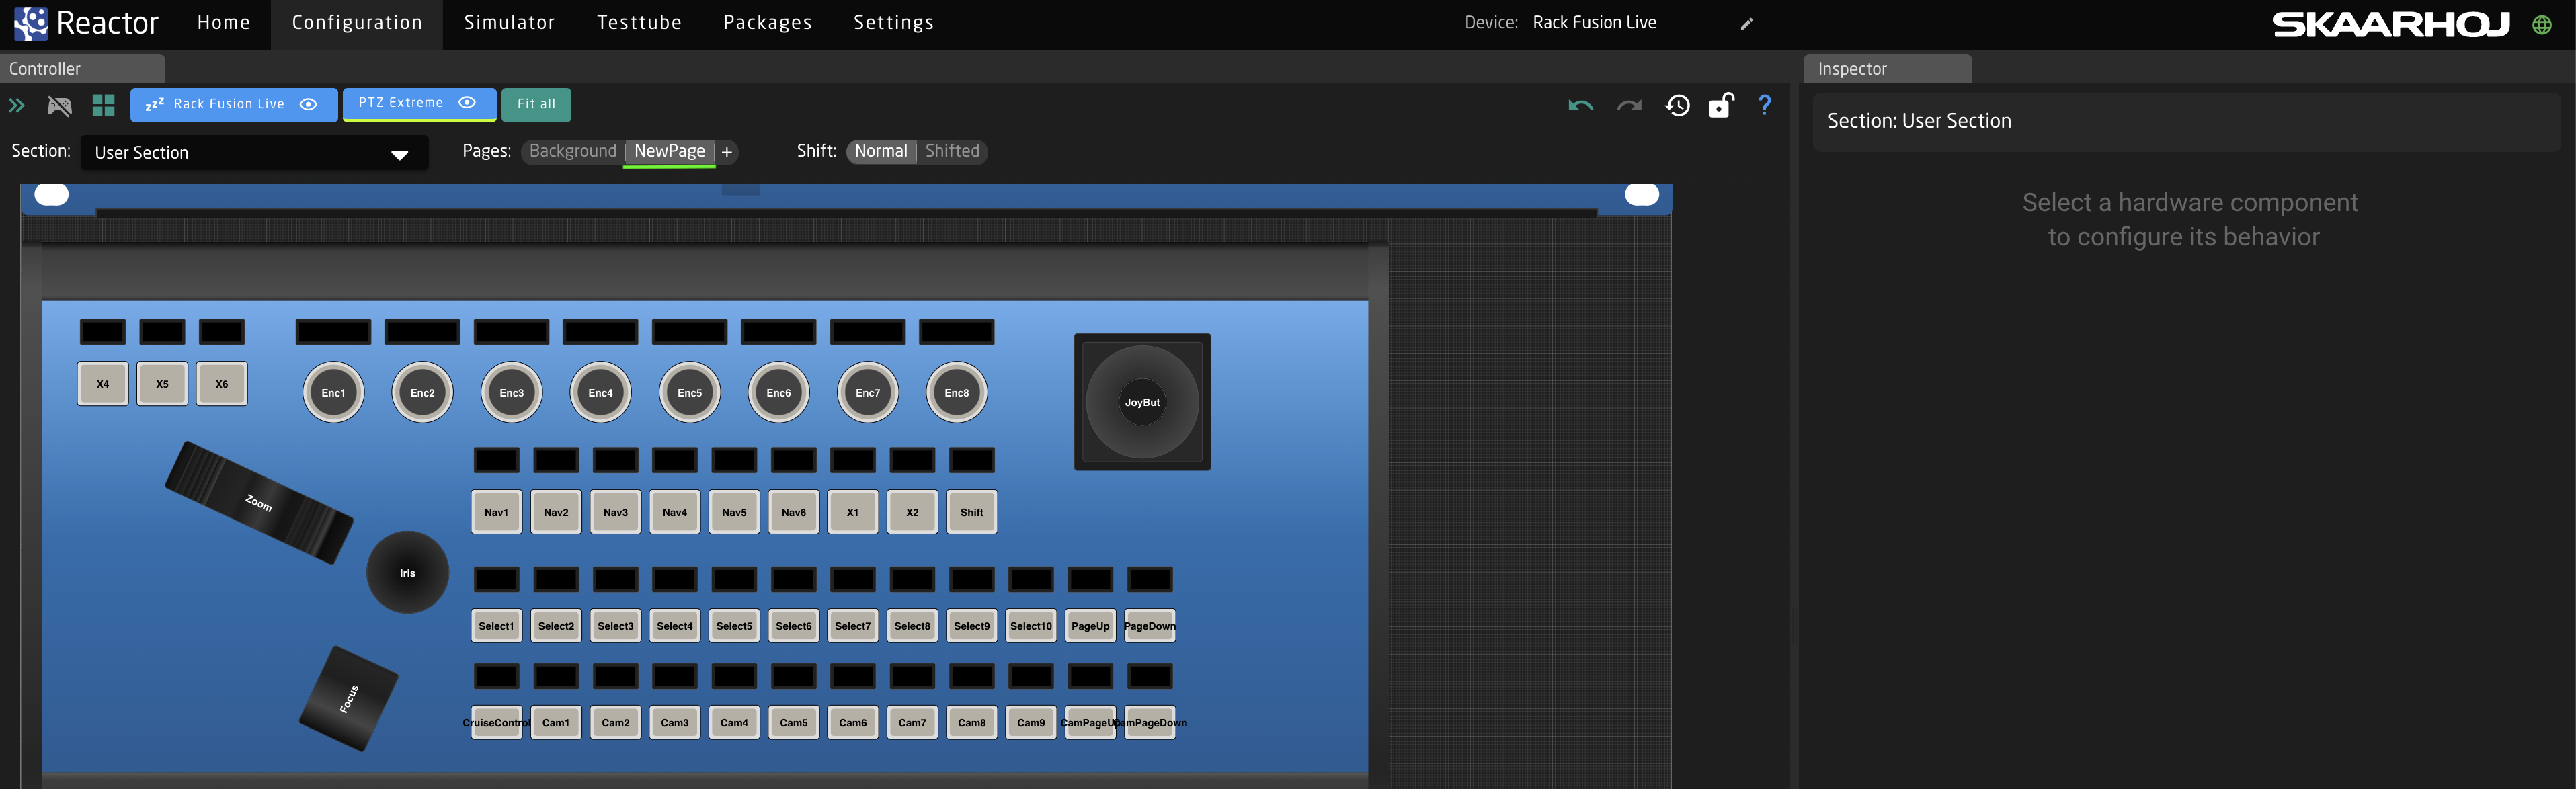
To work with sections in the configurator:
- Open your configuration in the configurator
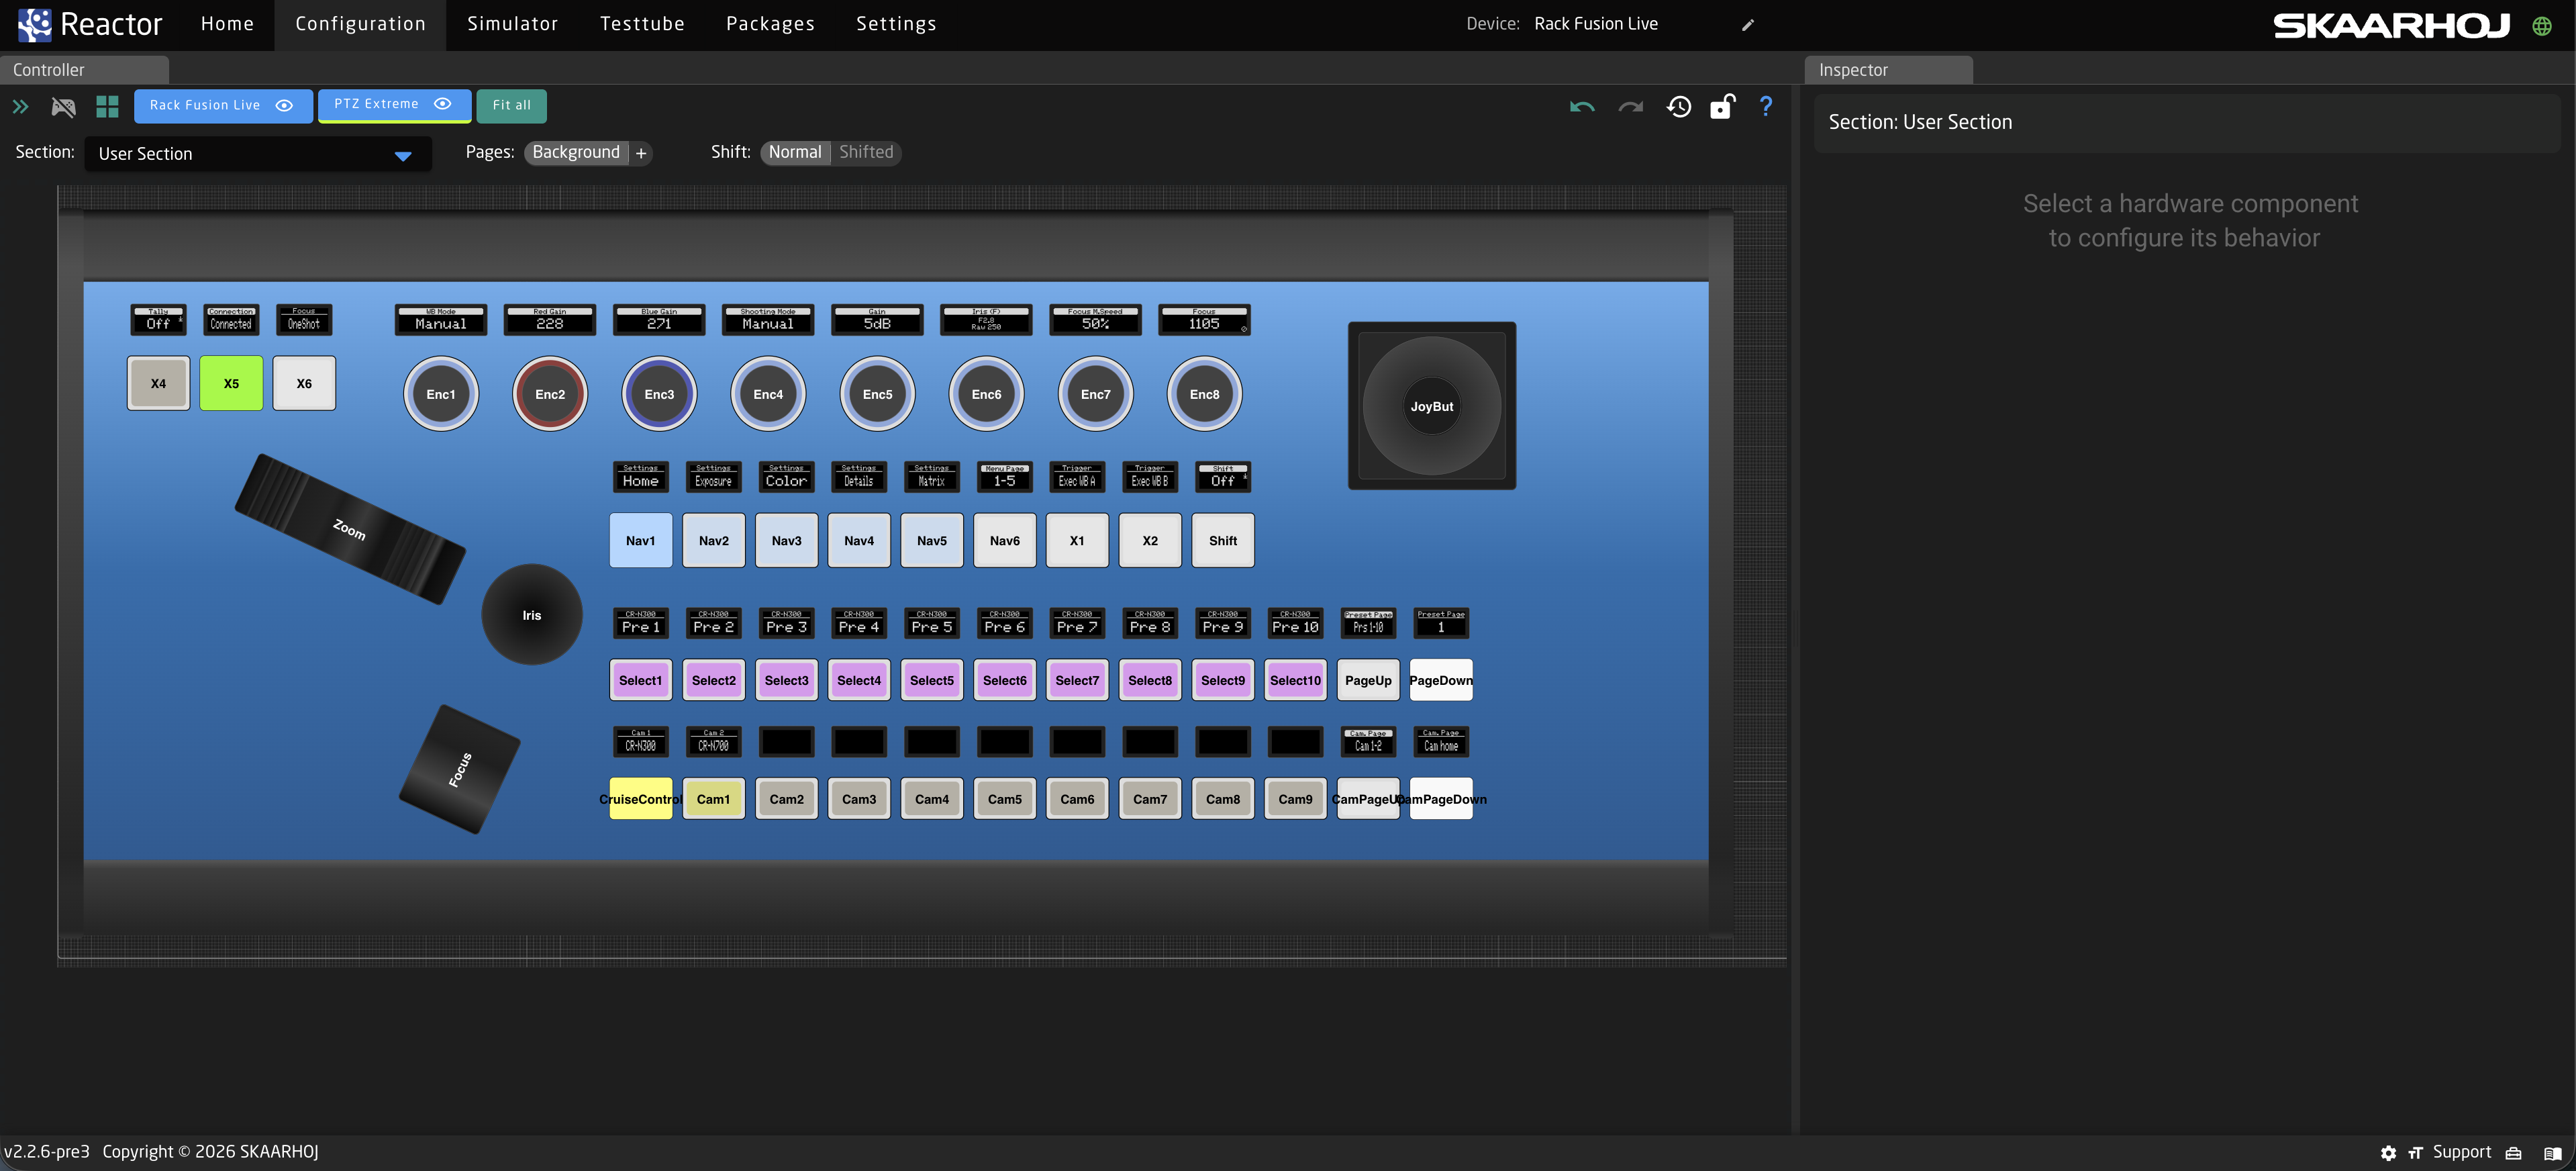
- Look for the Section Selector dropdown near the top of the interface
- Click the dropdown to see available sections
- Select a section to view and edit its components
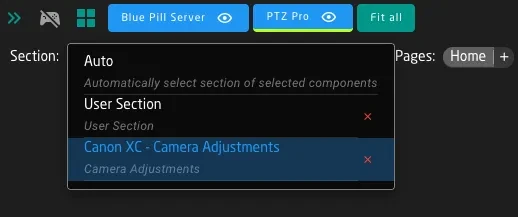
Normally, when editing an existing configuration, you would leave this dropdown in "Auto" mode, where the configurator will automatically select the section that a component you select is part of.
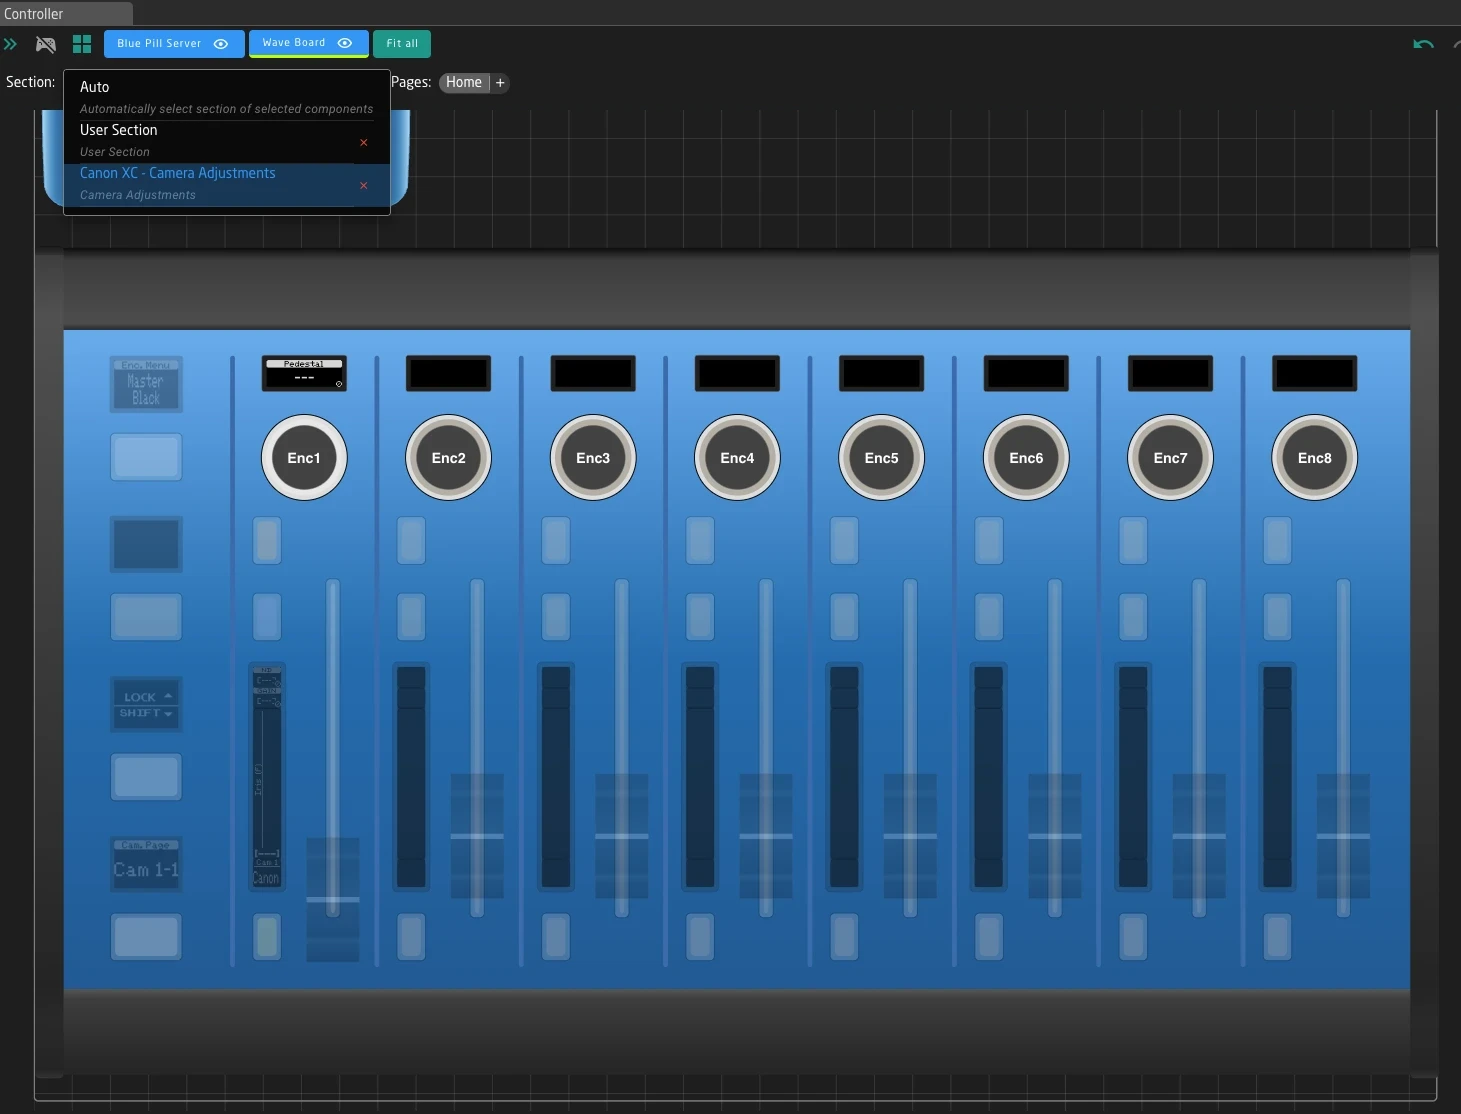
When a section is selected, the configurator highlights that section's hardware components on the controller visualization. You can then click on individual components to edit their behaviors.
When you're in Section View:
- Only the section's HWC Keys are shown and editable
- Other components on the controller still exist but are dimmed or hidden
- Changes you make only affect the selected section's components
To access components outside the current section, either switch to a different section or use Auto.
Page Variables and Menu Navigation
Many sections use Page Variables to provide multiple menu pages of functionality on the same physical components. This is how menu navigation works in most SKAARHOJ configurations.
How Pages Work
When creating and editing pages in the section view, Reactor will create layers and active if conditions accordingly. Page variable is used to select between those layers.
The Page Variable is a standard Reactor variable with multiple options (like "Home", "Exposure", "Color", "Focus"). The section displays different behaviors on its components depending on which page is currently selected.
Underneath reactor will always use "page1", "page2", "page3" and such for the values, only the labels of the variables options have the actual menu item name.
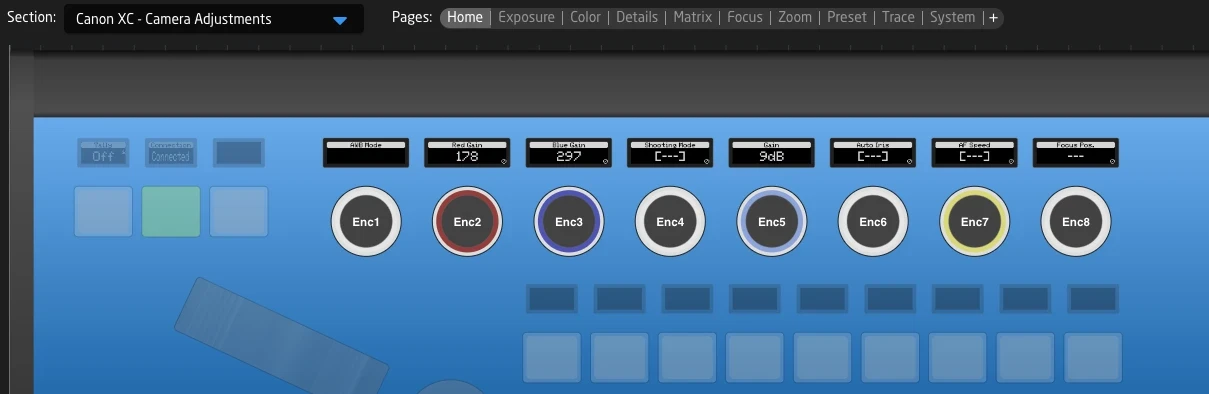
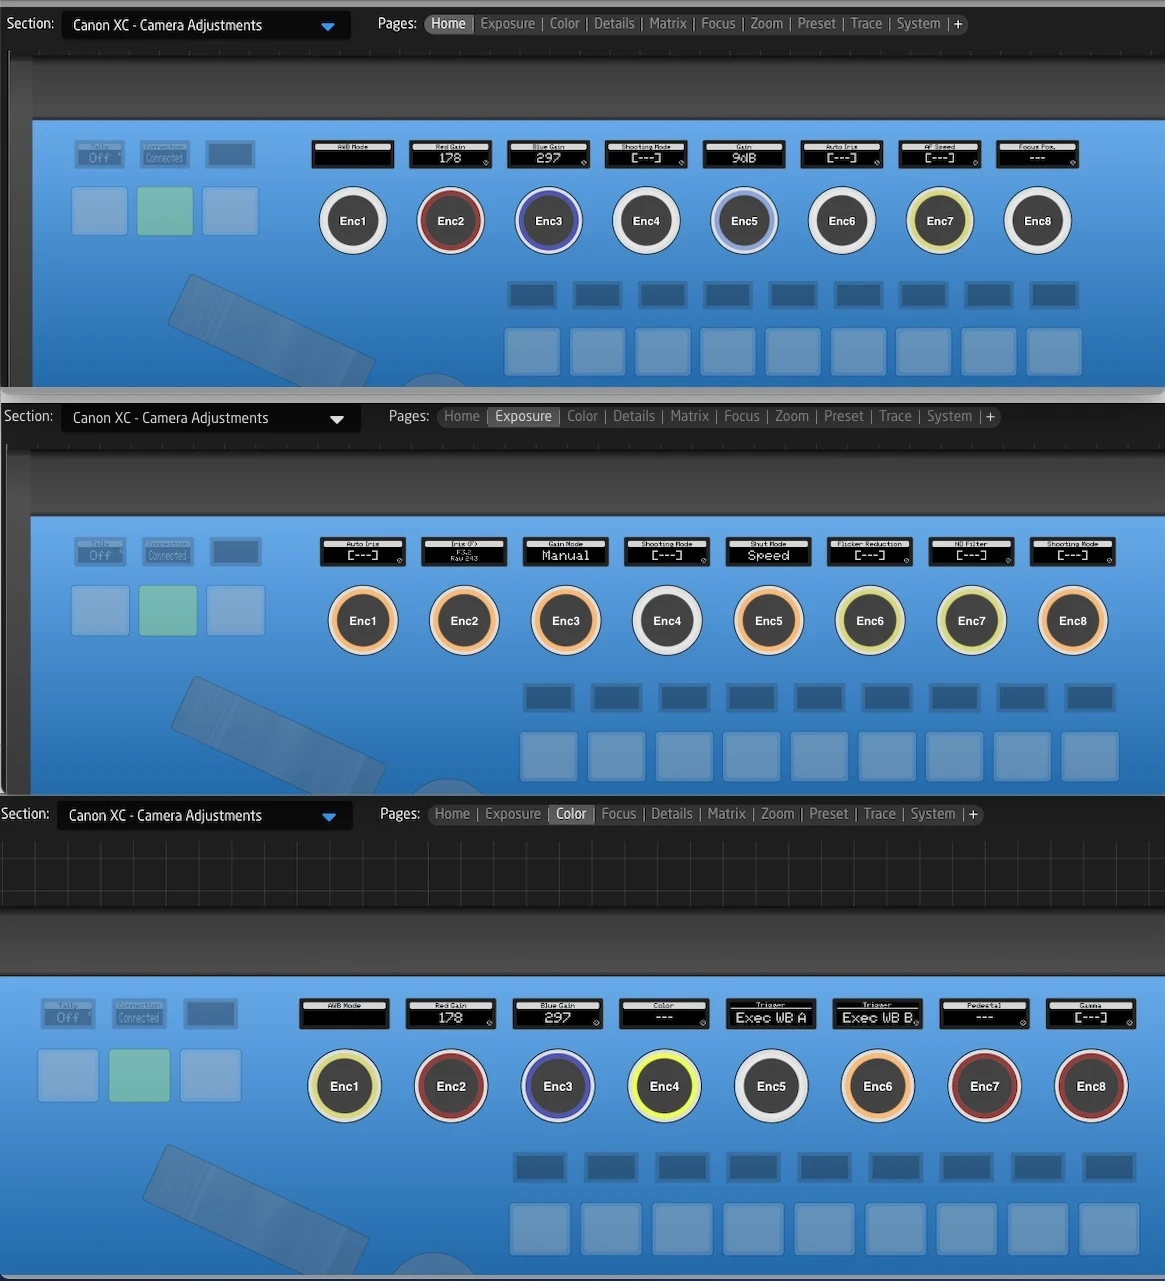
For example, in the Canon XC Camera Adjustments section on the PTZ Extreme:
- Home page: The 8 encoders control AWB Mode, Color Gain, Shooting Mode, Gain, Iris, and Focus
- Exposure page: The same 8 encoders now control Auto Iris, Gain Mode, Shutter settings, and ND Filter
- Color page: The encoders control White Balance, Color Temperature, and Master Pedestal
The physical encoders are the same - only the assigned behaviors change based on the active page.
Navigating Between Pages
In Section View, you'll see page navigation controls that let you:
- See the current page name
- Switch to different pages
- Understand which page you're editing
The exact location and appearance of these controls depends on the configuration, but they're typically visible when a section with pages is selected.

Page navigation in Section View is for editing the configuration. The actual runtime page switching is controlled by behaviors on your controller - often a dedicated Page button or encoder that cycles through the page variable's options.
Shift Variables
Shift Variables extend the functionality of your controls without requiring additional physical hardware. By holding a designated Shift button, you can access secondary behaviors on the same controls.
How Shift Works
A Shift Variable typically has two states:
- Off (Normal): Standard behaviors are active
- On (Shifted): Secondary behaviors become active
When you hold the Shift button on your controller, the Shift Variable changes to "on", and any shift-specific layers become active. This reveals additional controls that would otherwise be hidden.
Common Shift Patterns
In camera configurations like Canon XC, the Shift button provides access to:
- Exposure page: Shift reveals Auto Exposure Shift, DNR Mode, Flicker Reduction, Infrared Mode
- Color page: Shift reveals Matrix controls and extended color gain settings
- Focus page: Shift reveals additional focus adjustment parameters
This pattern effectively doubles the number of available controls on each page without adding physical buttons.
Shift in Section View
When editing a section with shift support, you may see:
- A shift state indicator showing whether you're viewing normal or shifted behaviors
- The ability to toggle shift state to edit shift-specific behaviors
- Separate layers in the tree for normal and shifted configurations
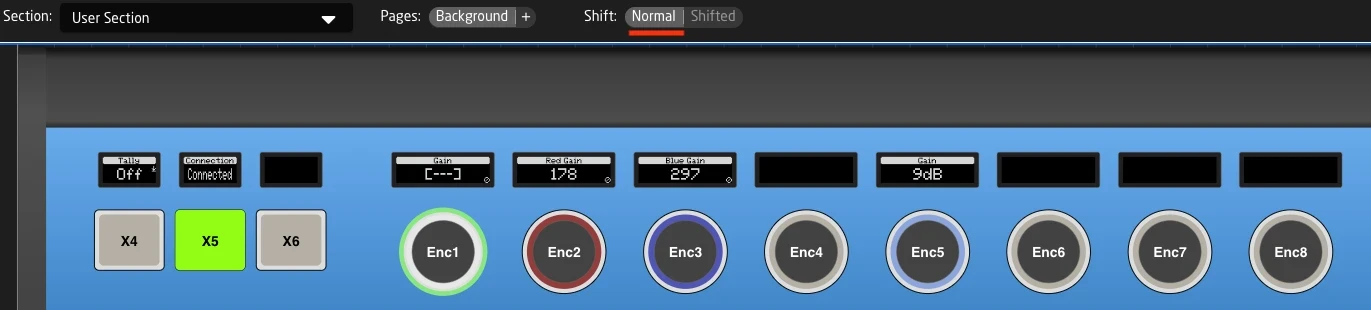
Normal
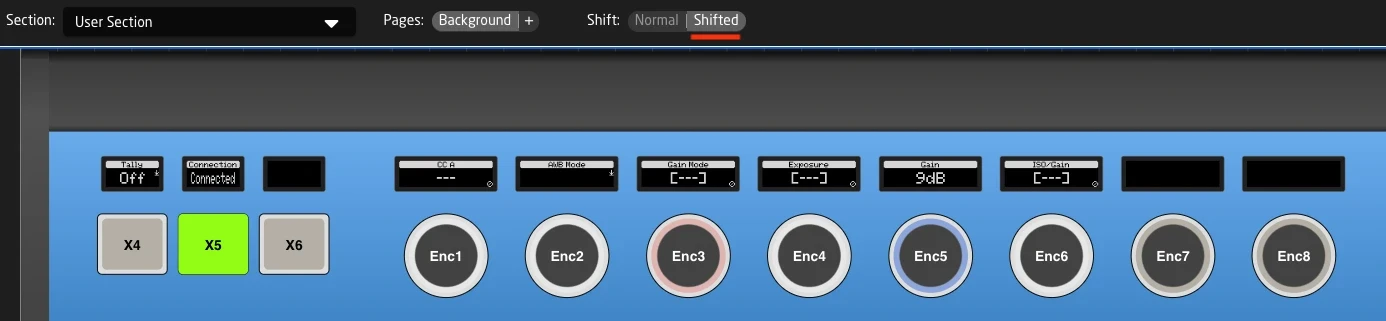
Shifted
User Section Pattern
Many SKAARHOJ configurations include a User Section - a dedicated area where users can customize their own button assignments.
The User Section
The User Section is part of all SKAARHOJ Default configurations. It is usually defined on top of all other parts of the configuration as an empty Layer, giving you a simple way to "overlay" additional pages and functions over the current configuration without having to change the existing config.
By default the User Section comes with a transparent Background layer, and includes all components on your controller. This means you edit it in a few simple steps:
- Select "User Section" from the Section dropdown

- Click any Component
- Assign a new Behavior on top of its current function.
The new added Behavior will now be independent of what has previously existed in your default configuration. This way you can easily
- Add more Functionality to parts of the camera selector that would otherwise be "unused"
- Add Behaviors to Buttons on Program or preview row, in case you never use certain inputs
- Add a full new page over everything that allows you to make quick adjustments on other devices during your production
Adding a full new blank page to your user section
As mentioned above sometimes you want to use the existing default config, but have one button that triggers a completely different page.
The best way to do this is to add a new page on the user section:
- Select the user section from the dropdown
- Add a new Page, make sure it is not transparent and give it a good name.

- Choose a button on your panel that will get you into the new page, select User Section -> select Background page and click your button.
- From the side choose Navigation -> Select Page
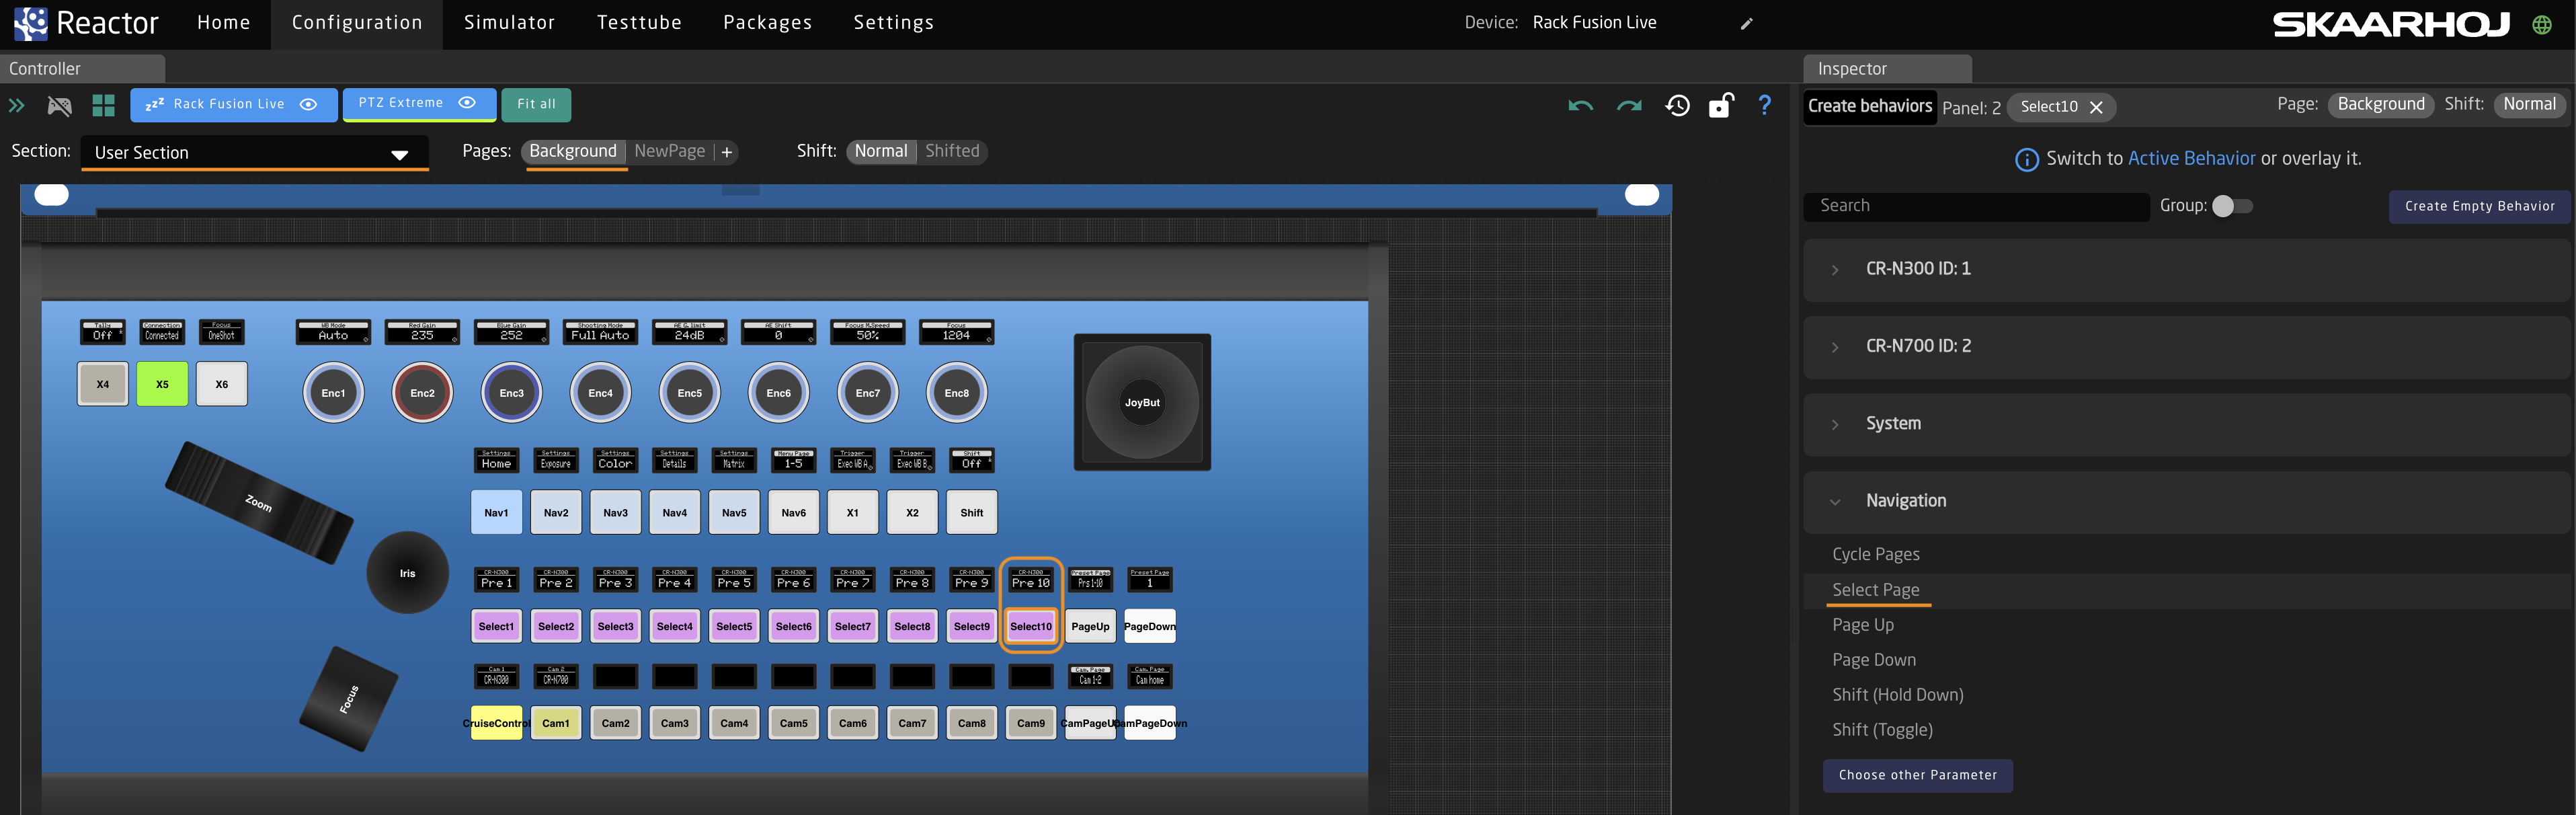
- Now select the value field and change it to your new page.
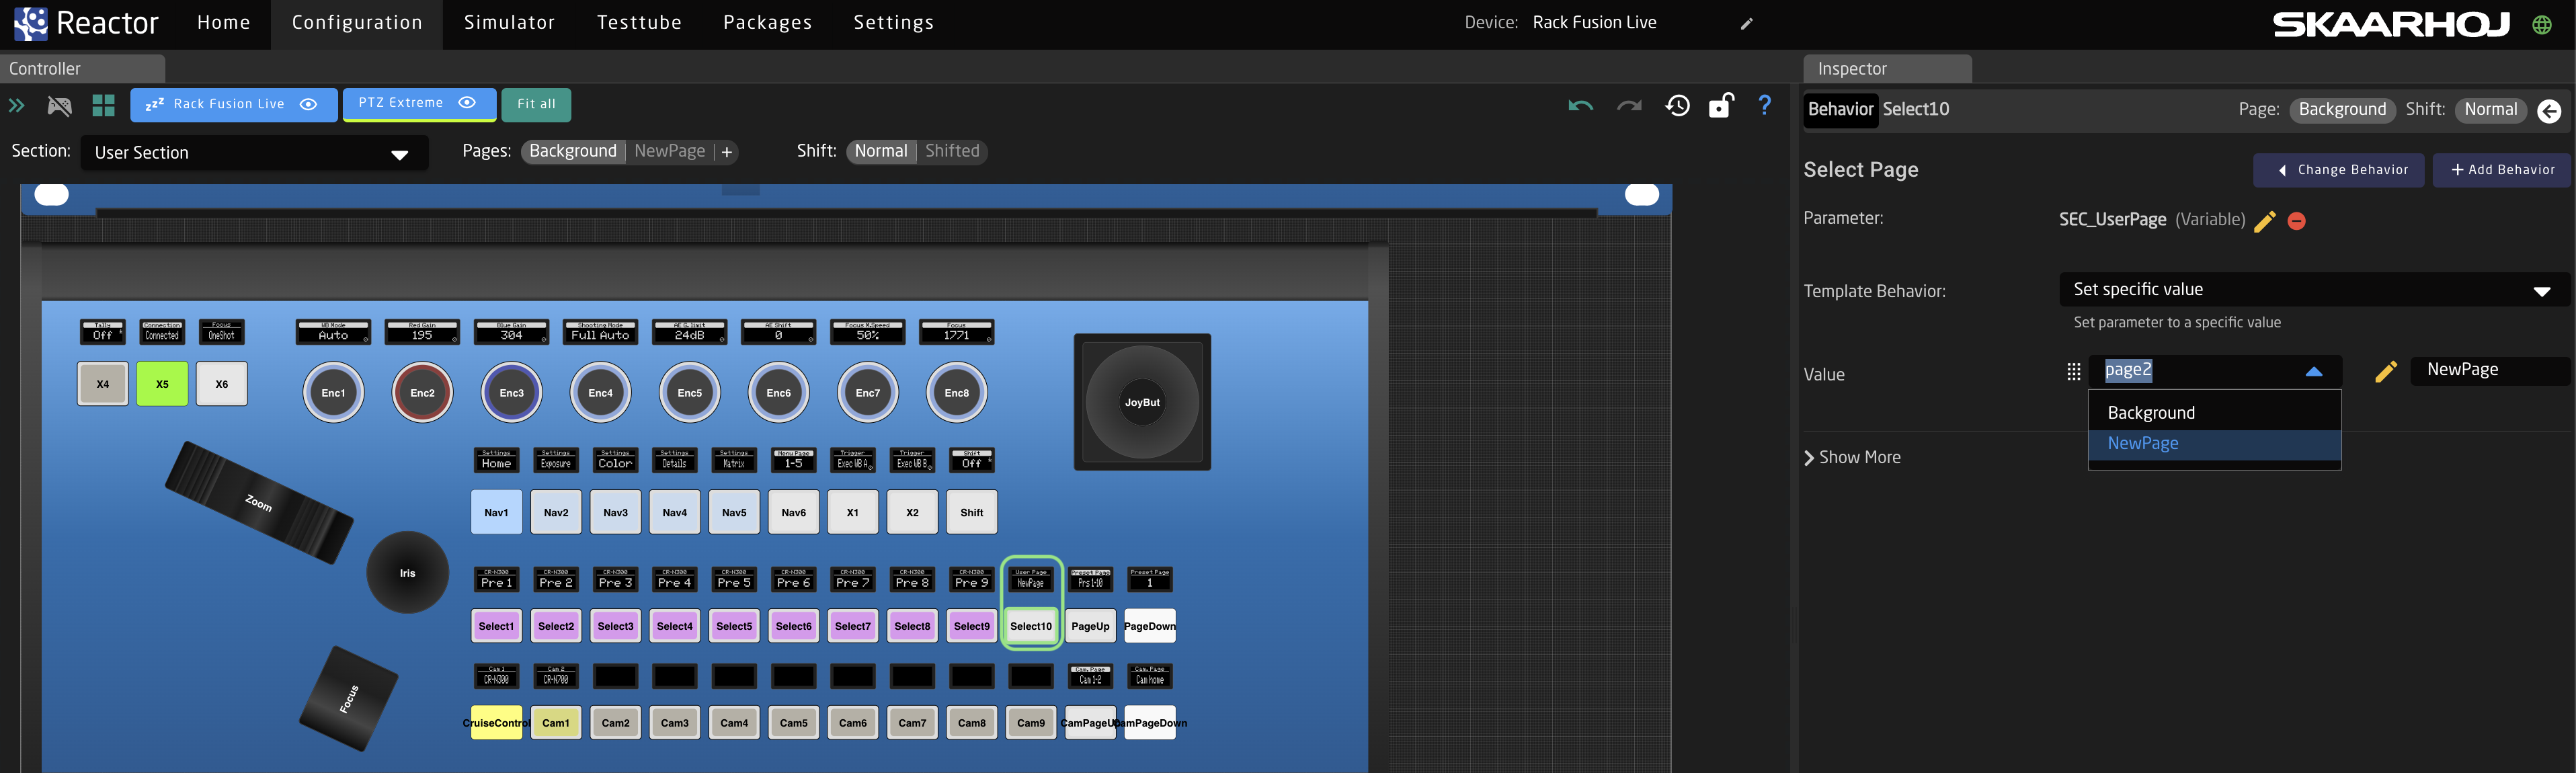
- Now you can start adding Behaviors to your new page, notice how the controller will blank out when you enter the page, and only show the new functions you added
Real-World Example: Canon XC Camera Adjustments
The Canon XC ProClass configuration demonstrates a well-designed section structure. Let's walk through how it uses sections, pages, and shift.
The Camera Adjustments Section
This section maps 8 encoders (Enc1 through Enc8) to camera parameters. It uses:
- Page Variable: "SettingPage" with 10 different pages
- Shift behavior: Hold-to-activate for extended controls
Page Structure
| Page | Enc1 | Enc2 | Enc3 | Enc4 | Enc5 | Enc6 | Enc7 | Enc8 |
|---|---|---|---|---|---|---|---|---|
| Home | AWB Mode | Color Gain R | Color Gain B | Shooting Mode | Gain | Iris | Focus Speed | Focus Position |
| Exposure | Auto Iris | Camera Iris | Gain Mode | (varies) | Shutter Mode | (varies) | ND Filter | Shooting Mode |
| Color | AWB Mode | - | - | Color Temp | Exec WB A | Exec WB B | Master Pedestal | Black Gamma |
| Focus | Focus Mode | Focus Speed | Focus Limit | Face AF | Focus Area | - | - | Focus Position |
Each page provides a complete set of related controls, making it easy to adjust one aspect of the camera without navigating through menus.
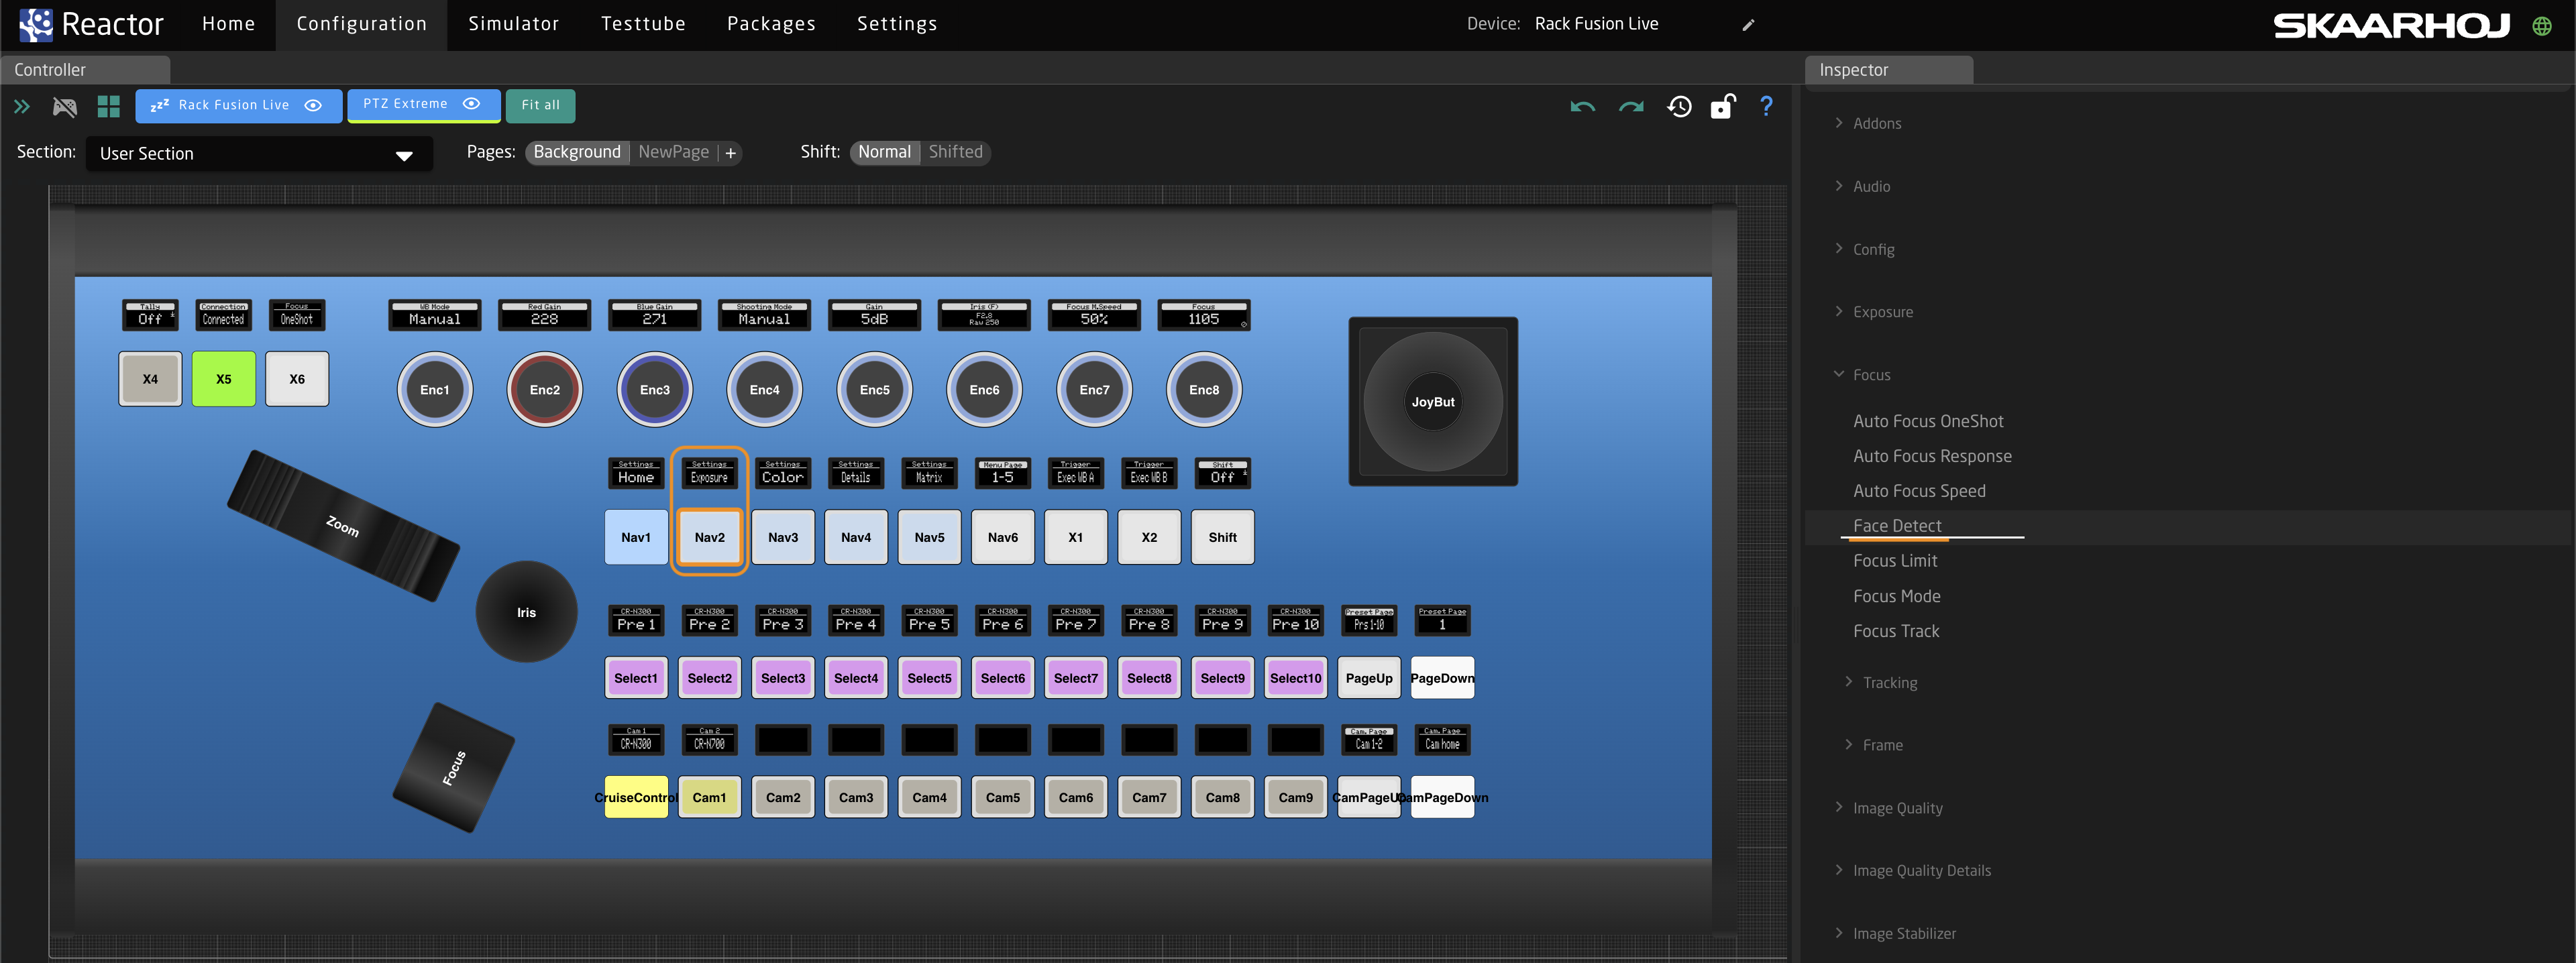
Shift Functionality
On the Exposure page, holding Shift reveals:
- Auto Exposure Shift and Response settings
- DNR Mode and settings
- Flicker Reduction
- Infrared Mode
- Image Stabilizer controls
This pattern repeats across pages - Shift always provides access to less frequently used but related parameters.
Advanced Tips for Working with Sections
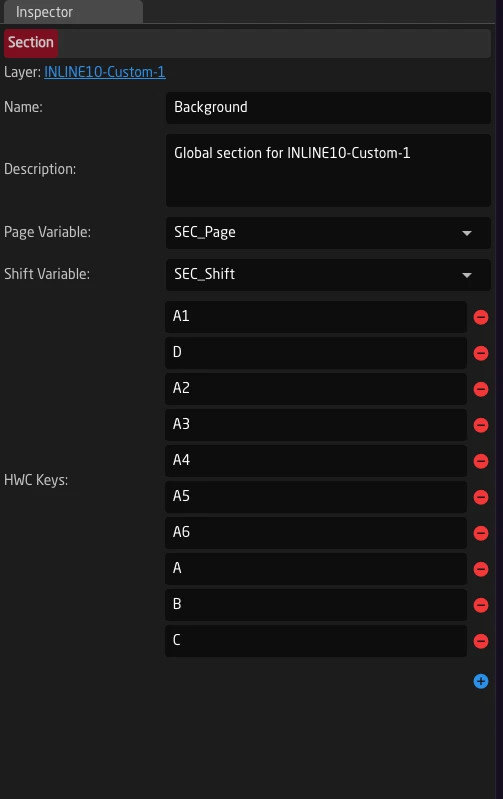
Section Definitions
Sections and what belongs to them can be defined on layers in the configuration tree. Each section specifies which hardware components belong to it, and optionally, which variables control its pages and shift states. This way a simple layer is highlighted in the section selector, together with the components that need to be taken into account when reactor creates additional pages and shift layers for this section.
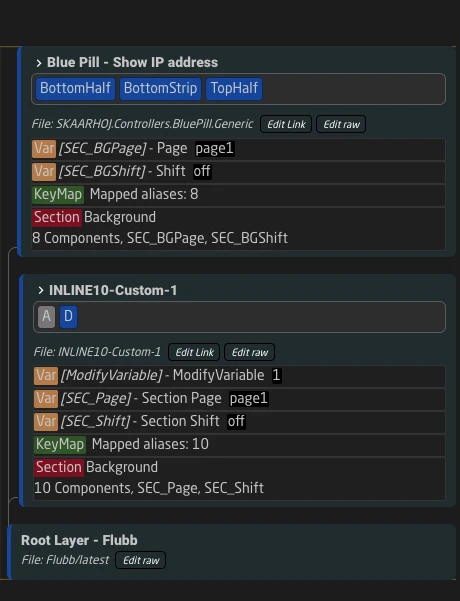
Each section defines a list of HWC Keys (Hardware Component Keys) - the names assigned to buttons, encoders, and other controls that belong to that section.
Variable Scope
Remember that Page and Shift Variables follow tree inheritance:
- They must be defined at or above the section layer
- Child layers can read and modify these variables
- This is why section variables are often defined on the same layer as the section configuration
Understanding this scope helps when troubleshooting why a page or shift isn't working as expected.