SKAARHOJ Default Configurations
Out of the box, we provide a quick setup to get you started controlling your devices. We’ve created a curated set of configurations to make it easy to add and combine devices from different manufacturers with our panels.
Panel Classes
To create systematic configurations, we’ve developed Configuration Classes, categorizing each SKAARHOJ panel by its intended purpose.
The following Configuration Classes exist:
- Camera Light Class
- Camera Standard Class
- Camera Pro Class
- Switcher Class
- Audio Class
- Quick Class
- Routing Panels
- MegaPanel Configurations
Camera Light, Pro, and Standard Class
Pro and Standard Class compatible panels are used for shading and PTZ control. A Pro Class panel has a menu based on 8 standard encoders, while a Standard Class panel has a menu based on 4 standard encoders.
These configurations are usually called "Generic Camera Control."
Light Class Panels
- PTZ Wiz
- Air Fly Pro (V2 and V3) Wiz Section
Standard Class Panels
- PTZ Fly
- PTZ Pro
- Color Fly
- Right Side of Rack Fusion Live
Pro Class Panels
- PTZ Extreme (V1, V2)
- RCP Pro
- RCPv2
- PTZ View (aka MKA 2)
- INLINE 22 + XC 7
Configuration Options
In these configurations, each panel has a Camera Selector, a Tally Forwarding Config, and a Routing Trigger Config.
The Camera Selector allows you to add different cameras. Each panel has a dedicated button row for camera selection. Depending on the device core used to connect the camera, a different menu will be loaded when the camera is selected. You can also configure its name, tally index, and routing index in the Settings Table.
Switcher Class Configurations
Switcher Class configurations are designed for live switching controllers and device cores. They provide the most common functions needed to control a switcher system while offering advanced features for deeper control, such as the Quick Class or PTZ sections.
Switcher Class Panels
- Air Fly
- Air Fly Pro (V1, V2, V3)
- Master Key One (V1, V2)
Audio Class Configurations
Audio Class configurations are default setups for controllers with at least four faders as the main components.
To use them in Reactor, select a "Generic Audio" configuration for your panel and fill the channel configuration with devices.
Audio Class Panels
- Wave Board (V1, V2)
- Wave Board Mini
- Color Fly (V2, V3)
- Wave Board (V1) 1
Quick Class Configurations
Quick Class configurations work with a Quick Bar and selected controllers that have a section of six Four-Way buttons. Select a Quick Class configuration in Reactor and fill the selector with the devices you want to control.
For more info, visit:
Routing Configurations
Routing Configurations map router devices to utility controllers like the Rack Fly series or the Quick Bar.
MegaPanel Configurations
SKAARHOJ MegaPanel configurations typically consist of one large configuration for several controllers, often based around a T-Block (Left or Right).
One M/E row usually consists of two Master Key 48s and one T-Block. Additional modules, such as the Wave Board Mini or PTZ View, can also fit the MegaPanel frame.
Understanding Sections in Default Configurations
The default configurations provide a few easily configurable sections.
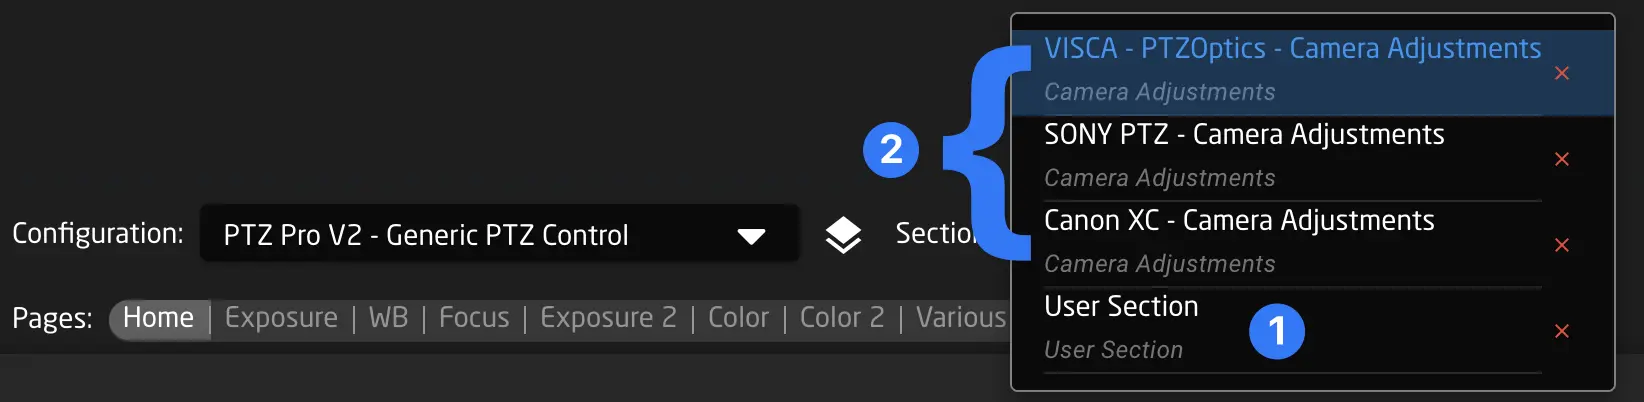
User Section (1)
The User Section exists in all SKAARHOJ default configurations. It covers nearly all components of a panel. When you create a behavior in the User Section, the new behavior overlays those defined below, allowing you to easily modify button functions even if they are deeply embedded in the default configuration.
Camera Adjustments (2)
The Camera Adjustments section is present in all camera-related configurations (Light/Standard/Pro Classes). The menu corresponding to the selected camera’s device core is loaded and can be customized here.
Engineering Menu
The engineering menu contains panel settings like, Brightness control and dim/sleep time. You can also find other settings like, expert mode and global Invert pan/tilt or the Panels IP Address.
It can be accessed in different ways based on the panel, and chosen configuration.
How do I know which method my configuration is using? Here we have listed the different default Configurations that have the engineering menu.
Remember this is a list of configurations. So the specific panels named here, only have access to the engineering menu, when the loaded configuration contains such menu. This also means that you will find panels not named here, that can also access an engineering menu. To find the exact method used in your panel config, you can navigate the list here, and try methods that is in correspondence with your panel type.
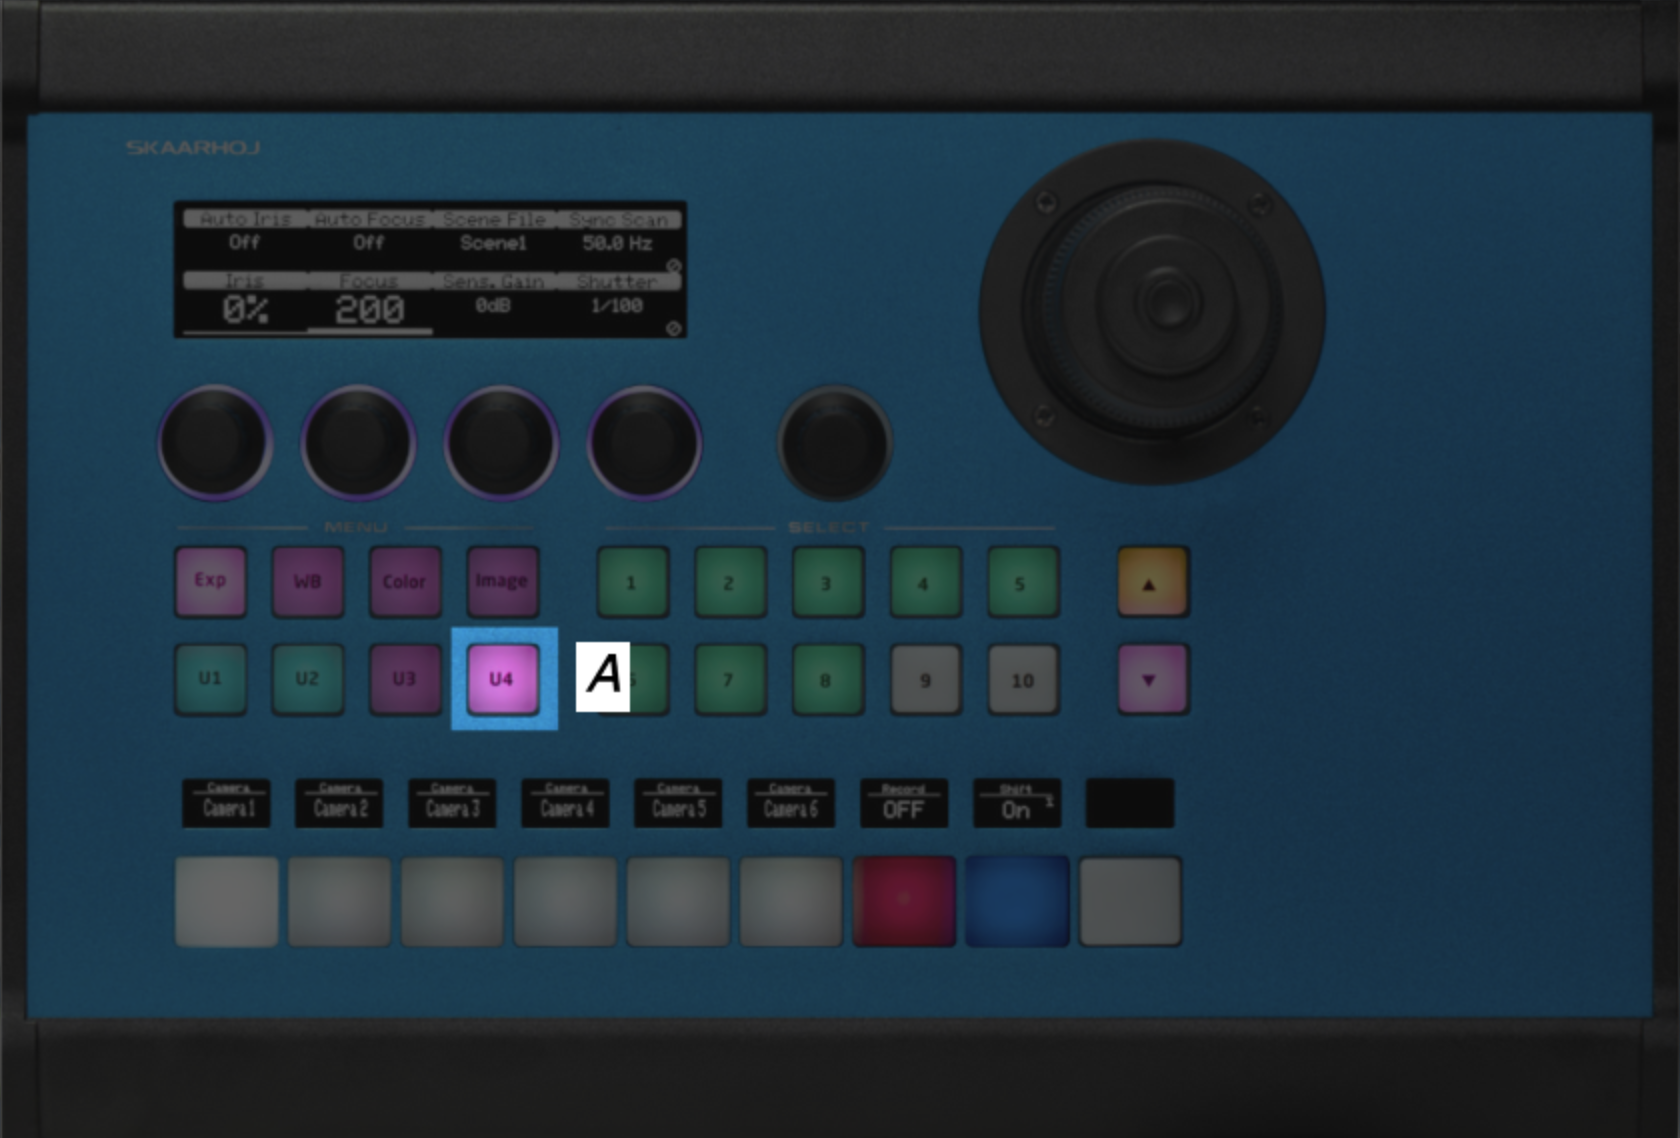
PTZ Pro
PTZ Pro
How To Activate
Press and hold U4 A for a few seconds
Models with this method
PTZ Pro only
PTZ Extreme
PTZ Extreme
How To Activate
Press and hold A for a few seconds
Models with this method
PTZ Extreme only
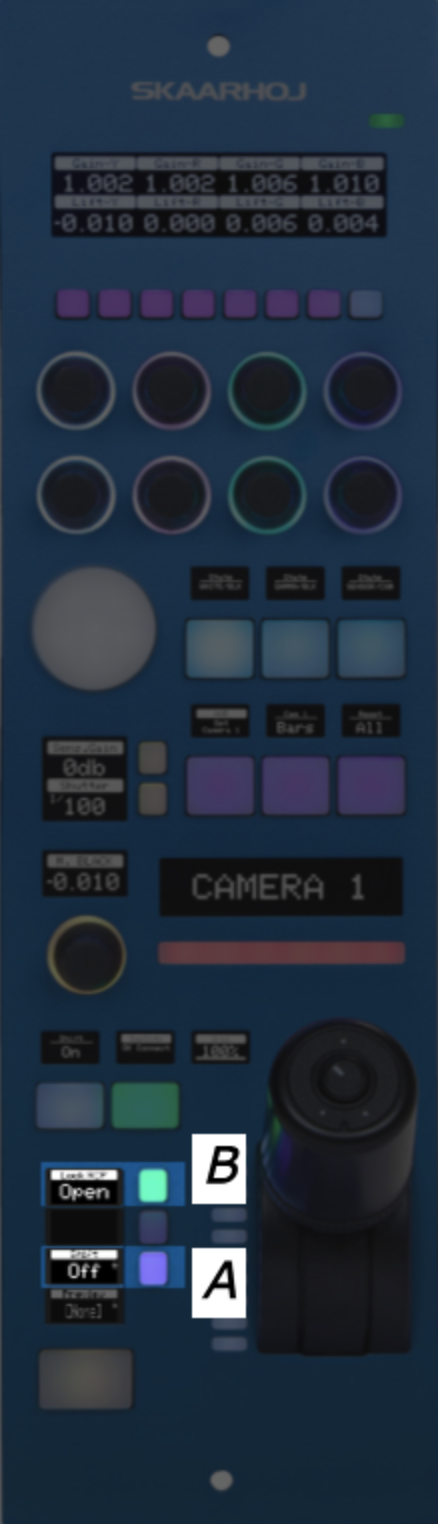
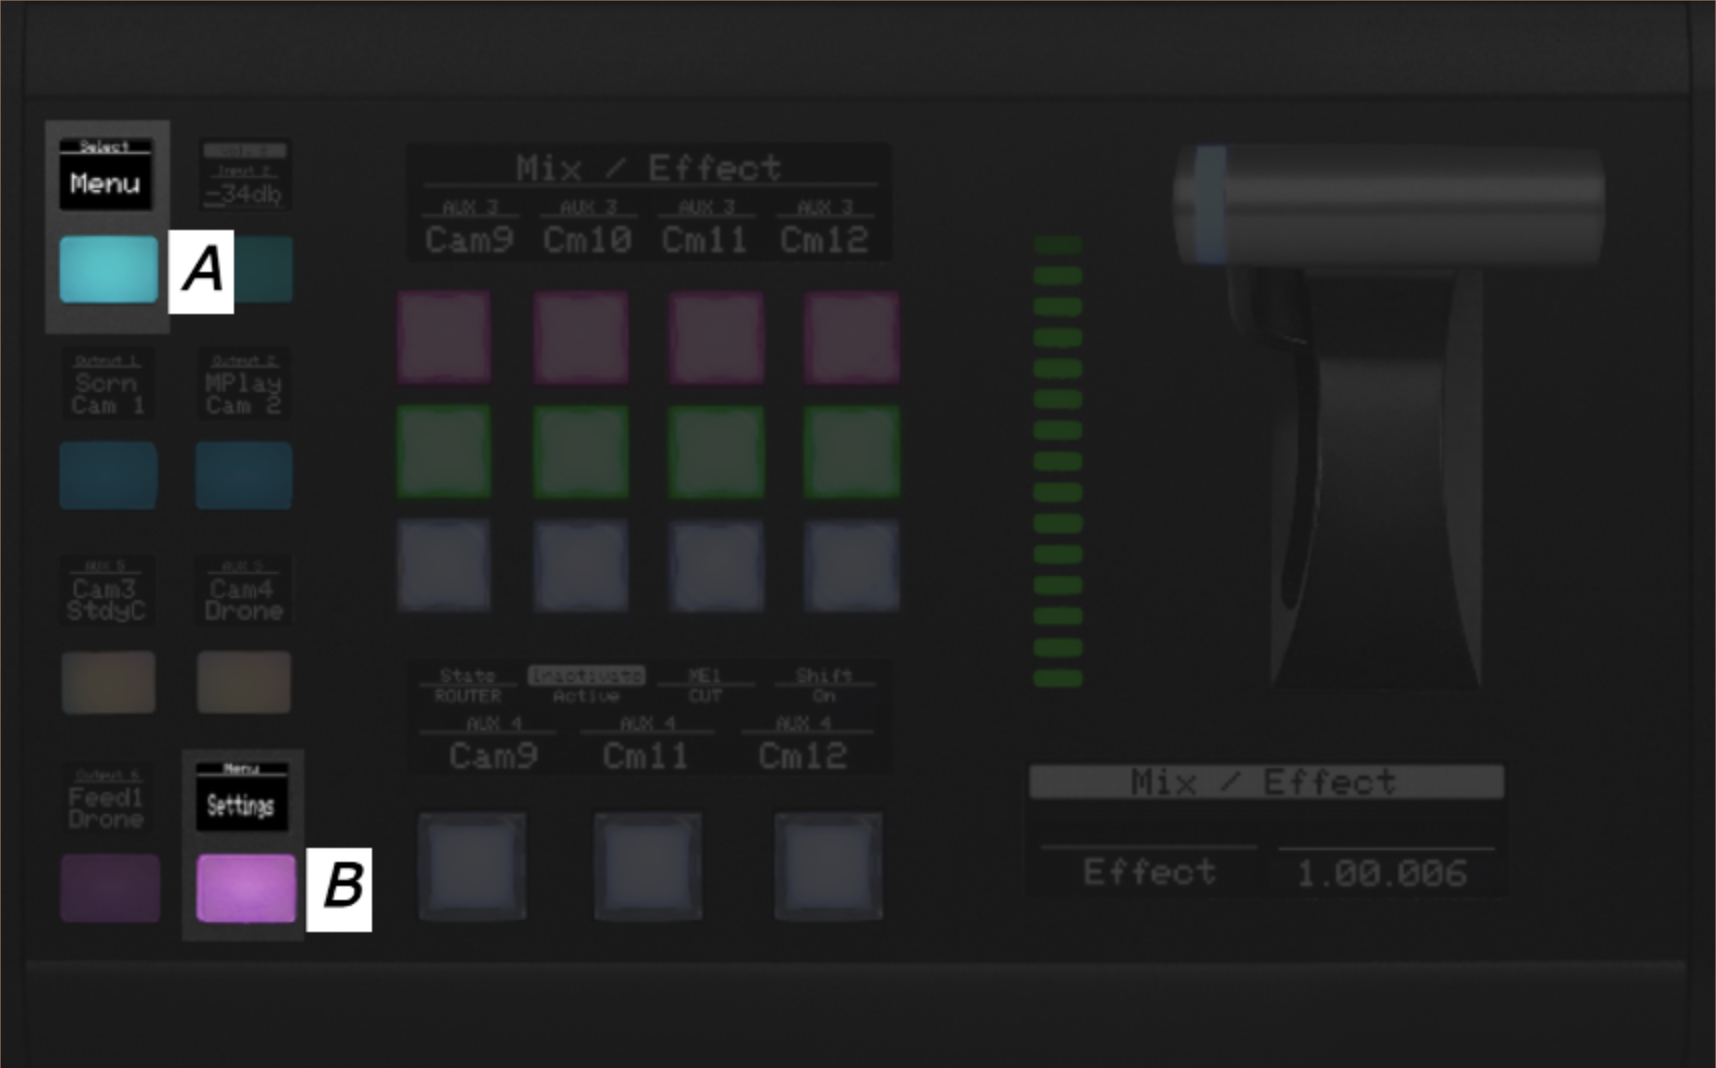
RCP
RCP
How To Activate
Step 1) Press and hold the 'Shift' button A
Step 2) Now press the 'Panel lock' button B to enter the engineering menu
Models with this method
All RCP models, with the config "RCP - Generic PTZ Control"
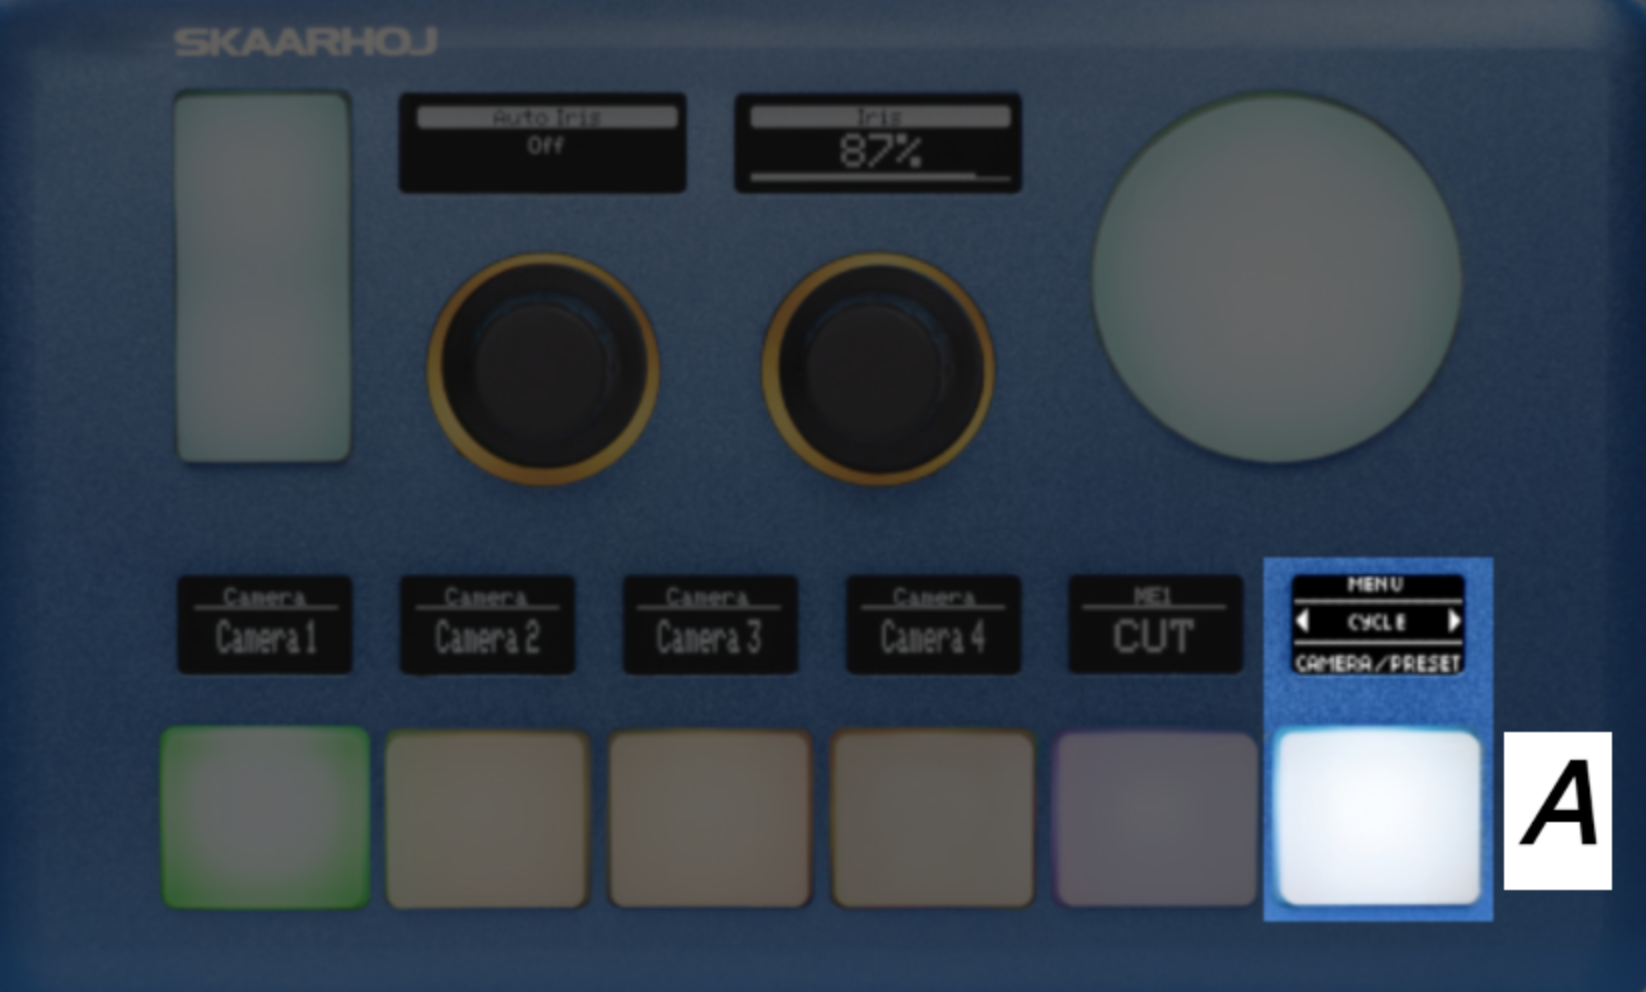
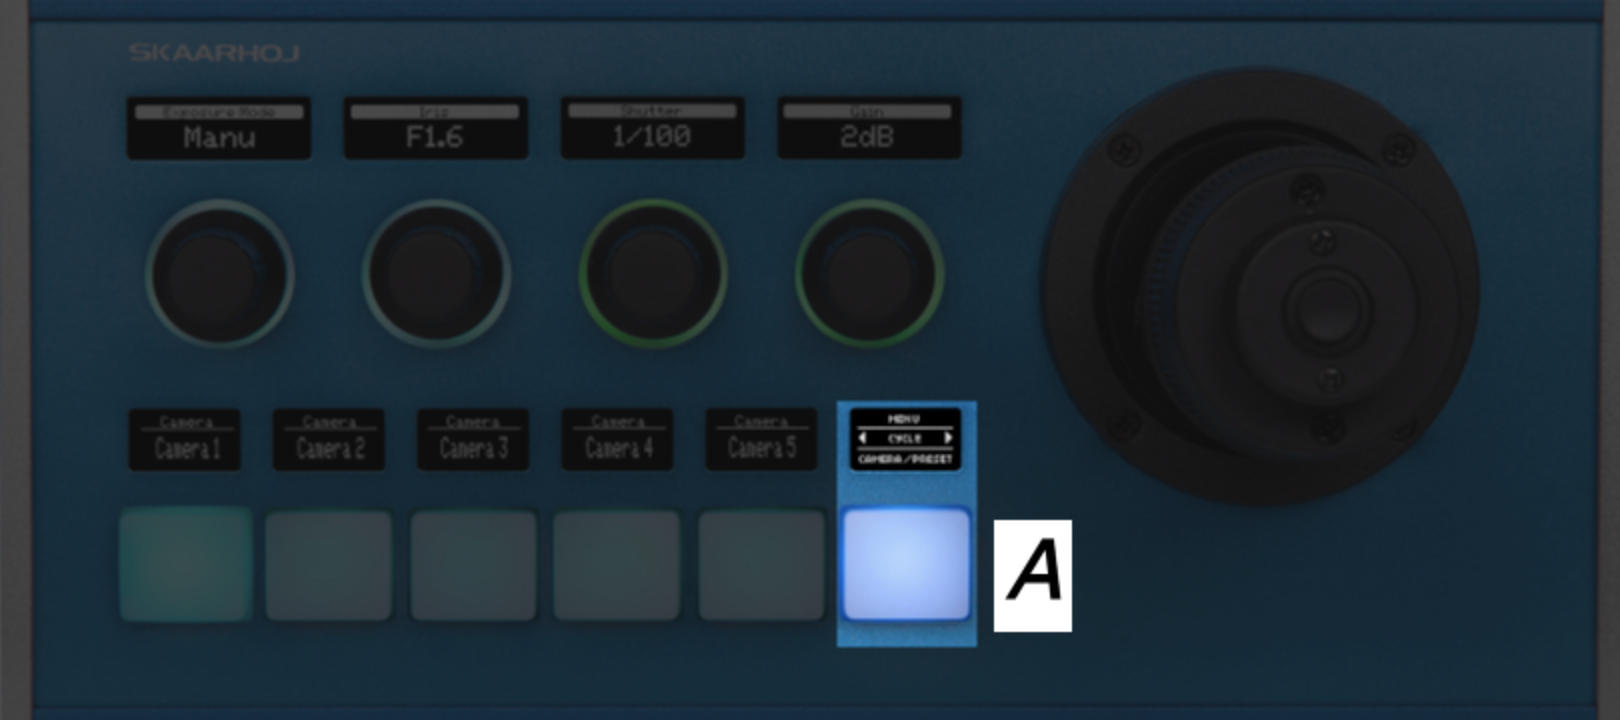
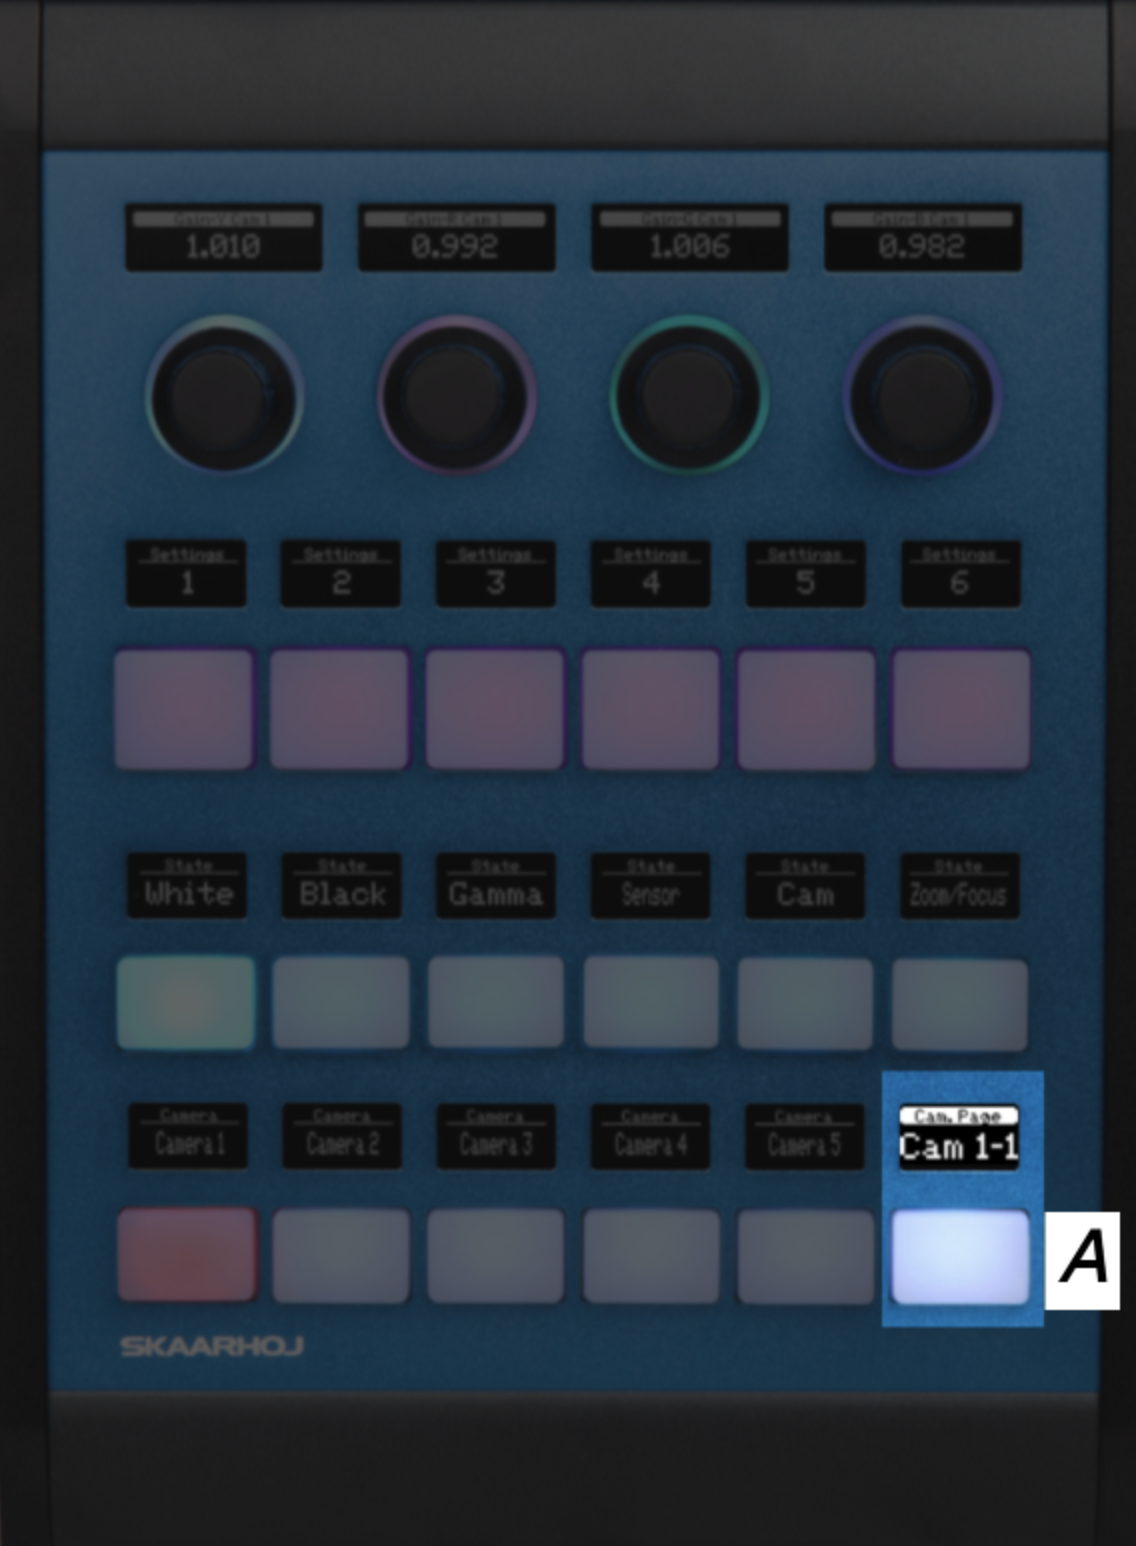
All other Configs with Camera Selector
All other Configs with Camera Selector
How To Activate
Press and hold the top edge of the 'Page' button A for a few seconds
Models with this method
Listed here is 4 panels that have support for a configuration, that have an engineering menu accessible the same way. Remember this is just examples, and that this method is not exclusive to these 4 panels.

Mega Panel
Mega Panel
How To Activate
Step 1) Press and hold the 'Shift' button A
Step 2) Now press the 'Panel lock' button B to enter the engineering menu
Models with this method
MKT1A, MKT1B, T-Block-Left, T-Block-Right
Kairos
Kairos
How To Activate
Step 1) Press and hold the button marked A
Step 2) Now press the button marked B to enter the engineering menu
Models with this method
Master Key One V2 with Kairos Config
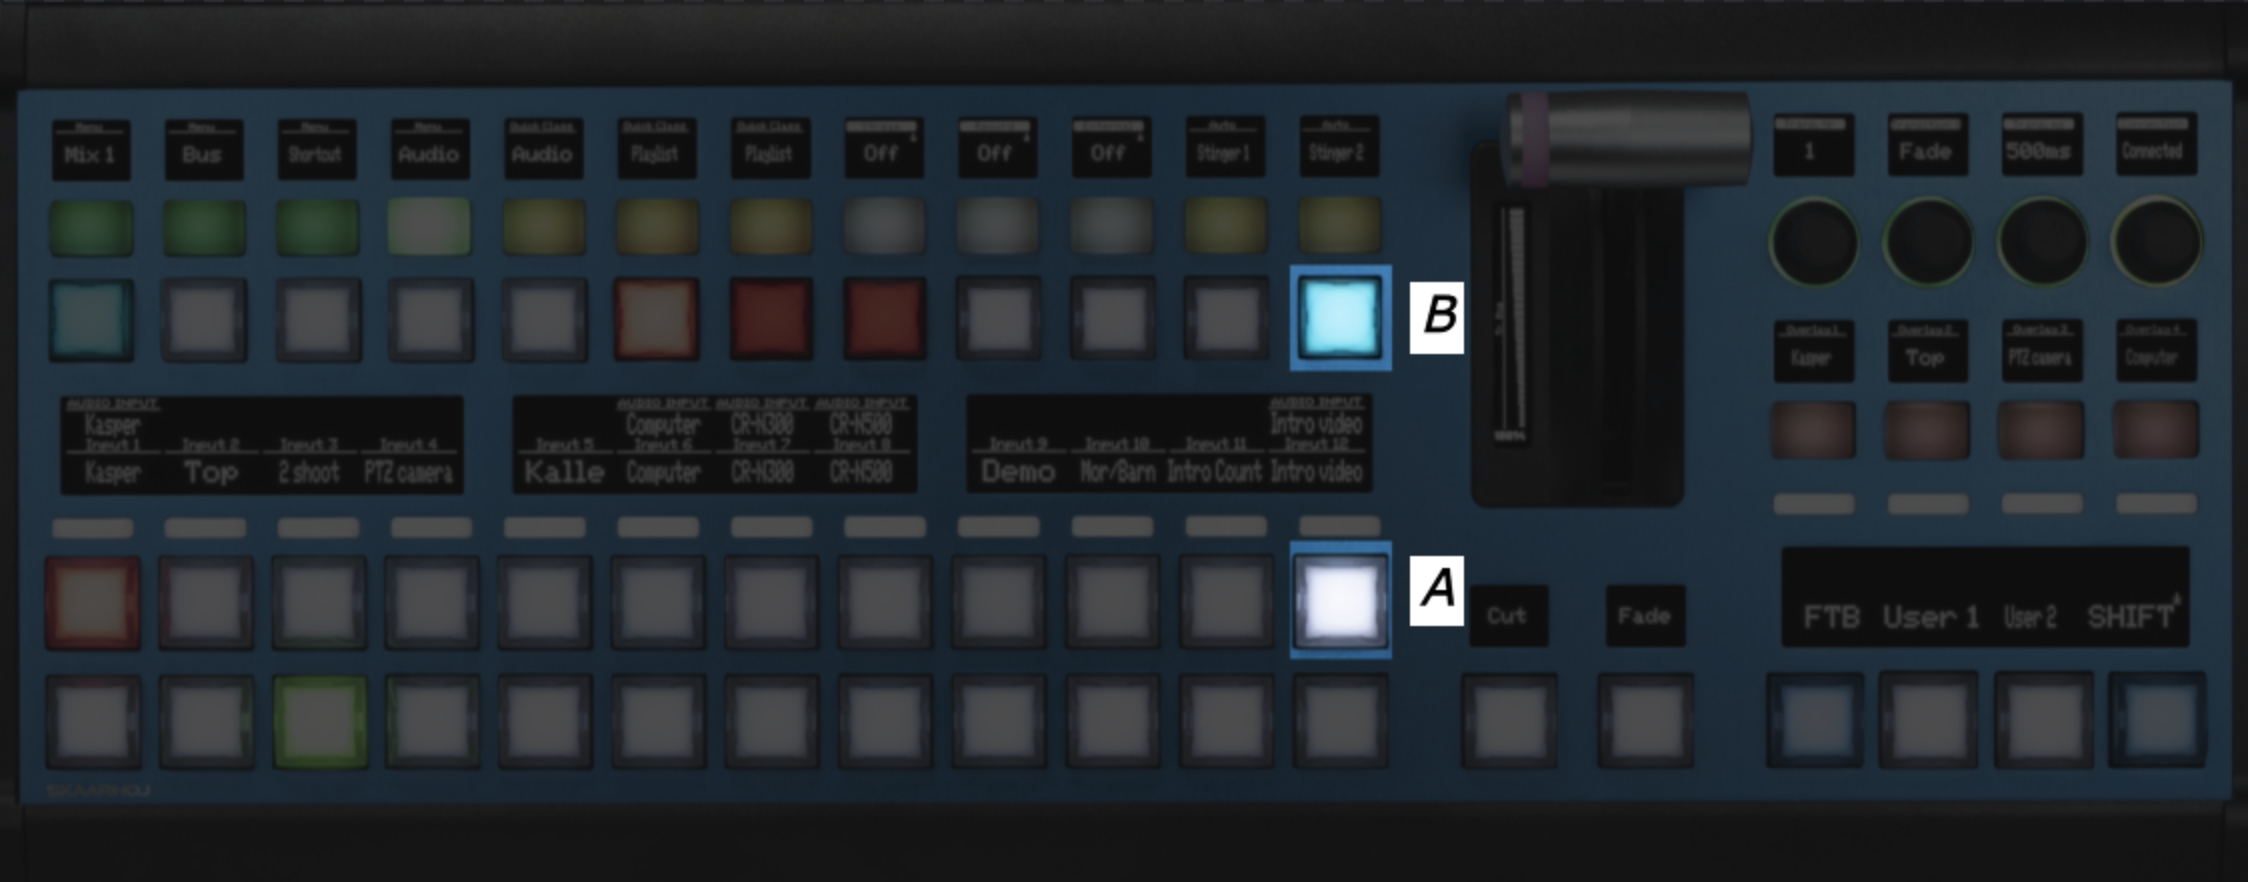
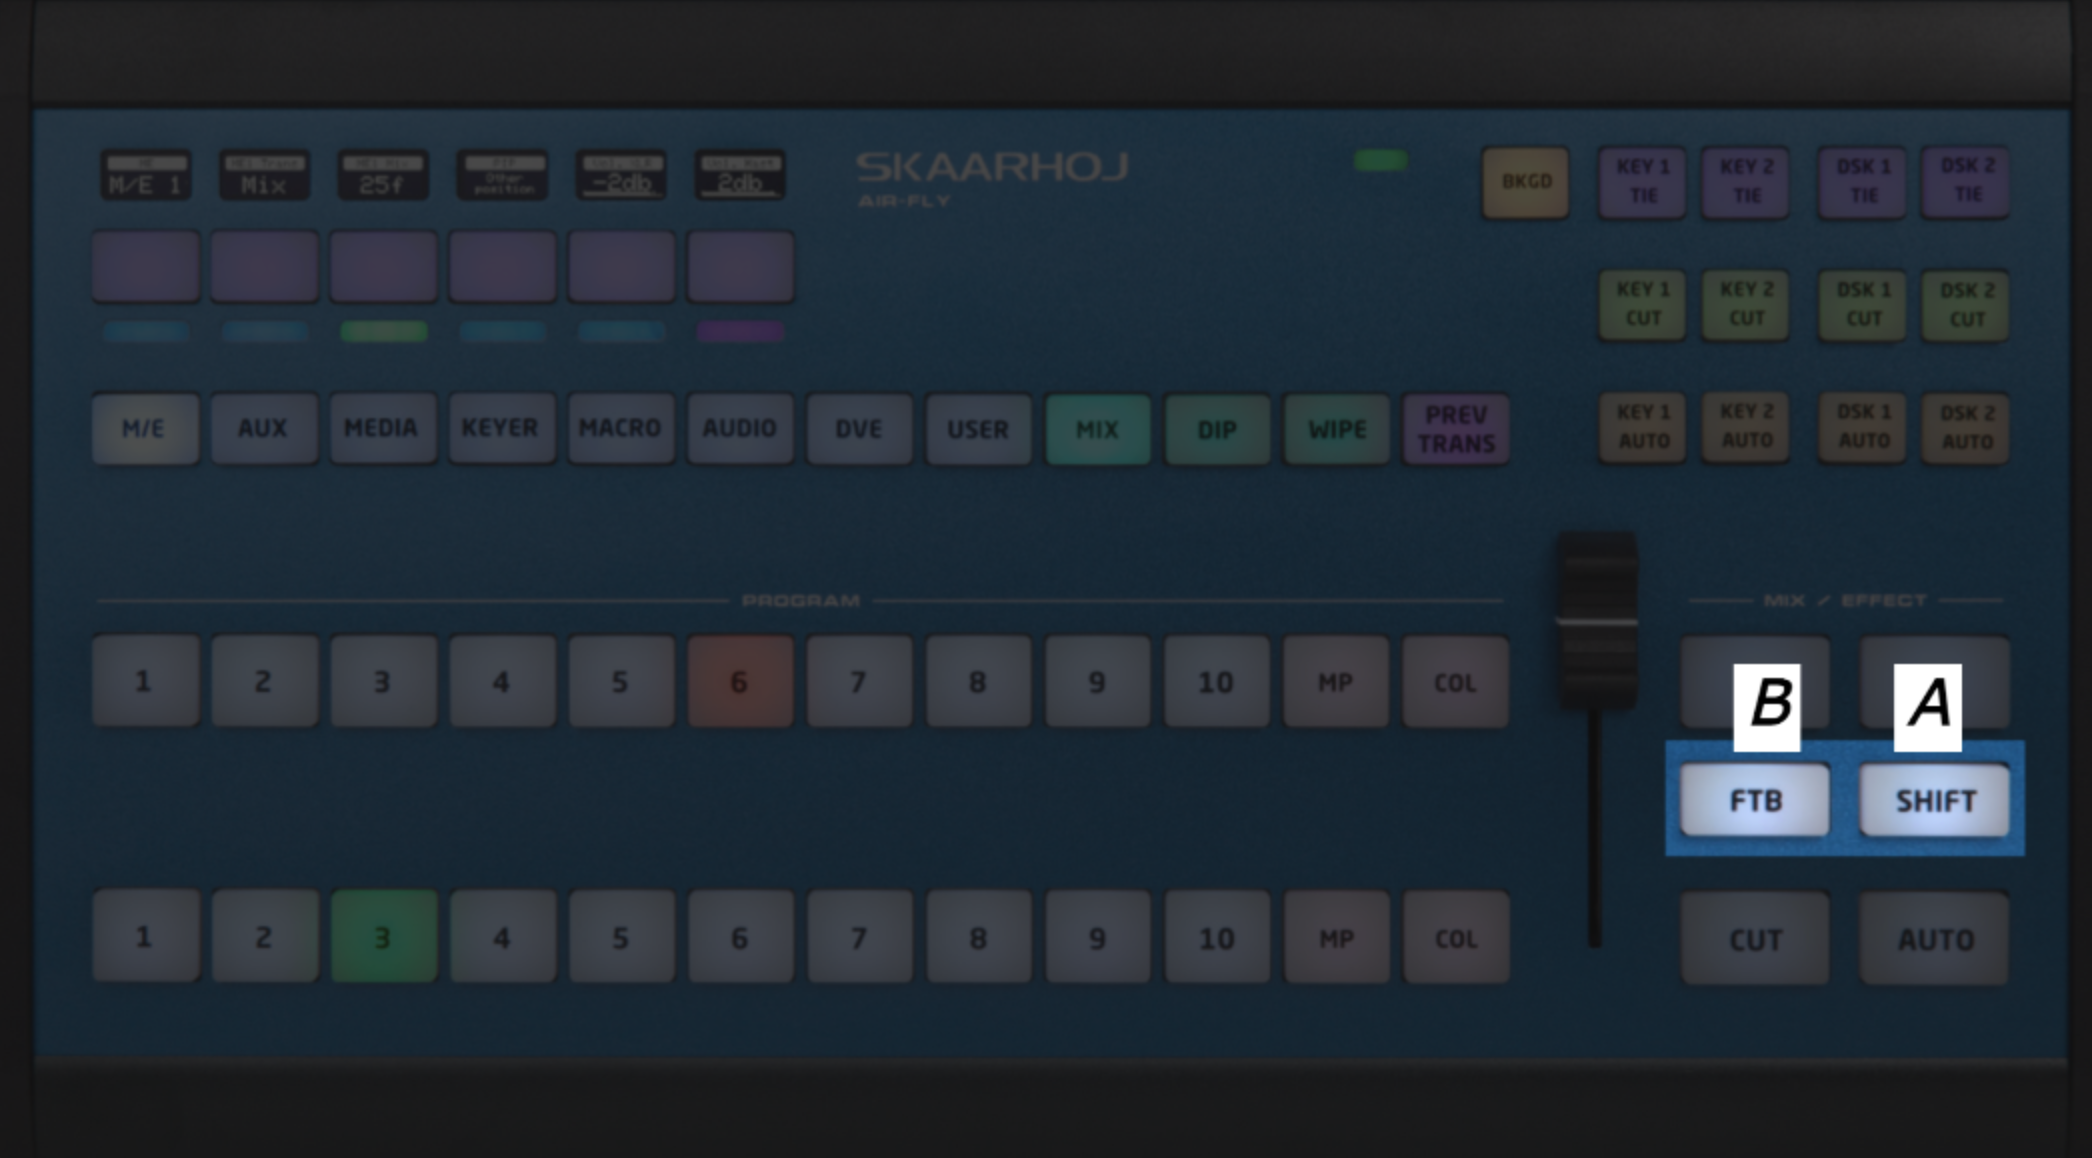
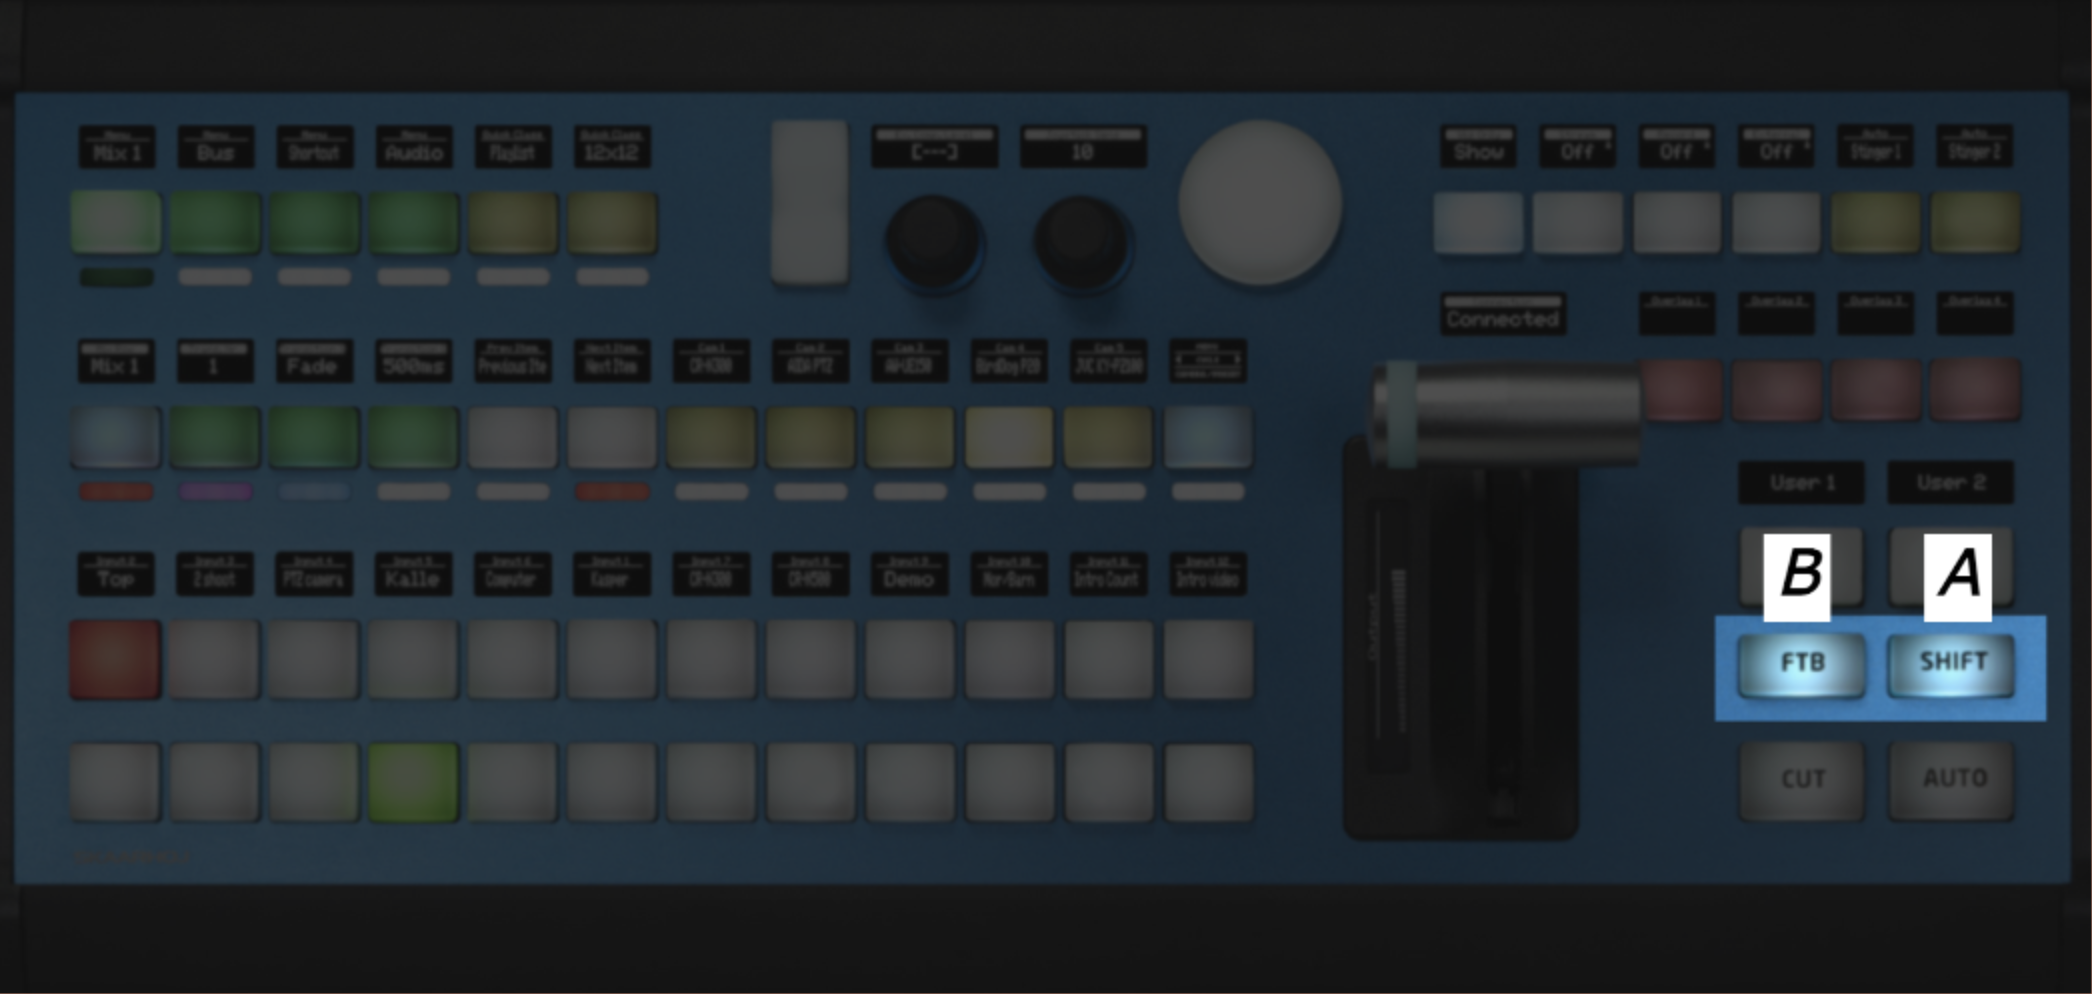
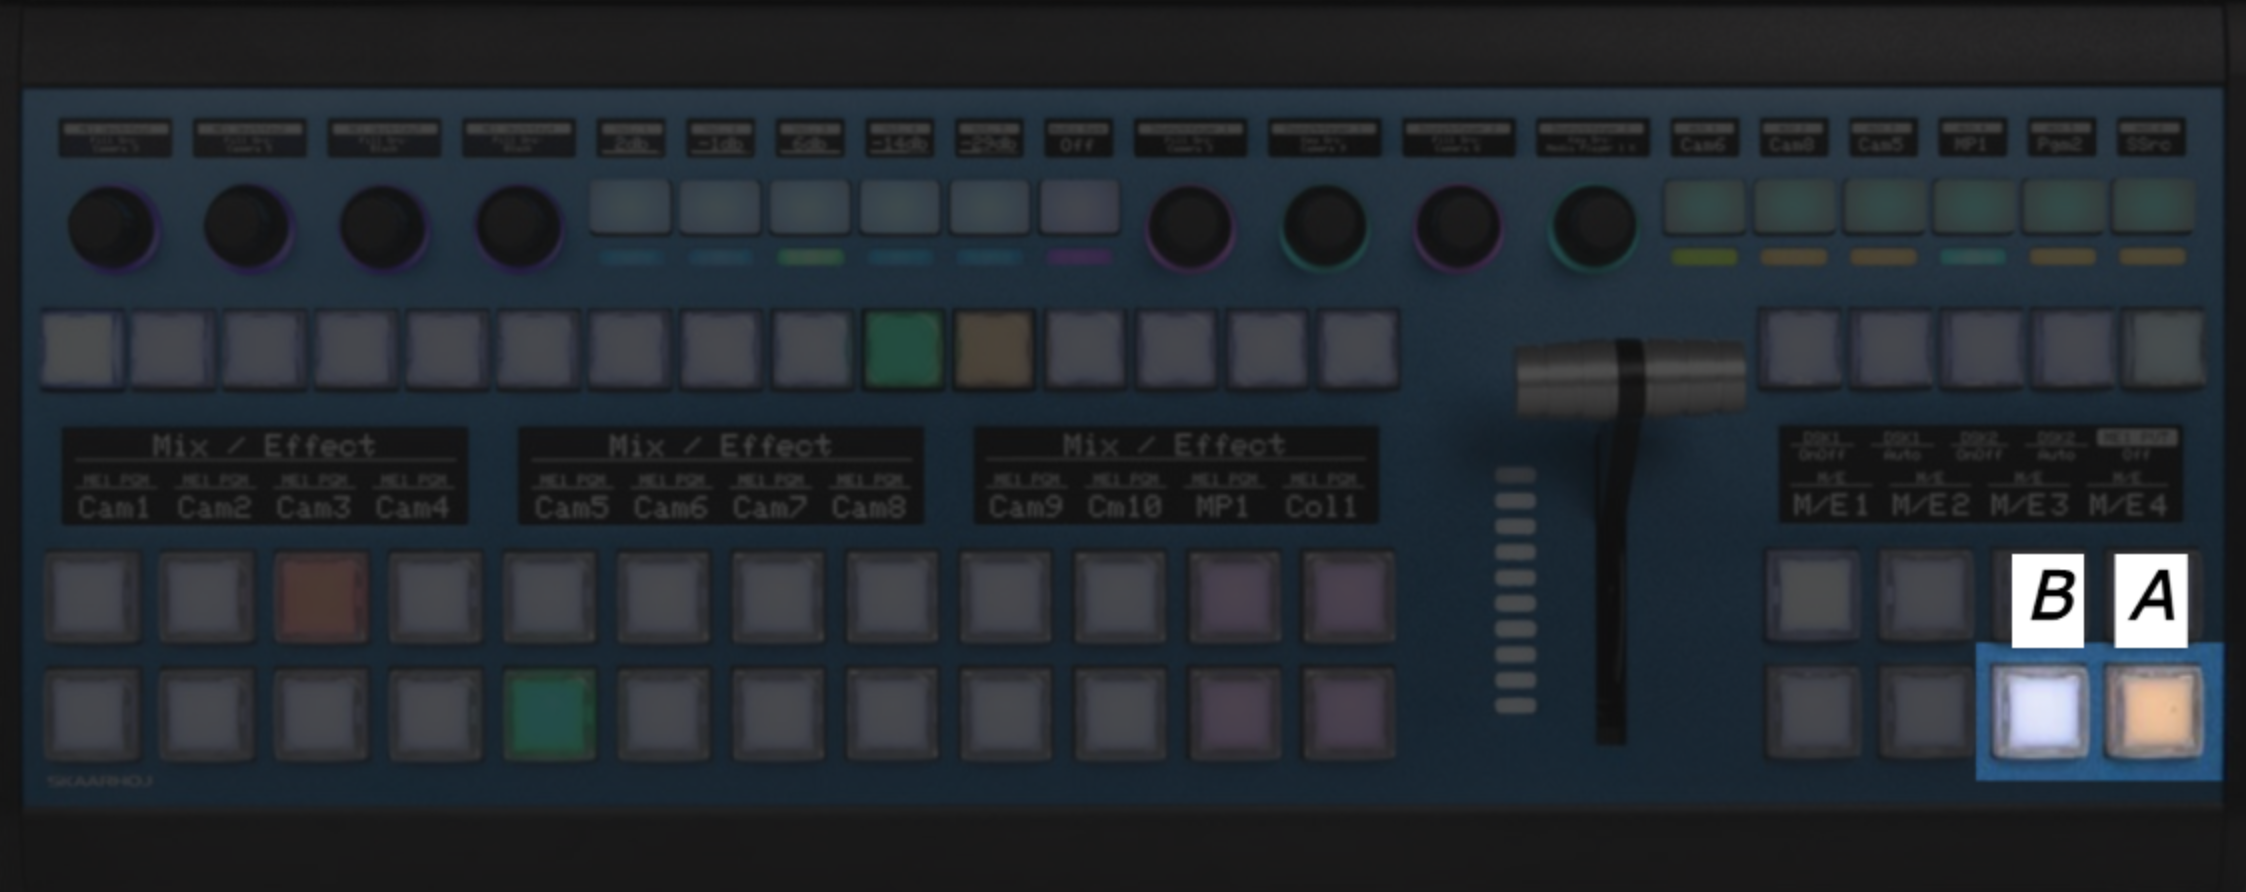
All other Switching Configs
All other Switching Configs
How To Activate
Step 1) Press 'Shift' A to make the FTB button light green
Step 2) Press 'FTB' B to enter the engineering menu
Models with this method
Listed here is 3 panels that have support for a configuration, that have an engineering menu accessible the same way. Remember this is just examples, this method is not exclusive to these 3 panels.
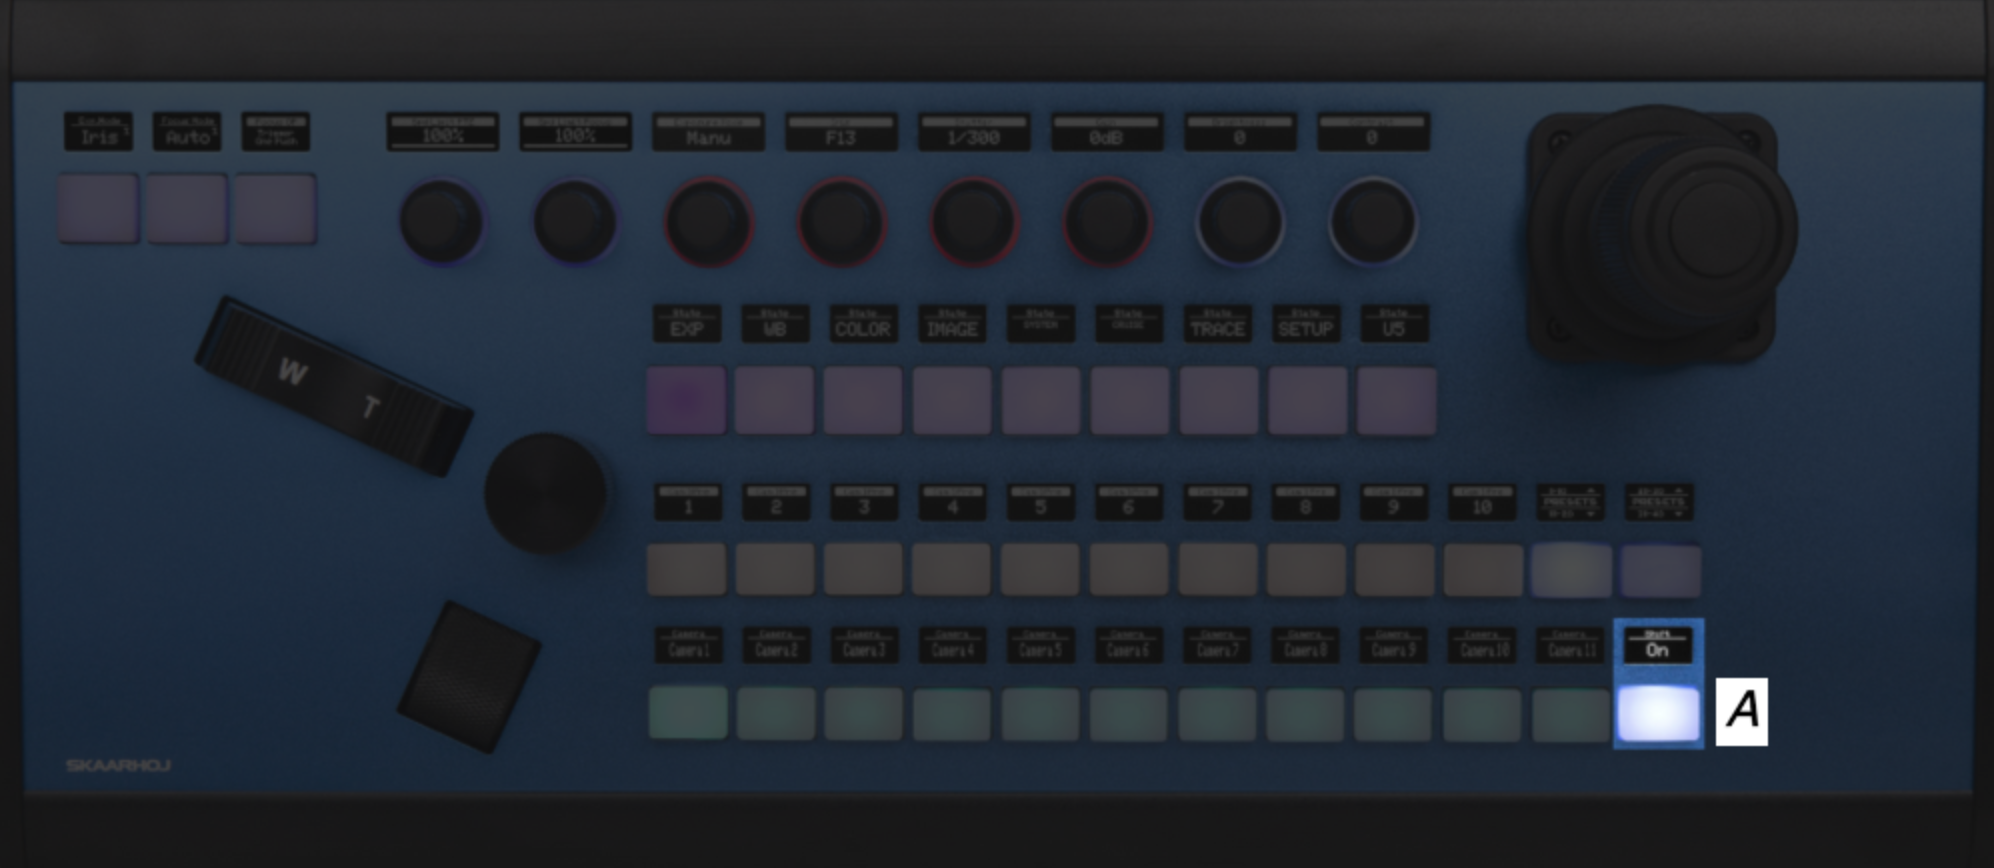
Audio & Light Control
Audio & Light Control
How To Activate
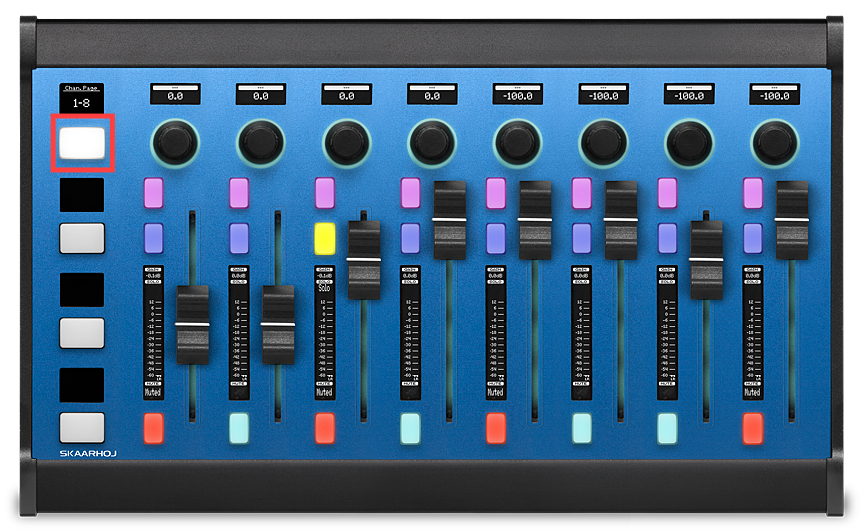
Step 1) Press and hold the first pager button.
Models with this method
Most panels that support the 'Audio & Light Control' configuration, supports this. Here a Wave Board is shown as an example.
-
Wave Board V1 has an alternative setup utilizing two extra buttons instead of the encoder. ↩