Feedbacks and Actions
So far, we have been using the included Template Behaviors to define how a component interacts with a parameter.
When we want to customize individual parts of a behavior or even create one from scratch (without selecting a Template Behavior), we need to understand Feedback Handlers and Actions (formerly known as Event Handlers).
Feedback Handlers
Feedback Handlers are the parts of the Behavior that define what a component shows. They can adjust things like LED color, display text and elements, and even the position of a motorized fader.
Every Behavior and Layer has a Default Feedback, which is shown automatically. Additionally, there are Conditional Feedbacks, which are only active when their Active-If condition returns true.
Let’s take a look at the available fields in a Feedback Handler:
There are several groups of fields:
General Feedback Fields
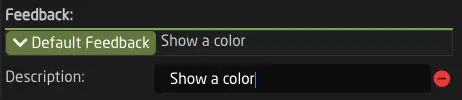
Description
Description
Give your Feedback Handler a readable description. This will be shown in the header and can make your behavior easier to understand.


Color
Color
Set the LED Color. You can select one from the color picker or even use a parameter to define the color of a component.
NOTE: You will not see a color show up if Intensity is OFF.

Blink Pattern
Blink Pattern
Make the component blink in a certain pattern. This is useful for cases where you want a button to attract additional attention, like warnings or other alerts.

Text Display
Solid Title Bar
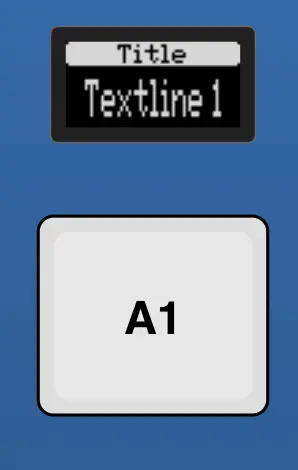
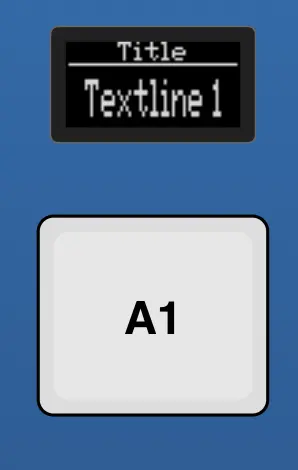
Solid Title Bar
Select whether the Title Bar should have a solid white background or be transparent. In SKAARHOJ default configs, a transparent title bar is often used to indicate that a button "Sets" the value written on it, while displays with a solid header bar usually show the current state of a value.
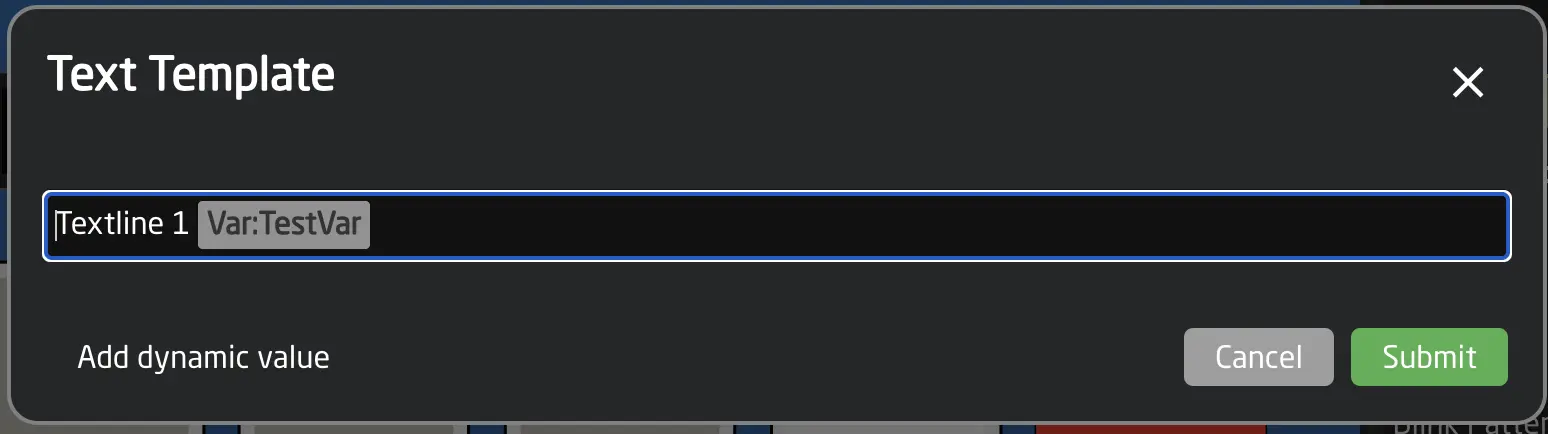
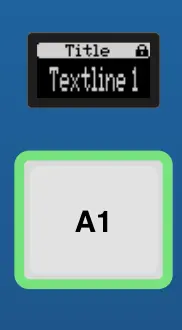
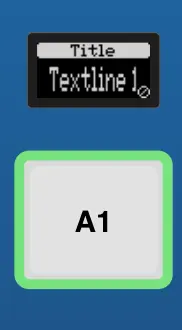
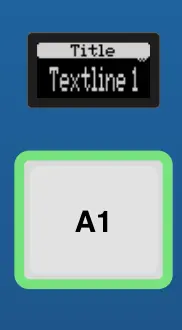
Textline 1 & Textline 2
Textline 1 & Textline 2
Specify the main text for the component. You can add dynamic values with parameters into the text using the helper window or braces {}.
Text Size
Text Size
Select a specific text size. This value corresponds to the font width and height as a comma-separated pair: 0,0 = Auto, 1,1 = smallest, 3,3 = largest, 1,2 = Tall and narrow, etc.
AutoWrap
AutoWrap
AutoWrap will automatically break the contents of Textline 1 to Textline 2 if the text exceeds the available display space.
Use Graphics for Unicode
Use Graphics for Unicode
By default, our displays do not support unicode characters. When turning on this option, text that contains unicode will automatically be rendered into an image, allowing the displays to fully support unicode.
Note: This may sometimes slightly change the rendering, or modify text size and font.
Simple Icons
State Icon Fine
State Icon Fine
Set a condition for when to show the fine icon, generally used to indicate when coarse mode is active.
Modifier Icon
Modifier Icon
Select one of several modifier icons to use. Modifier Icons are usually used to indicate what type of interaction is possible.
Tip: If you need these to be shown based on a condition, you will need to use several conditional feedback handlers.
Advanced Feedback Fields
Graphic Source
Graphic Source
Selecting a Graphic Source will override most of the text related fields from before and replace them with a graphical image. If you still like to specify a Title and Header Bar use the new "Graphics Title".
You can select between Icon, Parameter, QRCode and Widget.
Icons can be existing Bitmap icons from Reactors Library, or you can upload custom little images into your project.
Parameter allows you to select a parameter that will populate the image. This is needed for image parameters such as thumbnails from PTZ Cameras
QRCode allows to quickly and easily add a QR Code with a link into a Display.
Widget allows you to use specialized display widgets for dynamic visualizations.
Two widget types are available:
- VUMeter - Audio level meters with optional peak indicators, supporting both mono and stereo display. Perfect for monitoring audio levels with dB-scaled ranges and custom background graphics.
- Strength Widget - Horizontal bar indicators ideal for showing continuous values like iris position, focus, or fader levels.
Widgets require normalized data sources (use the :Current:Normalized modifier) and support multiple data inputs for complex visualizations.
For detailed widget configuration, field references, and examples, see Widgets.
Tip: To get rid of the white Background use the Image Filters "Invert" option.
Extended Feedback
Extended Feedback
Extended Feedback is what drives LED Bars or Motorized Fader's Motor Position. Make sure you use the correct modifiers for the parameter, EG: Behavior:IOReference:Current:Normalized
Show Value Indicator Bar
Show Value Indicator Bar
Here you can specify a Parameter to use for a small value indicator below the main display content. Make sure you use the correct modifiers for the parameter, EG: Behavior:IOReference:Current:Normalized
Don't inherit this feedback handler from template
Don't inherit this feedback handler from template
Turning on this option will ensure no parameters are inherited from the Template Behavior for this entire Feedback. Read more about inheritance here: Behavior Inheritance.
Actions
Actions are the parts of the Behavior that define what the component does when it is interacted with in various ways. Multiple Actions can be added to each behavior to enable different types of interactions or control different parameters.
Actions can also have an Active-If condition, but unlike Conditional Feedbacks, Actions are always active by default.
General Action Settings
Let's take a look at the available fields in an Action:
Handler Type
The Handler Type is a special field that determines the other available fields for configuration.
An Action can have one main type of trigger it interacts with. The trigger types are (as described earlier in Hardware Components): Binary, Pulsed, Analog, and Speed.
- A Binary Component can create ActDown and ActUp triggers.
- A Pulsed Component can create Pulsed Value triggers, like +1 and -1.
- An Analog Component can create Analog Value triggers from 0 to 1000.
- A Speed Component can create Speed Value triggers from -500 to +500, resetting to 0 when released.
After selecting the Handler Type, you can still add PreProcessors to the Action, which define how to respond when a different trigger type is received.
General Action Fields
Parameter
Parameter
Each Action can specify a different parameter to control. If no parameter is specified, the one defined at the top of the behavior form will be used.
Active If Condition
Active If Condition
Each Action can have a condition. If the condition is false, the Action remains disabled and is not used.
Example: This can be used to specify different Actions based on the value of a variable.
Invert Condition
Invert Condition
Specifies a condition that (if true) inverts the normal direction for control. If you would like to always invert it, simply select true.
Specific Settings: Binary
Binary Type
Binary Type
Specify whether this handler reacts only on a down press (ActDown) or only on release (ActUp). If not set, it will fire in both cases.
Edge Filter
Edge Filter
When mapped to a Four-Way button or encoder, use this setting to filter for a specific event, like pressing only up.
Set Mode
Set Mode
This allows you to specify how a press of the component will change the parameter. The following options are available:
-
Set
Set a specific value (specified using set values, see below). -
Cycle Up
Cycle up through the available options. -
Cycle Down
Cycle down through the available options. -
Cycle Up and Roll Over
Cycle up through the available options and continue at the start when going over the maximum. -
Cycle Down and Roll Over
Cycle down through the available options and continue at the maximum when going below the start. -
Random
Set a completely random value out of the possible ones that is not the same as the current value. -
Sequence
Sequence allows you to set several values in sequence, even for different parameters. You can specify a different parameter at each step. Choose sequence and add several steps.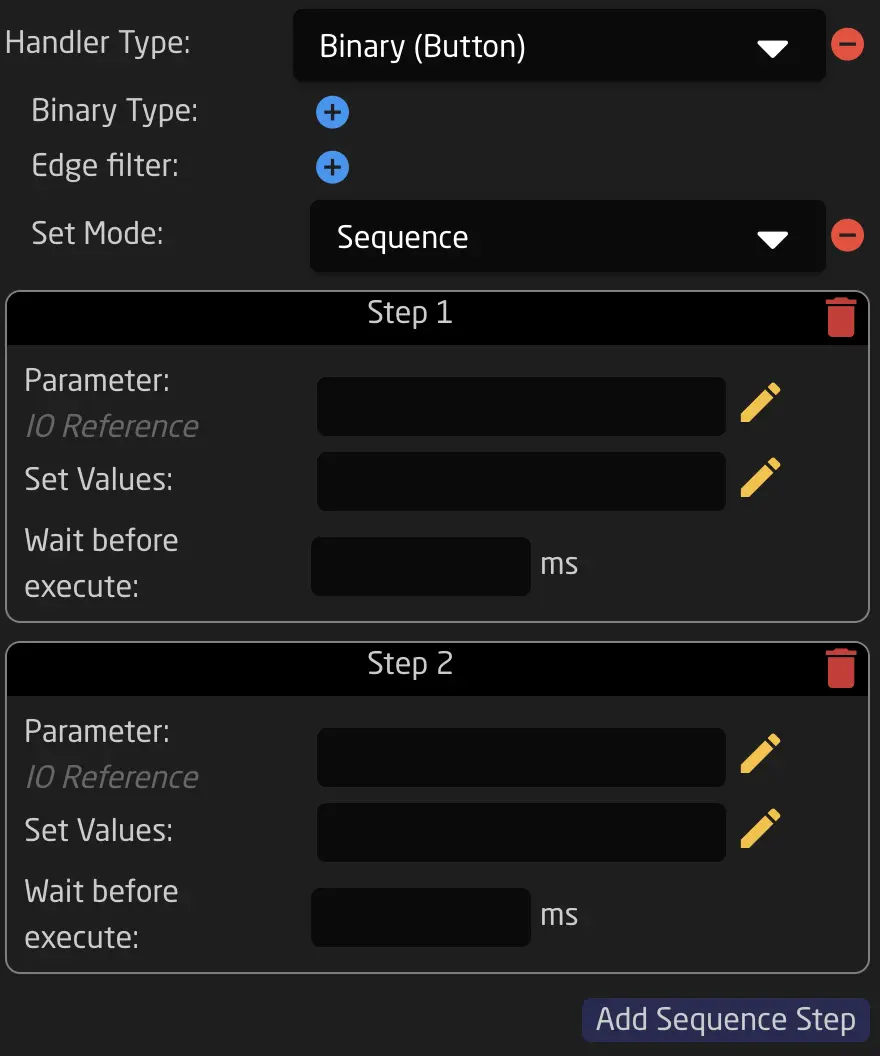
Binary Sequence Example -
Array-specific options for Variables:
See Chapter Variables.
Set Values
Set Values
Specify the list of values that this Action selects from. This defaults to using all options from the main parameter of the behavior (:All modifier).
Specific Settings - Pulsed
Rollover Condition
Rollover Condition
Specify a condition in which Rollover is allowed. Rollover means that when the end of the value range is reached, the next step jumps to the other end of the range.
Fine Step
Fine Step
Specify the fine step size for stepping through the parameter. You can either use the default for the behavior’s parameter (Behavior:IOReference:FineSteps) or specify your own.
For example: Select Literal Values -> then type 0.01 in the field.
The fine step size is used by default unless the CoarseCondition is true (see below).
Coarse Step
Coarse Step
Specify the coarse step size for stepping through the parameter. You can either use the default for the behavior’s parameter (Behavior:IOReference:CoarseSteps) or specify your own.
For example: Select Literal Values -> then type 10 in the field.
The coarse step size is used when the CoarseCondition is true (see below). In Reactor built-in behaviors like Change by step for long ranges, this is used when pressing down an encoder.
Coarse Condition
Coarse Condition
Selects between using fine steps (when false) or coarse steps (when true).
In Reactor built-in behaviors like Change by step for long ranges, this is used when pressing down an encoder.
Ganged Control Mode
Ganged Control Mode
When set to "Relative", and the component controls multiple parameters at once, they will all be stepped relative to their own values.
Otherwise, only the first value will be stepped, and all other values will be set to the destination value of the first.
Specific Settings - Analog
Discontinuity
Discontinuity
Discontinuity specifies what happens if the parameter being controlled has a different value than the current setting of the analog component. It defines the takeover strategy.
For example: If Iris is mapped to a RCP Joystick but has been changed on the camera in the meantime.
-
Double Linear: Double linear will map the value linearly from the current value towards each end of the value range. The rate of change (slope) may be different in each direction depending on the actual position of the analog component.
-
Offset: Offset will change the value from the current value towards the ends using the same and original rate of change. This means it may not entirely reach the end value as the analog component hits its end stop or it may reach the end value earlier than when the analog component hits its end position.
-
CatchUp: In this mode, the value won't change until the analog component is moved to the position that represents the current parameter value. At that instant, the analog component will linearly map its position to the value range of the parameter.
-
None: The value will jump to the correct mapped value when the component is moved.
Some information on this feature can be found in this YouTube video:
Note: This is not recommended to be used with MultiBehaviors.
Static Value Mapping
Static Value Mapping
Static Value Mapping allows you to change the 0-1000 range that the component outputs. You can use this to limit the range of faders or change how quick they respond.
Specific Settings - Speed
Speed handlers currently don't have configuration options exposed in the UI.
Advanced Action Fields
Event Preprocessor
Event Preprocessor
Event preprocessors allow all kinds of advanced modifications, like hold down, repeat, and other tricks. See the advanced chapter on Event Preprocessors for more details.
Rate Limiting for Pulsed Events (Encoders)
Pulses Per Second
Pulses Per Second
Rate-limits incoming encoder pulses to the specified maximum number per second. When set to a value greater than 0, pulses arriving faster than the allowed rate are either discarded or pooled (see Pool Pulses).
This is useful when controlling devices that cannot handle rapid encoder input, or when you want to smooth out encoder response.
Example: Setting this to 15 limits encoder events to 15 pulses per second maximum.
Pool Pulses
Pool Pulses
When enabled (and Pulses Per Second is set), incoming pulses that arrive during the rate-limiting interval are accumulated instead of discarded.
- Disabled (default): Extra pulses within the rate limit window are discarded - only one pulse per interval is forwarded.
- Enabled: Pulses are added together and sent as a combined value when the interval elapses.
Example: If the user rapidly turns an encoder 5 clicks within one rate-limit interval, with pooling enabled all 5 clicks are summed and sent as a single value of 5.
Pooled Pulses Scale
Pooled Pulses Scale
When Pool Pulses is enabled, this applies a scaling multiplier to the accumulated pulse value, creating an acceleration effect for rapid encoder movements.
The scaling formula increases the output progressively: slower turns remain precise while faster turns produce larger jumps.
| Pooled Pulses | Output (Scale: 3) |
|---|---|
| 1 | 1 |
| 2 | 4 |
| 3 | 7 |
| 5 | 13 |
| 10 | 28 |
Use case: Allows fine control with slow encoder turns while enabling quick navigation through large value ranges with fast turns.
Rate Limiting for Analog/Speed Events (Faders, Joysticks)
Value Changes Per Second
Value Changes Per Second
Rate-limits incoming analog (fader) and speed (joystick) events to the specified maximum number per second. When set to a value greater than 0, only the most recent value within each rate-limit interval is forwarded.
This is useful when controlling devices that cannot process rapid value changes, or to reduce network/system load.
Example: Setting this to 20 limits fader/joystick updates to 20 per second maximum.
Value Changes Per Second Send First
Value Changes Per Second Send First
When enabled (and Value Changes Per Second is set), the first incoming event is sent immediately, before rate-limiting kicks in for subsequent events.
- Disabled (default): Only trailing-edge events at rate-limited intervals are sent.
- Enabled: The first event is sent immediately for responsive feedback, then rate-limiting applies to continuous movement.
Use case: Provides immediate response when starting a fader movement while still limiting the update rate during continuous adjustment.
Don't Inherit
Don't Inherit
Turning on this option will ensure no parameters are inherited from the Template Behavior for this entire Feedback. Read more about inheritance here: Behavior Inheritance.
Inheritance of Feedback and Event Handlers from Template Behaviors
When adding Feedback Handlers to a behavior that uses a Template Behavior, they will be combined with those from the template. Feedback Handlers defined in the template are marked as Inherited.
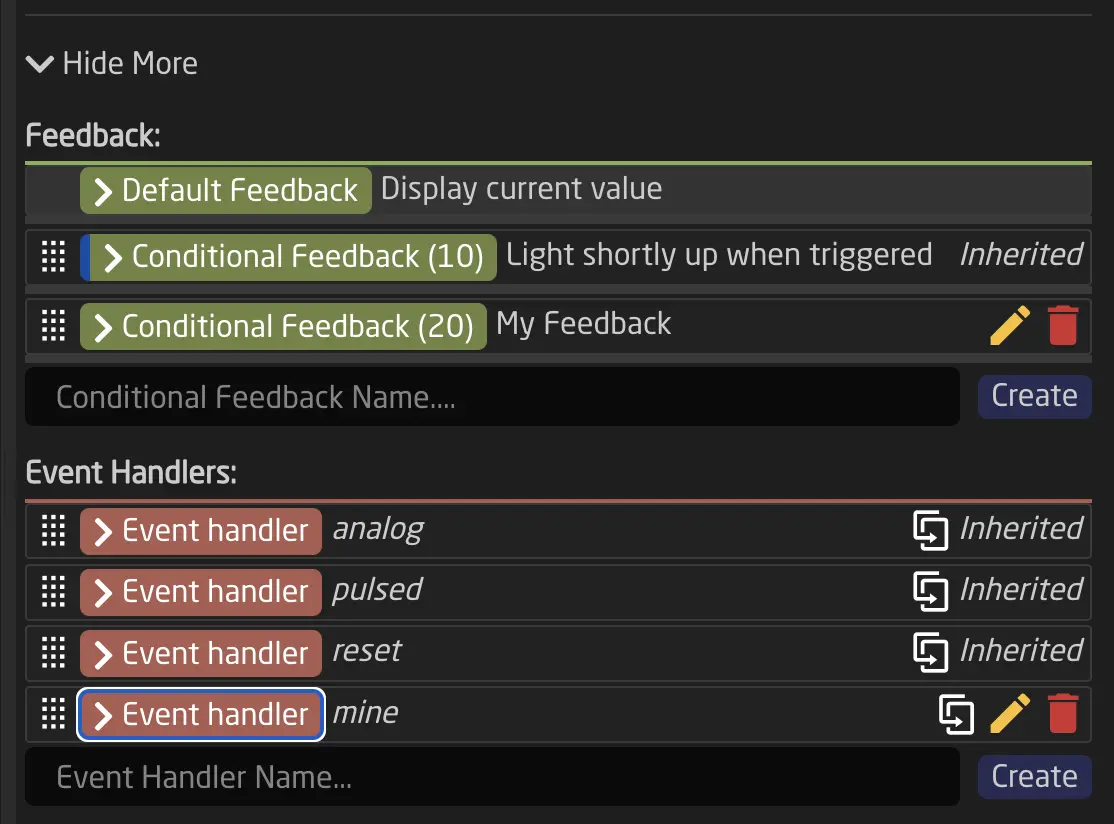
Feedback Handlers with the same index number in both the template and the behavior will be merged (overridden). The same applies to Actions with the same name.
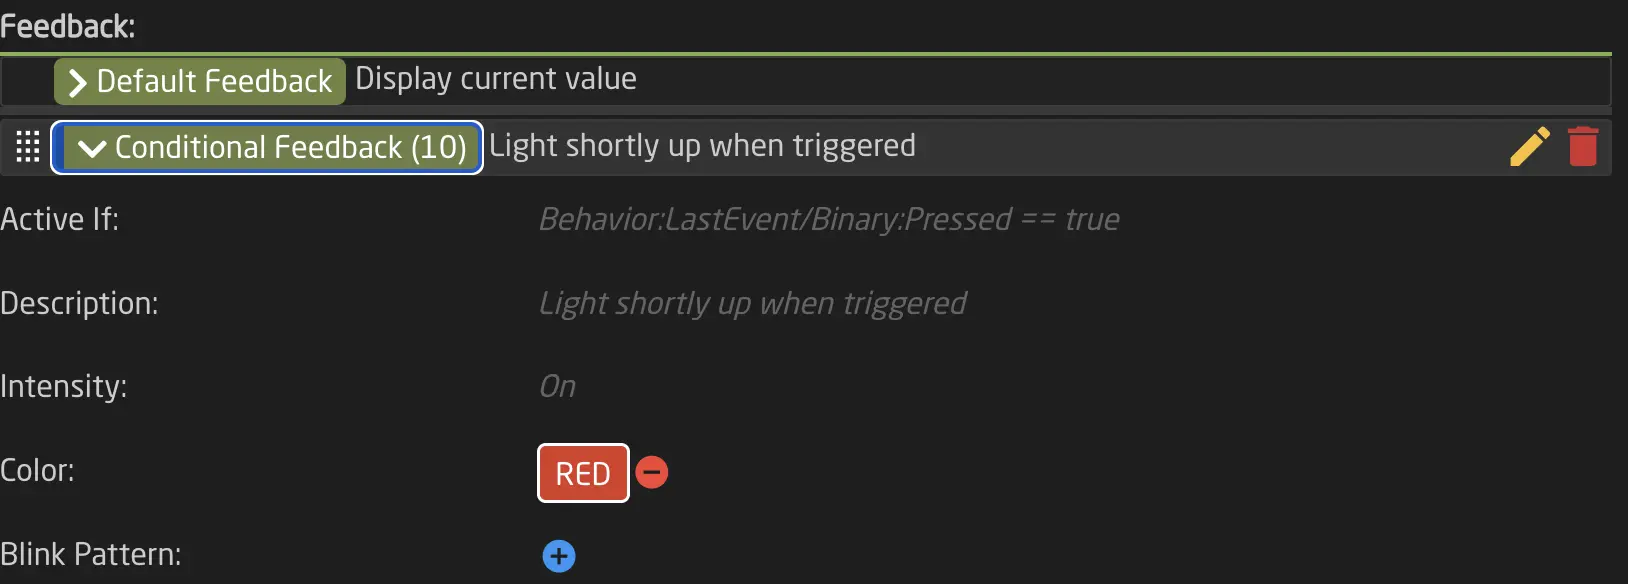
In the example above, after modifying the Feedback Handler with index 10 (changing the color), the fields inherited from the Template Behavior's Feedback Handler with index 10 are still visible.