MultiBehaviors
A MultiBehavior allows a single hardware component to contain and execute more than one behavior. This is useful in three main scenarios:
- Sequences: Execute multiple behaviors one after another with configurable delays between them. For example, recall a camera preset, wait two seconds, then start recording.
- Multiple functions on one component: Combine different behaviors on a single button or encoder. For example, an encoder that controls a parameter with rotation and triggers an action on press.
- Variable-based selection: Use Active-If conditions on individual sub-behaviors so that a variable determines which behavior is active. For example, a joystick that dynamically switches between Pan and Tilt control based on a rotation variable.
Many of Reactor's built-in Template Behaviors are MultiBehaviors internally. For example, "Encoder with Press Action" and "4 Ways 4 Parameters" each contain multiple sub-behaviors. When you need similar flexibility for custom configurations, you can create your own MultiBehavior.
Creating a MultiBehavior
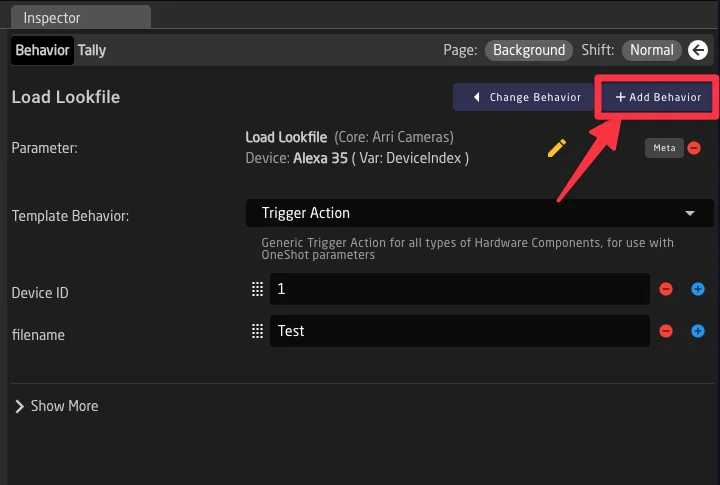
To create a MultiBehavior, start with a hardware component that already has a configured behavior:
- Select the component in the configurator to open its behavior in the inspector.
- Click the Add Behavior button in the top-right area of the inspector (next to Change Behavior).
- Your behavior is automatically converted to a multibehavior, and you can pick a second behavior to add.
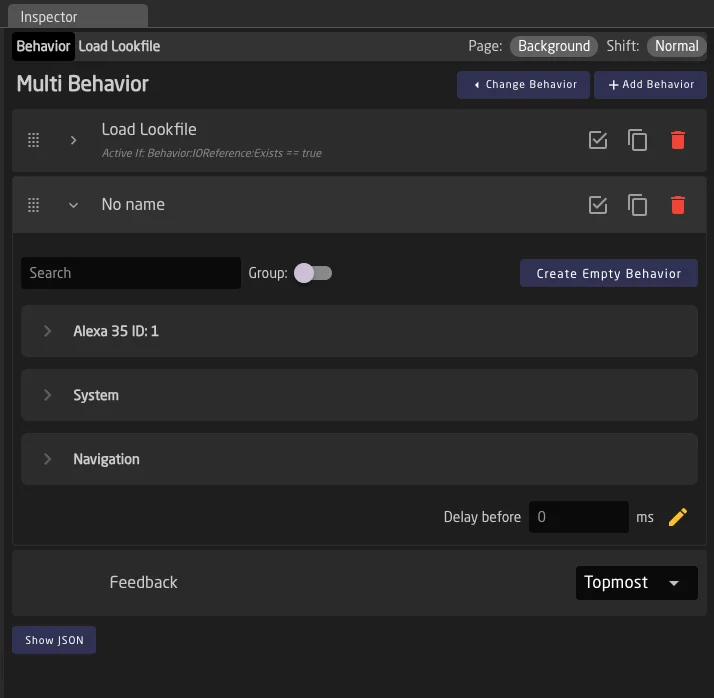
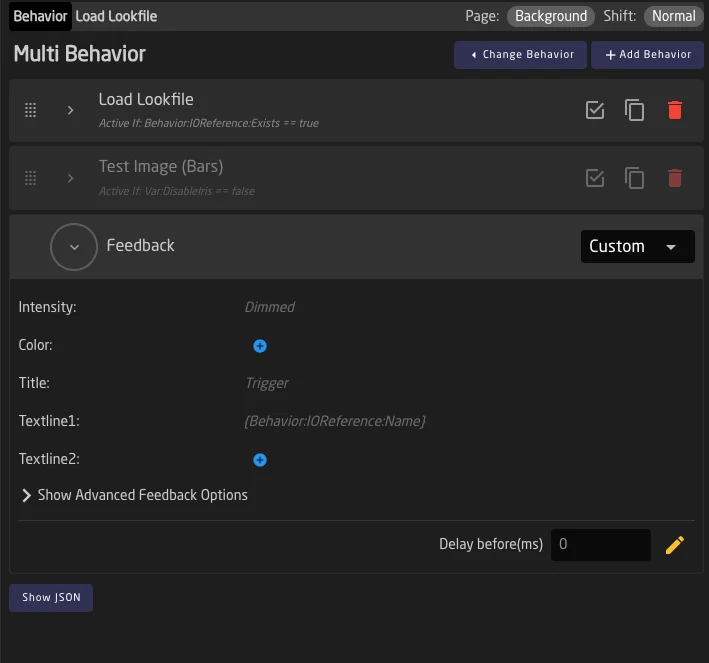
- The inspector title changes to "Multi Behavior" and all sub-behaviors appear as a list.
Managing Sub-Behaviors
Adding Sub-Behaviors
Click Add Behavior at the top of the MultiBehavior form to add a new sub-behavior at the end of the list. The behavior palette appears inside the expanded row, allowing you to select a preconfigured behavior or create a custom one.
Reordering Sub-Behaviors
Sub-behaviors execute from top to bottom, so their order matters. Each row has a drag handle (six-dot icon) on the left side. Grab it and drag rows to reorder.
Editing Sub-Behaviors
Click a row (or the chevron icon) to expand it and reveal the full behavior editor, identical to what you see for a regular behavior. Double-click the behavior name to rename it inline.
Duplicating and Deleting
Each row has a copy icon to duplicate the sub-behavior and a red delete icon to remove it. Duplicating creates a copy at the end of the list.
If you delete sub-behaviors until only one remains and the feedback is not set to "Custom", the MultiBehavior automatically converts back into a regular single behavior.
Bypassing Sub-Behaviors
Each row has a checkbox icon on the right side. When unchecked (bypassed), the sub-behavior is skipped during execution but stays in the list. This is useful for temporarily disabling a sub-behavior without removing its configuration.
Execution Order and Delays
When a trigger reaches the MultiBehavior (button press, encoder turn, etc.), Reactor processes the sub-behaviors from top to bottom. For each one:
- Check bypass — skip if bypassed.
- Evaluate Active-If — skip if the condition evaluates to false.
- Apply delay — wait the configured number of milliseconds.
- Execute — fire the behavior's event handlers.
Per-Entry Delays
On the bottom of each behavior, a Delay before field lets you specify a value in milliseconds to wait before executing.
The yellow pencil icon next to the delay field opens the parameter reference helper, allowing you to use a parameter value (IOReference) as the delay instead of a static number.
Active-If Conditions
Each sub-behavior can have an Active-If condition. When present, the condition is checked before the sub-behavior executes. If it evaluates to false, the sub-behavior is skipped.
This is the primary mechanism for variable-based selection: by giving each sub-behavior a condition (e.g., Var:Mode == 1, Var:Mode == 2, Var:Mode == 3), you can dynamically change what a component does and shows based on a variable's current value.
Setting Active-If Conditions
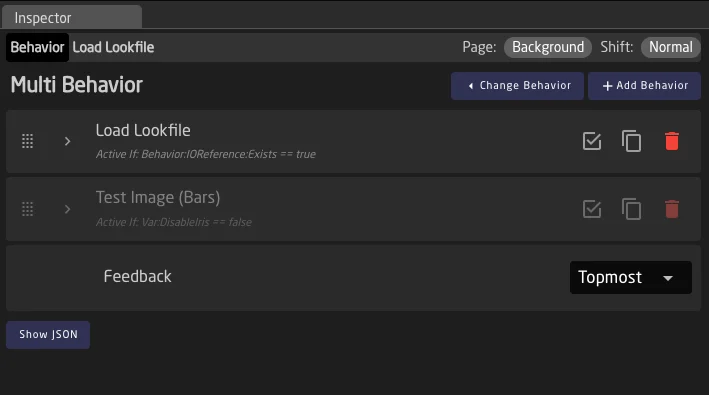
If set, the Active-If condition appears below the behavior name in each row: Active If: condition. Click on this text to open the Condition Helper window — the same one used for layer conditions and feedback conditions. See Variables and Conditions for details on condition syntax.
For sub-behaviors that inherit from a Template Behavior with an existing Active-If condition, the inherited condition is shown. You can override it by clicking and editing.
When a sub-behavior's Active-If condition evaluates to false at runtime, its row appears greyed out in the configurator. This gives you live visual feedback of which sub-behaviors are currently active.
Use Case: Variable-Based Selection
Say for example you want to have a quick way to switch the axes of a joystick, eg when switching from a 16:9 to a 9:16 workflow for social media with a PTZ camera. A variable PT_Rotate is used to select the neededrotation angle (0°, 90°, 180°, 270°). You can create a MultiBehavior with four sub-behaviors:
| Sub-Behavior | Active-If Condition | Function |
|---|---|---|
| Pan | Var:PT_Rotate == 0 | Controls Pan speed |
| Tilt Inverted | Var:PT_Rotate == 90 | Controls Tilt speed (inverted) |
| Pan Inverted | Var:PT_Rotate == 180 | Controls Pan speed (inverted) |
| Tilt | Var:PT_Rotate == 270 | Controls Tilt speed |
With the feedback set to Topmost, the display automatically shows the currently active direction. When the user rotates the controller, only the matching sub-behavior executes.
Feedback Configuration
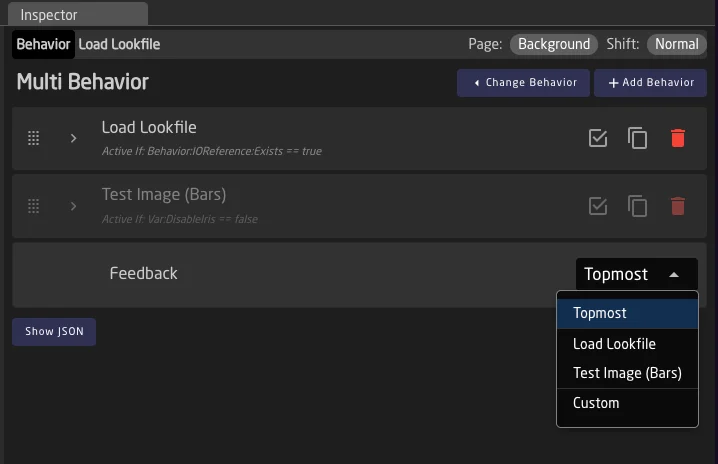
Since a MultiBehavior contains multiple sub-behaviors, you need to choose which one determines the visual feedback (LED color, display text, etc.) shown on the hardware component. This is configured via the Feedback dropdown at the bottom of the MultiBehavior form.
Topmost
Topmost
The first sub-behavior in the list whose Active-If condition evaluates to true (or has no condition) determines the feedback. This is the default and works well with variable-based selection, because the displayed feedback automatically matches whichever sub-behavior is currently active.
Specific Sub-Behavior
Specific Sub-Behavior
Select a specific sub-behavior by name from the dropdown. The feedback always comes from that sub-behavior, regardless of Active-If conditions or execution order. The dropdown lists all sub-behaviors by their configured name.
Custom
Custom
Define feedback independently of any sub-behavior. When selected, the feedback row expands to reveal the full feedback editor (the same one available in regular behaviors). This also reveals the default delay configuration field. Use this when none of the sub-behaviors' feedback is appropriate for the MultiBehavior as a whole.
Practical Examples
Example 1: Sequential Actions (Recall Preset + Record)
A button that recalls a camera preset and starts recording after a delay:
- Sub-behavior 1: "Recall Preset 1" — Uses the Trigger Action template with the camera preset recall parameter. No delay.
- Sub-behavior 2: "Start Recording" — Uses the Set Specific Value template with the record parameter. Delay: 2000ms.
- Feedback: Topmost — shows the preset recall status on the button LED.
When pressed, the button immediately recalls the preset. After two seconds, recording starts automatically.
Example 2: Encoder with Rotate and Press
An encoder that controls a parameter with rotation and triggers an action on press:
- Sub-behavior 1: "Iris Control" — Uses the Change by Step template for the iris parameter. Responds to rotation events.
- Sub-behavior 2: "Auto Iris Toggle" — Uses the Toggle Two Options template for the auto-iris parameter. Responds to press events.
- Feedback: Set to "Iris Control" so the display shows the current iris value.
Reactor includes several built-in Template Behaviors for this pattern, such as "Encoder with Press Action" and "Encoder with Toggle Action". Use MultiBehaviors when you need custom combinations beyond what the built-in templates offer.
Example 3: Variable-Based Mode Selection
A button whose function changes based on a variable:
- Sub-behavior 1: "Bars Toggle" — Active If:
Var:CameraMode == bars. Toggles bars on/off. - Sub-behavior 2: "Record Toggle" — Active If:
Var:CameraMode == record. Toggles recording on/off. - Sub-behavior 3: "Standby Toggle" — Active If:
Var:CameraMode == standby. Toggles standby mode. - Feedback: Topmost — the button always reflects the active mode.
When the CameraMode variable changes (e.g., from another button or layer), the same physical button automatically switches its function and display.
Limitations
- No nesting: Sub-behaviors cannot themselves be MultiBehaviors. Only one level of sub-behaviors is supported.